
|
New ‘Star Wars’ Stamps Are Coming This Spring https://ift.tt/3bxIa3X Jan. 26, 2021 New ‘Star Wars’ Stamps Are Coming This SpringCollect All 10 Character-Inspired Stamps Featuring Beloved Droids 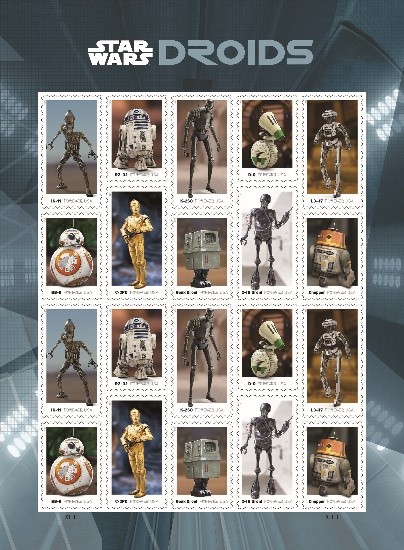
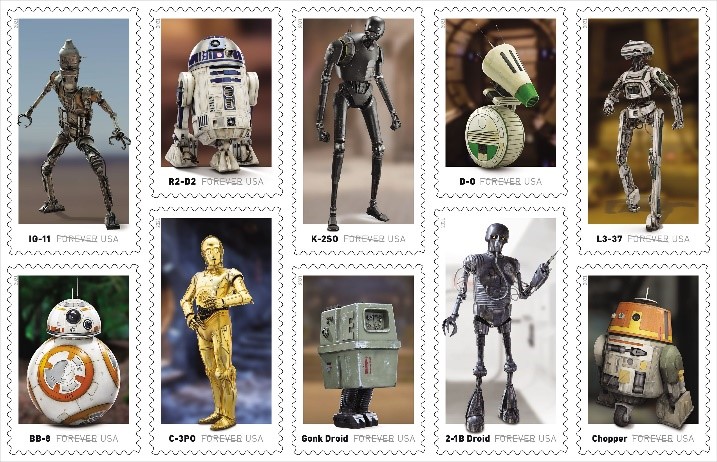
WASHINGTON, DC — The first characters fans meet in the first “Star Wars” film, “Star Wars: A New Hope,” are droids — namely C-3PO and R2-D2 — and droids have continued to play pivotal roles throughout the “Star Wars” galaxy.
With 10 dazzling new character-inspired stamps, the Postal Service salutes beloved droids from the “Star Wars” galaxy and the imagination that brings these technological marvels to the screen. Representing more than four decades of innovation and storytelling, the droids featured in this pane of 20 stamps are IG-11, R2-D2, K-2SO, D-O, L3-37, BB-8, C-3PO, a GNK (or Gonk) power droid, 2-1B surgical droid and C1-10P, commonly known as “Chopper.” The characters are shown against backgrounds representing settings of memorable adventures. The selvage features a passageway from the floating Cloud City above the planet Bespin, introduced in “Star Wars: The Empire Strikes Back.” These set of droids are a nod to Lucasfilm’s, as well as its parent company, Disney’s, commitment to science, technology, engineering, and math (STEM) learning and the continued collaboration between “Star Wars: Force for Change” and global pre-K-12 nonprofit organization “FIRST” (For Inspiration and Recognition of Science and Technology). “Star Wars: Force for Change” and “FIRST” have joined forces to expand access to STEM learning to more young people around the world, and to help them envision a brighter, more inclusive future. Lucasfilm, the studio that created the “Star Wars” franchise, is celebrating its 50th anniversary in 2021. Greg Breeding was the designer of the stamps and pane. William Gicker was the art director. Additional details about the new “Star Wars” droids-inspired stamp collection, including the issue date, will be announced later this year. Postal Products The Postal Service receives no tax dollars for operating expenses and relies on the sale of postage, products and services to fund its operations. ### Lucasfilm, the Lucasfilm logo, “STAR WARS” and related properties are trademarks and/or copyrights in the United States and other countries of Lucasfilm Ltd. and/or its affiliates. © and TM Lucasfilm Ltd. Printing via USPS News https://ift.tt/2hH9aDC January 26, 2021 at 09:03AM
0 Comments
Maker of CREATOR Metal 3D Printer to Be Bought by Lumentum for $5.7B https://ift.tt/39jeGVS There have been several important acquisitions in the 3D printing industry, including that of EnvisionTEC by Desktop Metal, Origin by Stratasys, and 3D Hubs by Proto Labs, leading us to speculate on some more to come. Now, It has been confirmed that Lumentum (NASDAQ: LITE), a manufacturer of optical components and subsystems, has entered into an agreement to purchase photonics maker Coherent, Inc. (NASDAQ: COHR), which manufactures the well-received CREATOR 3D printer. The cash-and-stock deal is valued at $5.7 billion and sent Lumentum’s stock up roughly $2/share on Monday, January 25. Coherent stock had already been trading at a high value since January 19, when the deal was first announced. Stockholder rights law firm Bragar Eagel & Squire, P.C., as well as WeissLaw LLP, are investigating the merger for what they believe may have been an “unfair process and ultimately agreed to an inadequate merger agreement.” Coherent joined the 3D printing industry in 2018, when it acquired German company OR Laser. Two years prior, OR Laser had released a comparatively inexpensive, yet rapid powder bed fusion metal 3D printer, the CREATOR. This was followed by a hybrid version that could perform milling every five to 10 layers. 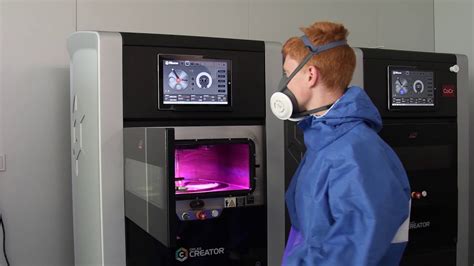
The Coherent Creator. Image courtesy of Coherent. The system was very well received for its low price and the ability to 3D print 30 percent more quickly than comparable machines. However, Coherent no longer has a page for the machine and its YouTube channel has been nearly scrubbed of its Creator content, indicating definite changes in its additive manufacturing plans. It also appointed a new CEO, former McKinsey & Co. senior adviser and Diebold Nixdorf AG chief Andreas Mattes, in April 2020. Perhaps, as its merger with Lumentum approached, the businesses decided to ditch 3D printing in favor of a pure focus on lasers and other optics. An older version of the OR Laser twitter account was active up until September 2020, so perhaps all is not lost. Maybe we’re in store for a revamping of its additive division with more printers or a simple rebranding of its existing machines. We’ve reached out to the company for comment. Printing via 3DPrint.com | The Voice of 3D Printing / Additive Manufacturing https://3dprint.com January 26, 2021 at 09:02AM
https://ift.tt/3or04bu
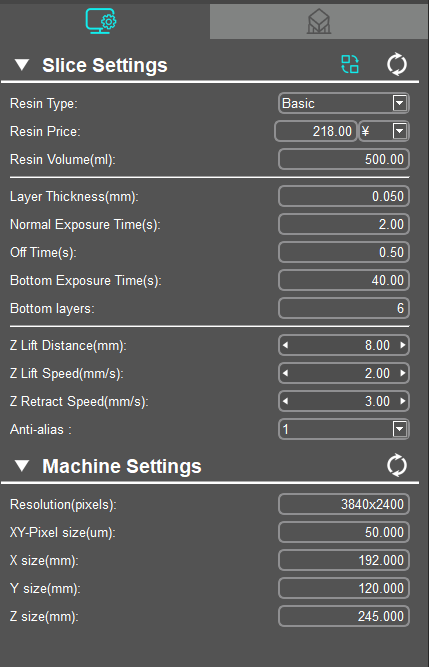
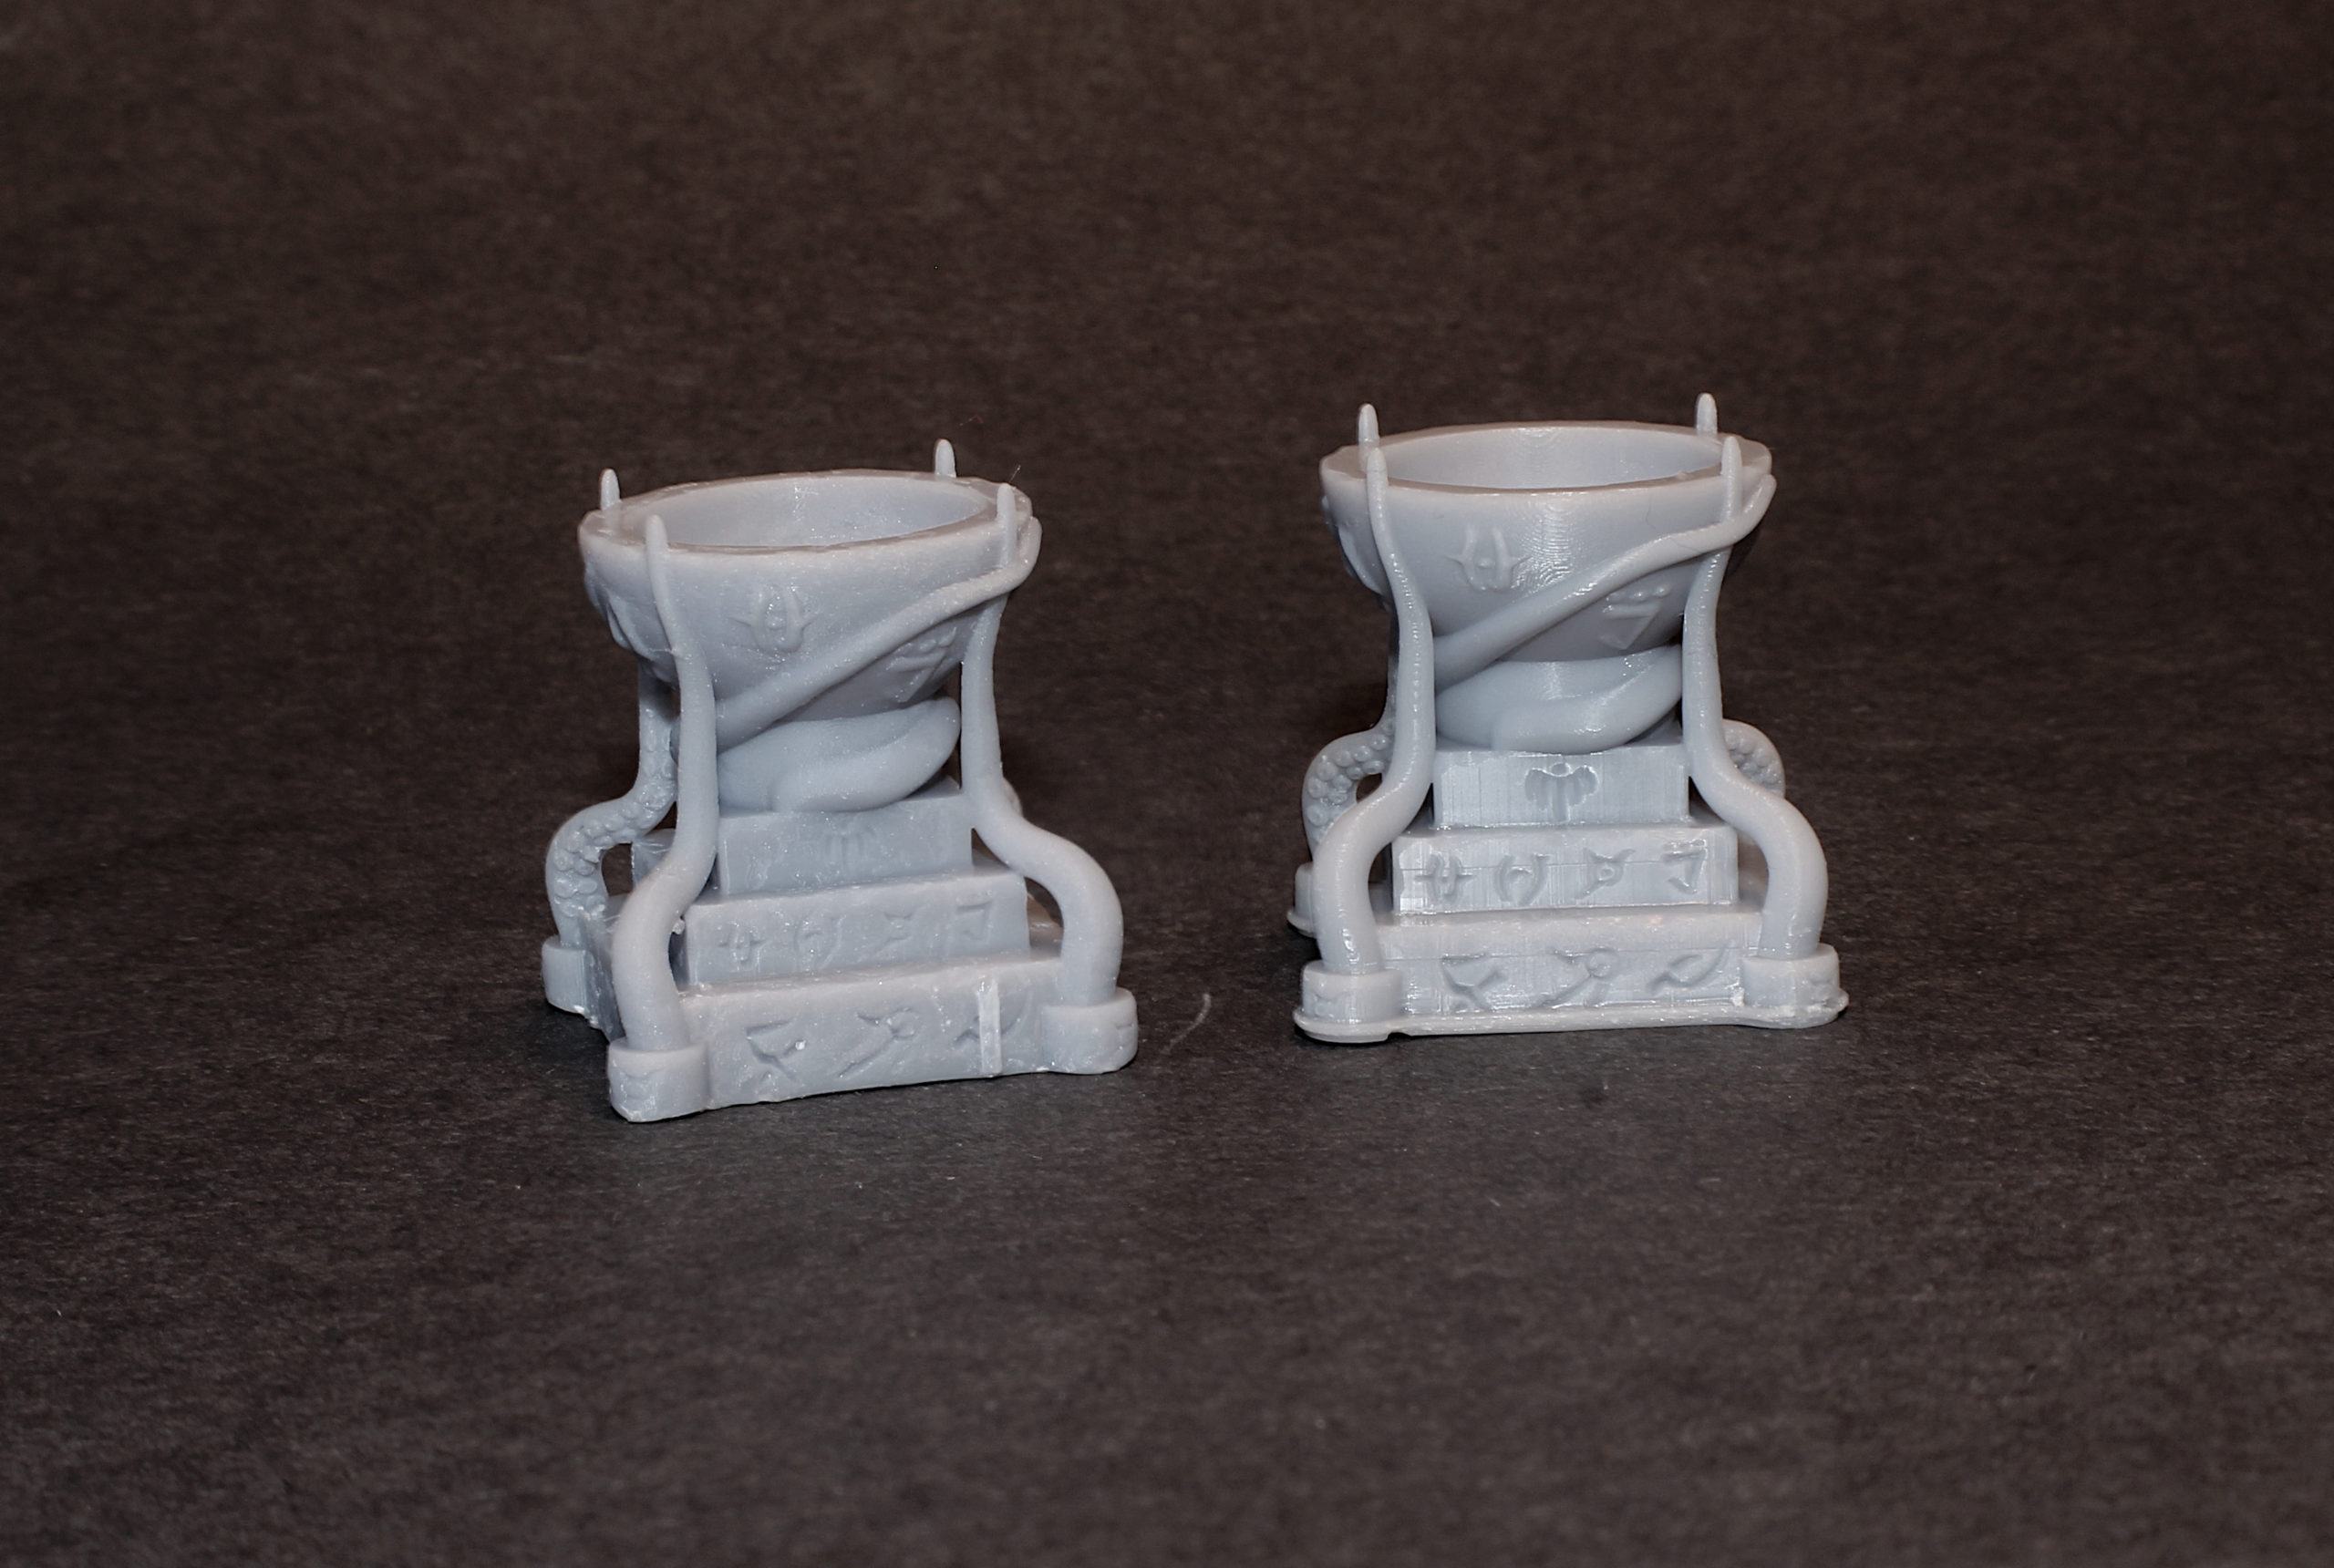
Reviewing the Anycubic Photon Mono X 3D Printer: Bigger, Stronger, Faster! https://ift.tt/36h4BGW The golden age of resin printing is finally upon us! With the announcement of the Elegoo Saturn in 2020, large-volume resin printers have been all the rage. Anycubic announced its own addition to the space in September, the Anycubic Photon Mono X. I’m a big fan of Anycubic and have probably logged several hundred printing hours on my original Anycubic Photon. So, I didn’t hesitate when I found a good deal on the Mono X. This is my review and guide on getting started for anyone interested in the Anycubic Photon Mono X. In short: The Mono X is an excellent printer, both bigger and faster than its predecessors, and also boasts a few interesting new features. There are potential issues to be aware of, but overall, the Mono X is a great printer and a welcome addition to my collection! SpecsBuild Volume: 192 x 120 x 245 mm Minimum Layer Height: 10 microns XY Resolution: 50 microns (3840 x 2400 pixels) Z Axis: Dual Linear Rails Leveling: Semi-Automatic LCD Screen: Monochrome Wi-fi: Print monitoring The most noticeable feature of the Mono X is the larger build volume. The build plate is wider than the length of my original Photon. The size increase alone was enough to justify picking up a Mono X. However, there are a few other improvements that took me by surprise. The monochrome LCD screen is a welcome upgrade. Monochrome screens not only last longer (allowing up to several thousand hours of printing before needing to be replaced), but also enable much shorter cure times than the RGB LCD screens on older models. The increase in print speed is actually very noticeable, and I originally thought my slicer had made a mistake when I saw the estimated time on my first print. Here’s a cool little shrine model I made for a Kickstarter campaign I did last year. It printed in just over 5 hours on the Mono X, at a layer height of .05 mm. The same print would have taken over 8 hours on my original Photon!
In addition to the faster curing times and longer lifespan, Monochrome LCD screens use less energy. The dual linear rails on the Z-axis offer added stability compared with older resin printers like the original Photon or Elegoo Mars. Levelling has also been made a little easier and will definitely save some hobbyists time and frustration. The Mono X also comes with Wi-Fi connectivity, though it’s not a feature I use. You will still have to save your prints to USB, as the sliced files can’t be sent directly to the printer over Wi-Fi. However, you can monitor prints using the Anycubic app to see when a print is finished. For some, this might be a welcome improvement, especially if you keep your printer in a separate room. The Mono X is also substantially quieter than my original Photon. The noise never bothered me but it’s still a nice improvement. The slope of the top of the build plate is flatter than on older models. As a result, more resin builds up and stays on the bed, whereas most of it would eventually drip off on my original Photon. This is a minor annoyance, but just takes a few swipes with the plastic spatula included with the printer. Additionally, prints stick to the build plate more firmly than on other models. I suppose it’s better to have too much adhesion than too little, but prints can sometimes be challenging to remove. This also just requires a little extra spatula work, but if it becomes too much, I will go over one potential solution in a bit. One thing I miss about the original Photon was the moveable door, which allowed for much easier access when removing the build plate. The Mono X comes with a clear enclosure that needs to be removed and set aside. This adds a few extra steps after a print is finished but isn’t a big deal. There are two potential issues that are definitely worth noting. The LCD screen does not come with the same level of protection as previous models. As a result, punctures in the FEP that cause a resin leak can cause serious issues. Cured resin on the screen that could be easily scraped off on the original Photon could lead to serious damage on the Mono X. Additionally, a number of people (myself included) received a warped build plate, which can (and did, in my case) lead to a frustrating number of failed prints. I’m not sure how common this issue is, but based on what I’ve seen on Facebook groups and subreddits, it’s common enough to warrant some discussion. I will go over how to address those issues shortly. The only other complaint I have about the Mono X is Anycubic’s slicer software. I was fairly content using the older version (1.3.6) on my original Photon. It was basic, but intuitive and always got the job done. Version 2.1.2, which is compatible with the Mono X, does add a few useful features, but is not nearly as easy to work with. While the auto-support function on the older version worked flawlessly, you have to manually raise the model on the new version before automatically adding supports. Additionally, I constantly find myself adding supports to overhangs missed by the slicer. It’s annoying, but definitely not a deal-breaker. Lychee seems to be a highly recommended slicer alternative and the Chitubox version 1.8 Beta is compatible with the Mono X, however I haven’t tried either of them personally. CosmeticsI’ll keep it short: the Mono X is a very good looking printer. The design is simple and elegant and the amber enclosure adds a nice touch of color. Additionally, the touchscreen and UI are both a little nicer than on previous models. Quote request Are you looking to buy a 3D printer or 3D scanner? We're here to help. Get free expert advice and quotes from trusted suppliers in your area. Powered by Aniwaa Initial SetupAssembly was very easy. Screw in the Wi-Fi antenna, attach the build plate and connect the power chords. Bed LevelingLeveling the Mono X is also straightforward.
Printer and Slicer Settings: The standard default settings in the Anycubic Workshop seem to work pretty well. I usually print at .05mm. I would lower the exposure time a bit if printing at lower layer heights.
One other setting you may need to change is the UV power, which can only be changed on the printer itself, not in the slicer. Anycubic recommends 80%. For some reason, my default was set at 50%. My prints were much more consistent after I changed that. The old Anycubic slicer would automatically raise the model when automatically adding supports. In the new version, I usually have to raise the model up a few millimeters, before navigating to the supports environment. You will need to play around with the support settings to see what works best for you. I still can’t say I’ve found the “perfect” support settings. And when automatically adding supports, double check the model to make sure there aren’t any major overhangs that weren’t supported. Often, the supports include a raft that intersects with the models and are difficult to remove from the print without leaving some damage. 
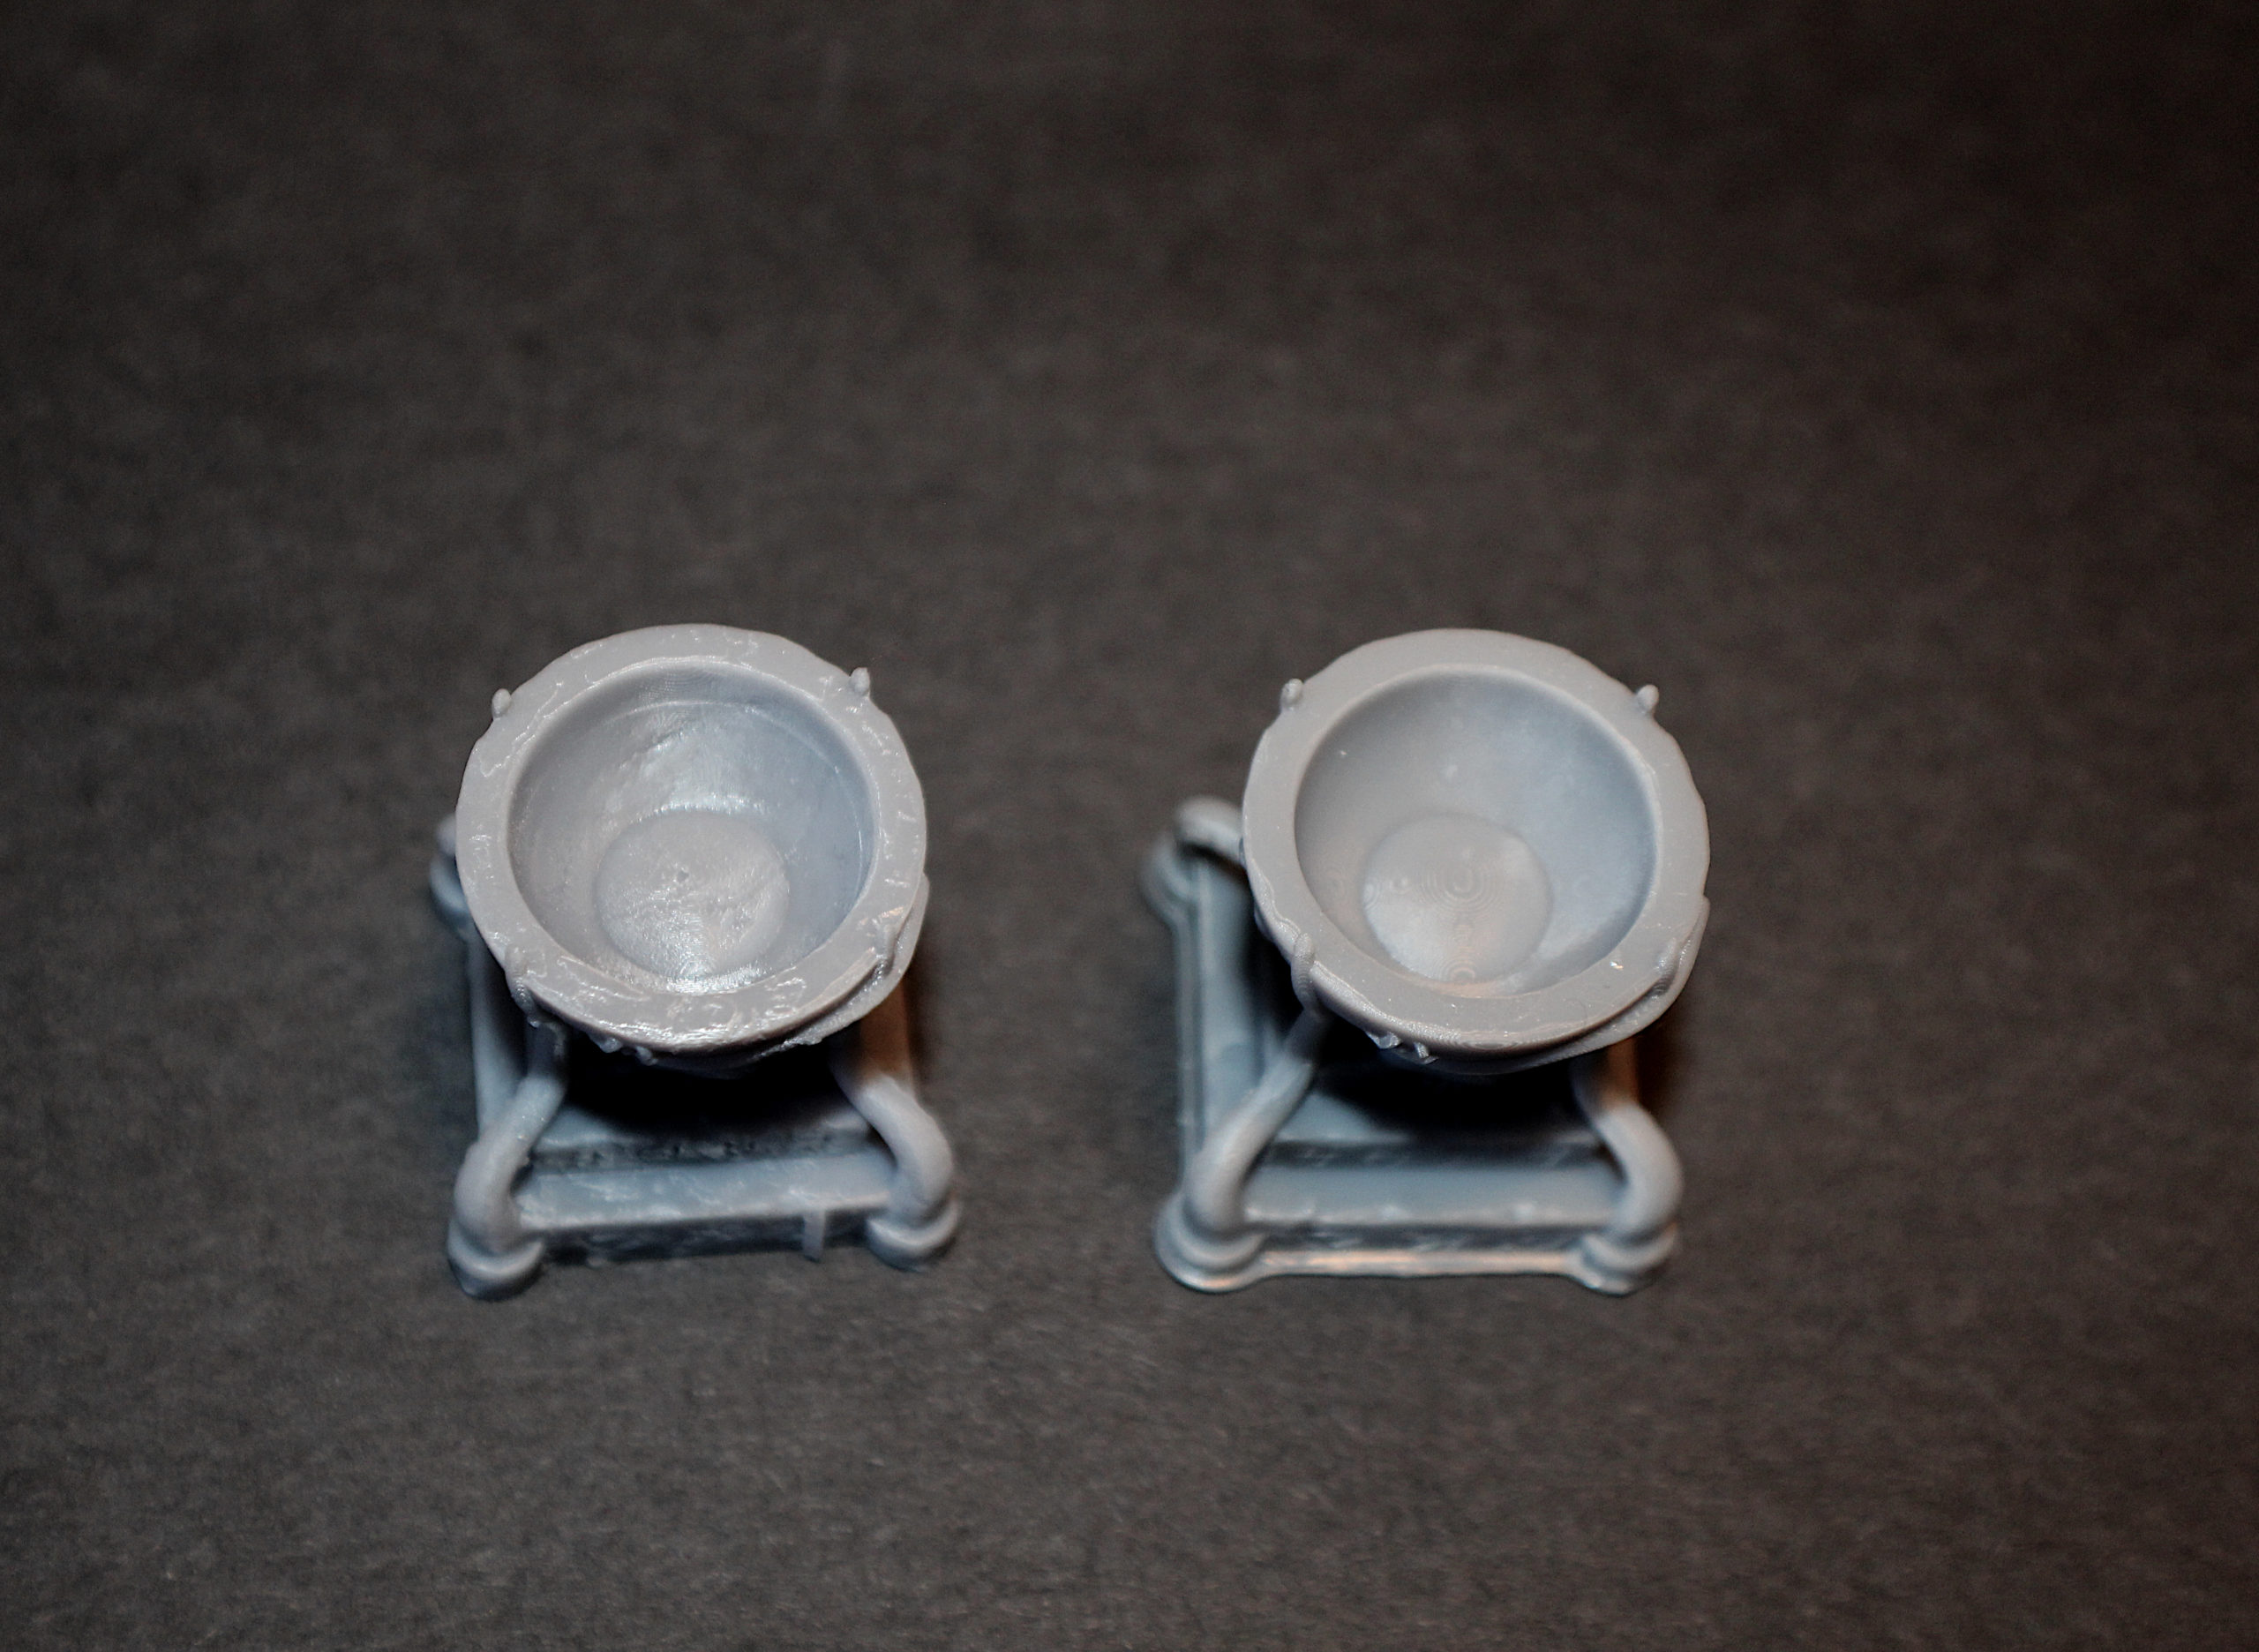
A few of the rafts for supports under the overhangs on this print left some marks behind, but the print still turned out nicely for what it needs to be: An Arduino holder for an electronics project I’m working on. Once you’re happy with the supports, export the model, insert the USB, screw in the vat, add resin and add the enclosure. Then select “Print” on the touchscreen, select the right file and click “Play”. 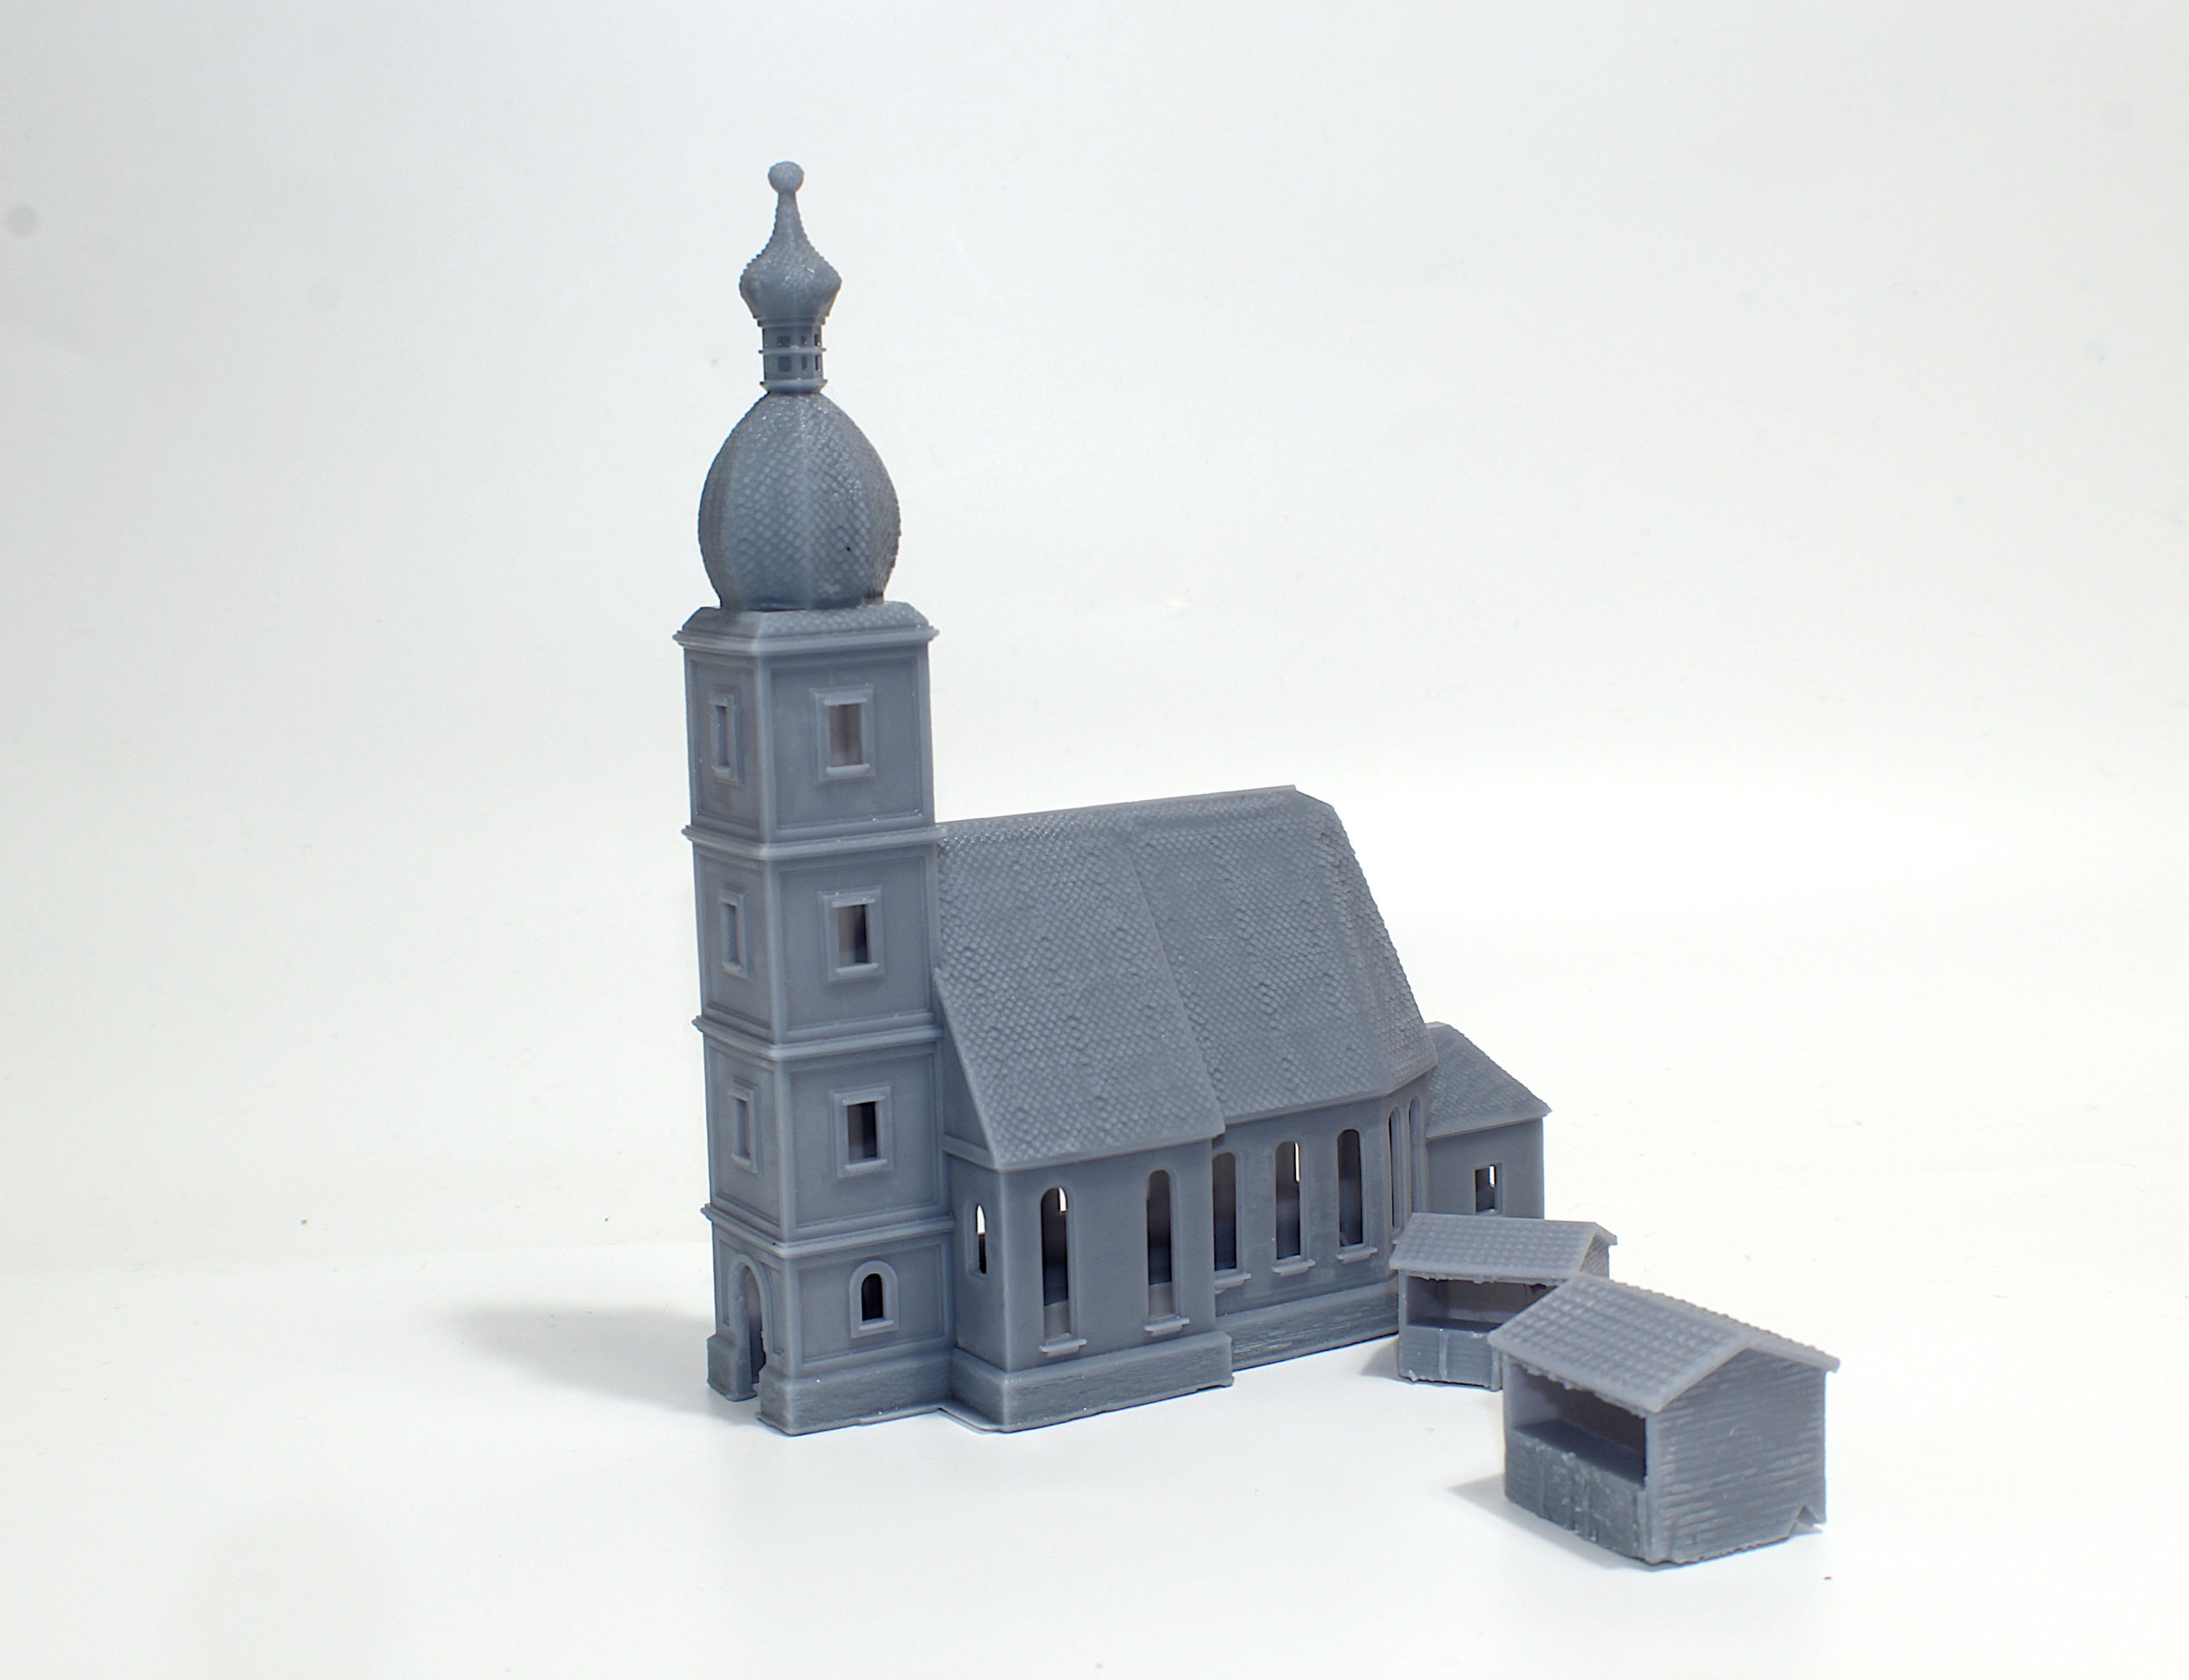
Raft and support removal left a few marks on these prints, but they still turned out pretty nice. This was also before I had replaced my warped build plate. Anti-AliasingThe Mono X also offers anti-aliasing functionality in the settings. This wasn’t an option on my original Photon, and I’d heard mixed reviews. But I thought I’d give it a try. Anti-aliasing is meant to make the print surface smoother and more consistent and lessen the wavy layer lines that sometimes show up on prints. The drawback is that it might remove some finer details. It’s hard to tell in these pictures, but the print on the left was printed with standard settings, the print on the left used an anti-aliasing value of 4. They’re pretty similar (aside from some poor support removal on my part), but the one on the right does have a bit smoother surface. Some of the details do seem a bit softer though. I’m no expert, so you should play around with the settings and see what works for you.
Here are a few more prints on my Mono X: 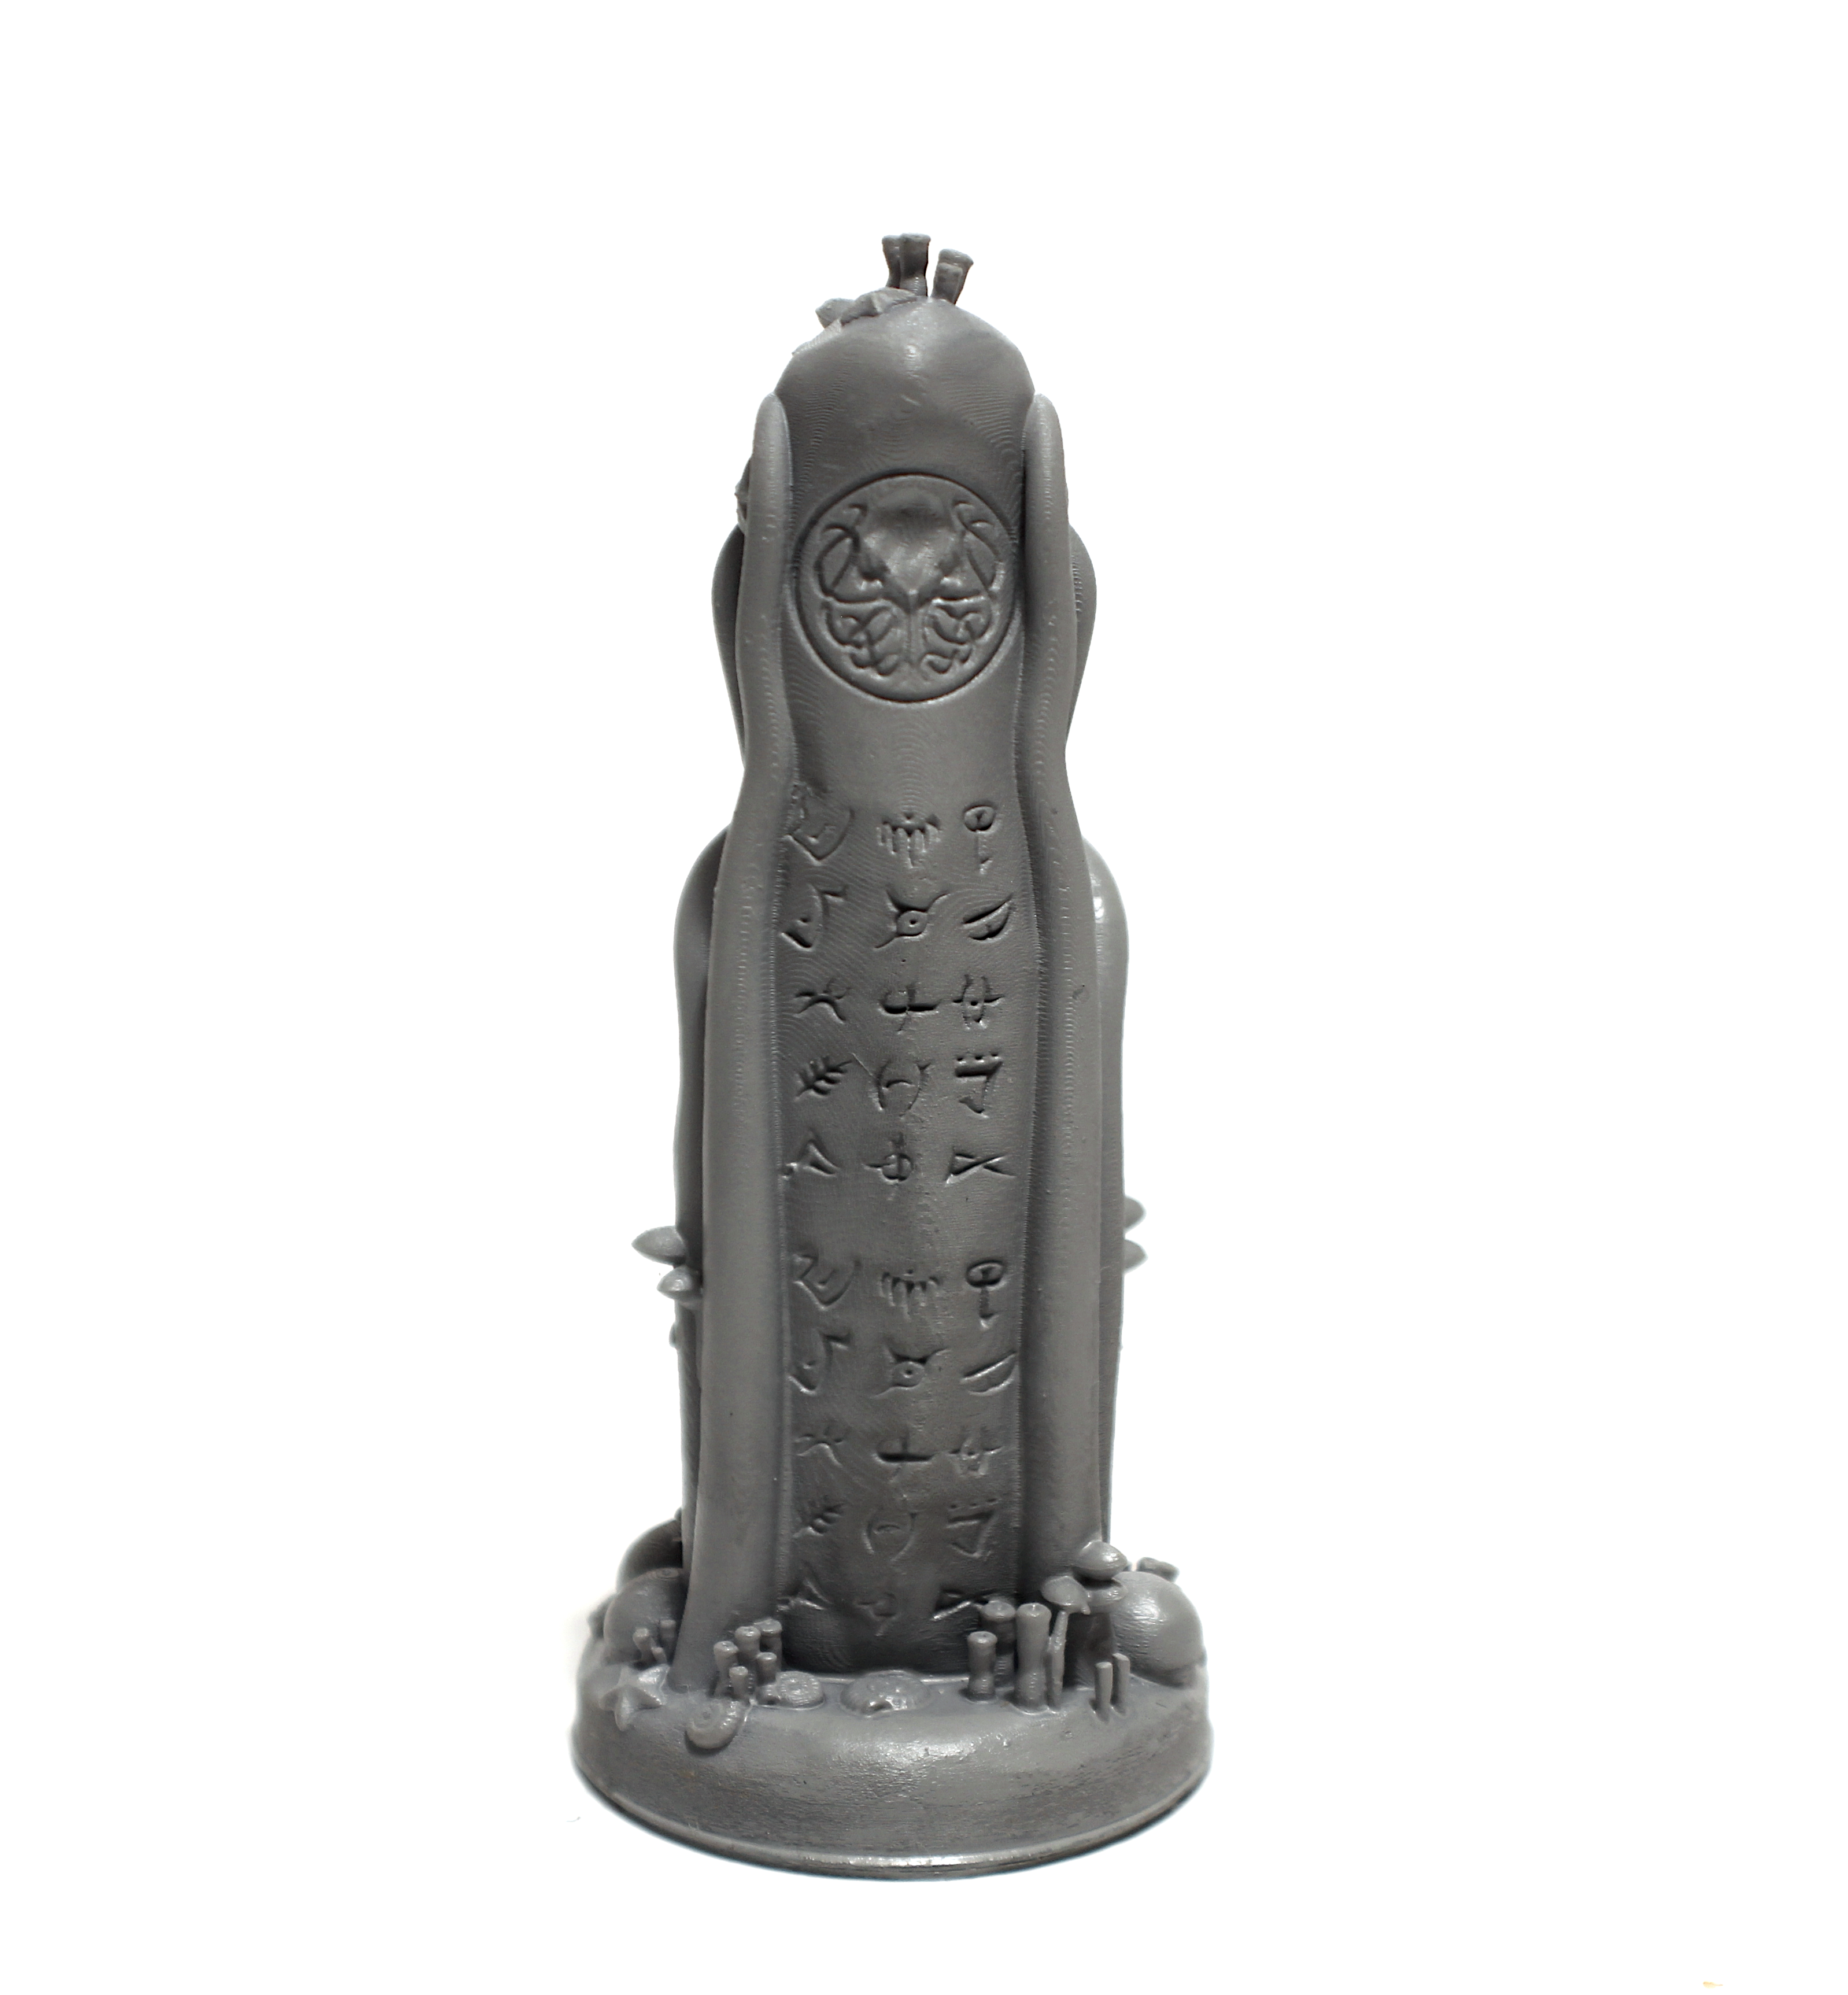
A closeup of another one of my models, after some priming. 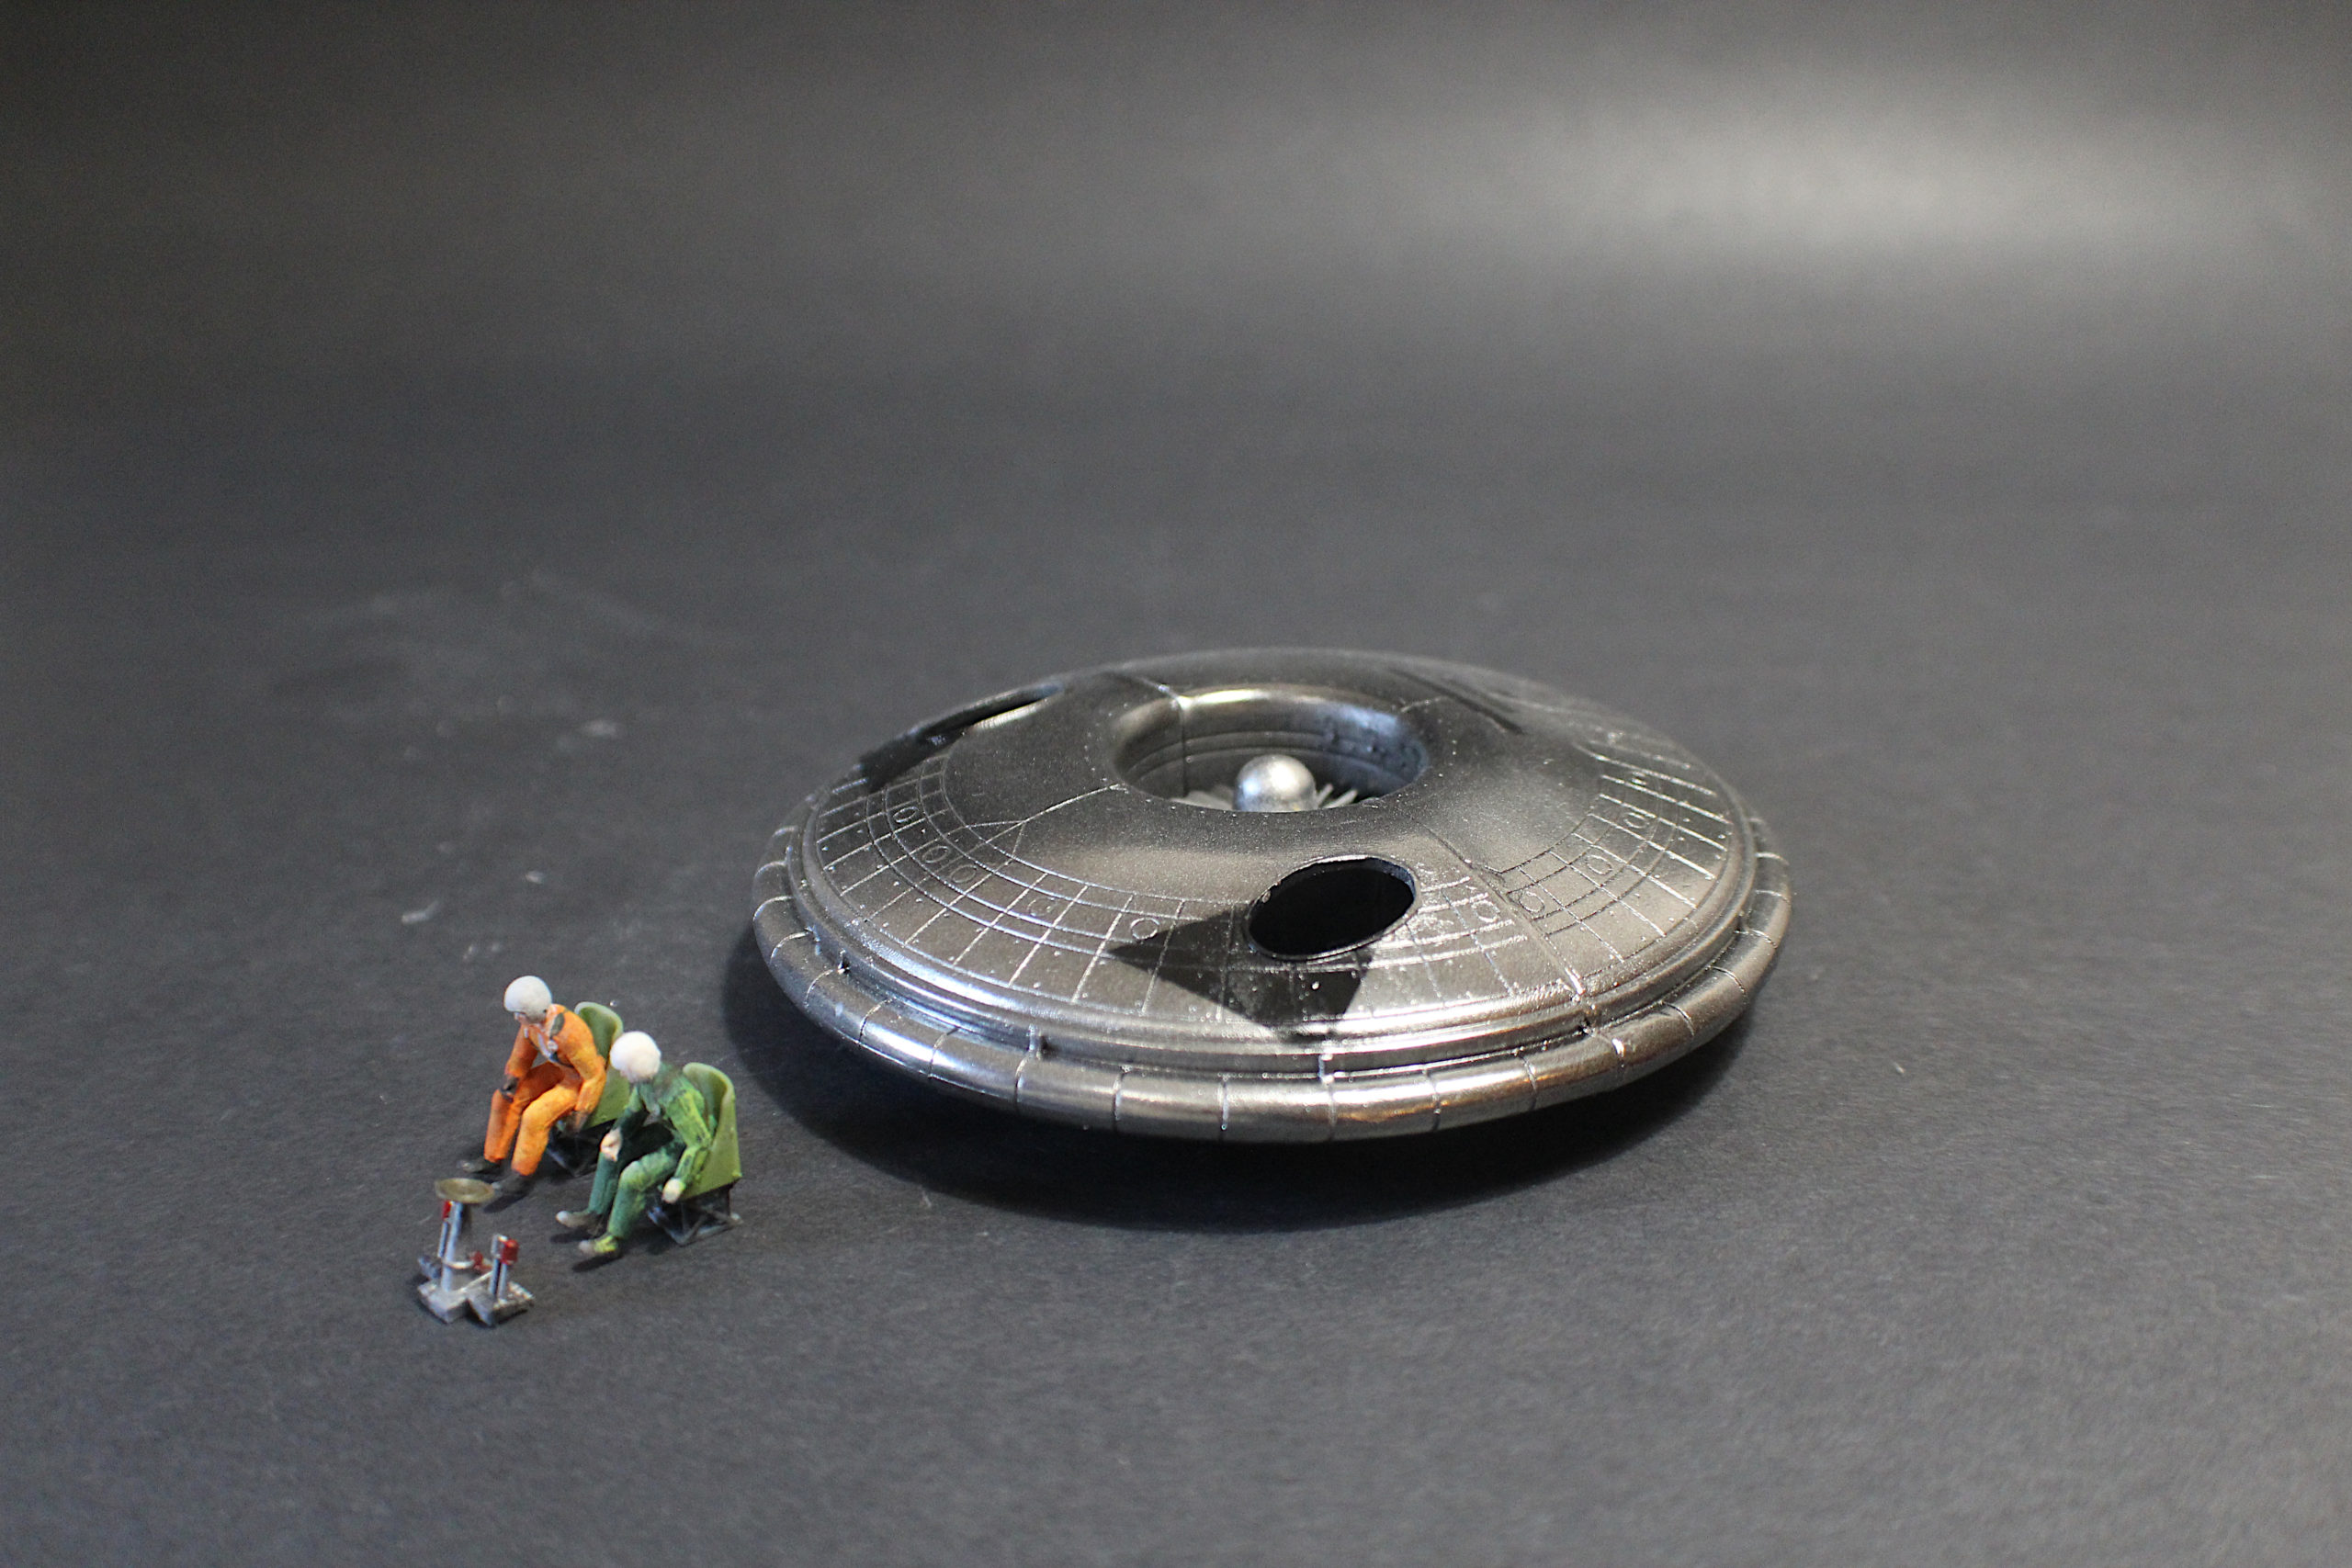
A little UFO model I’m working on, after some painting. 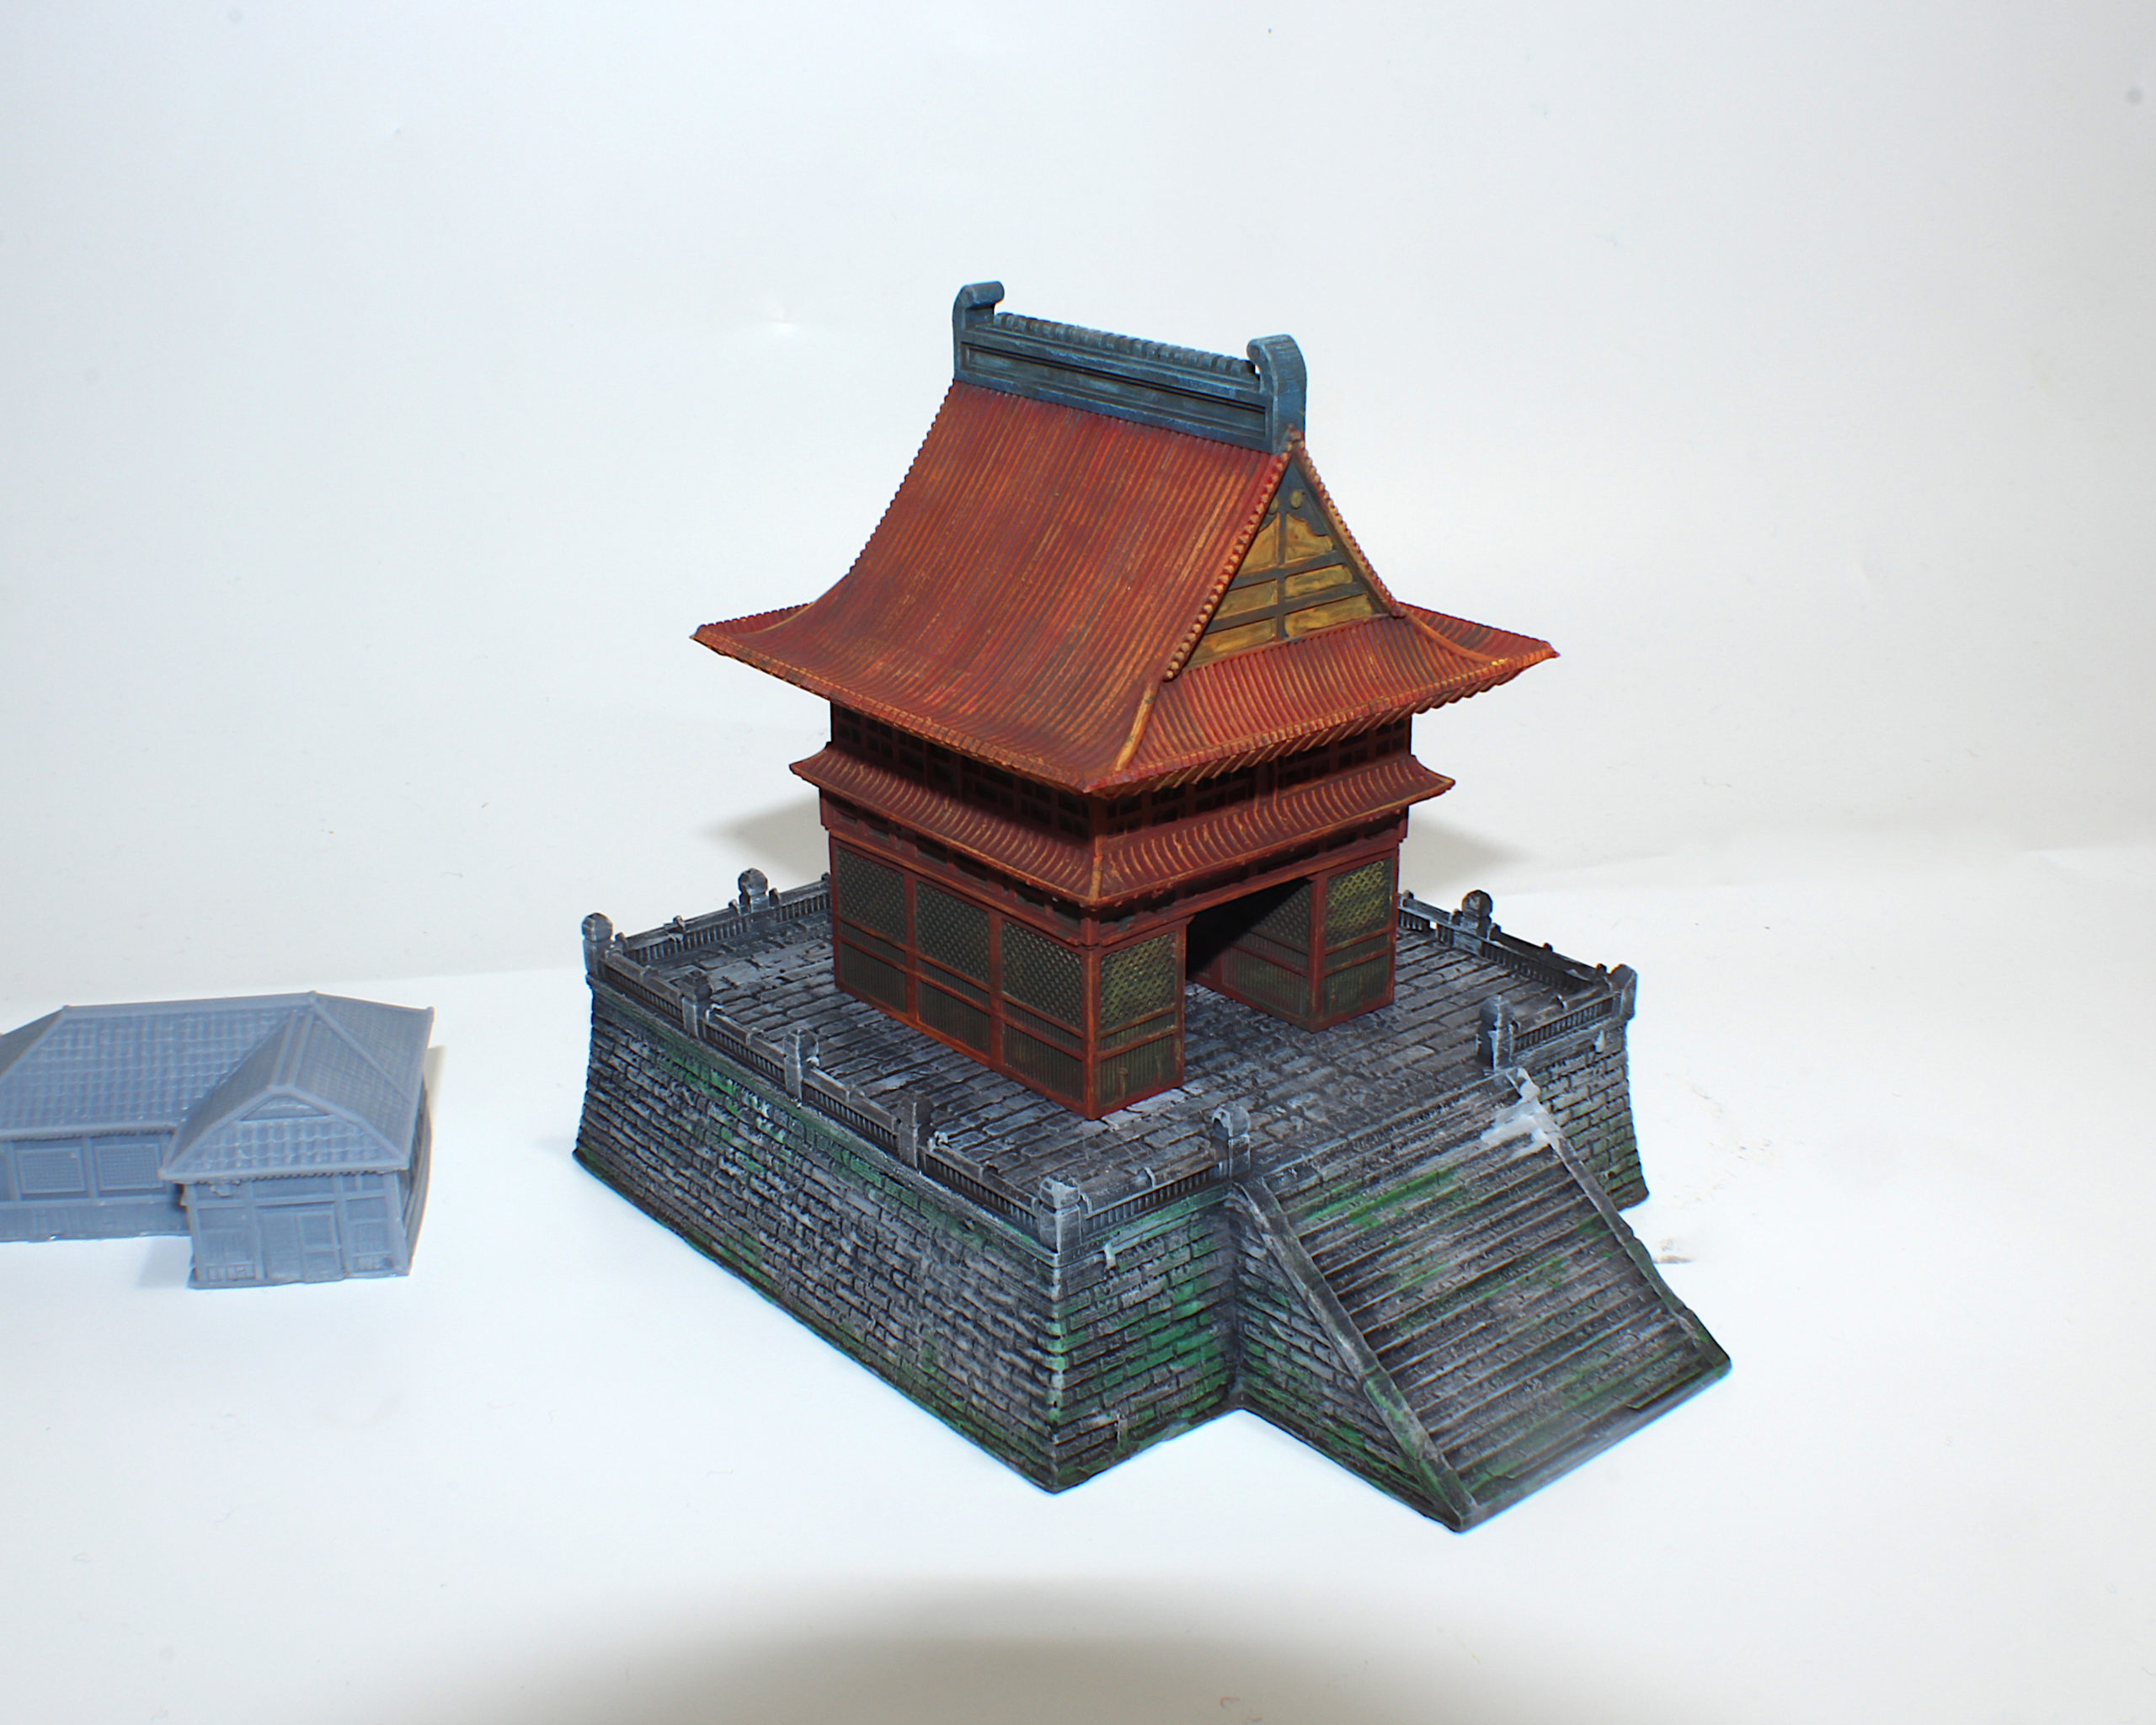
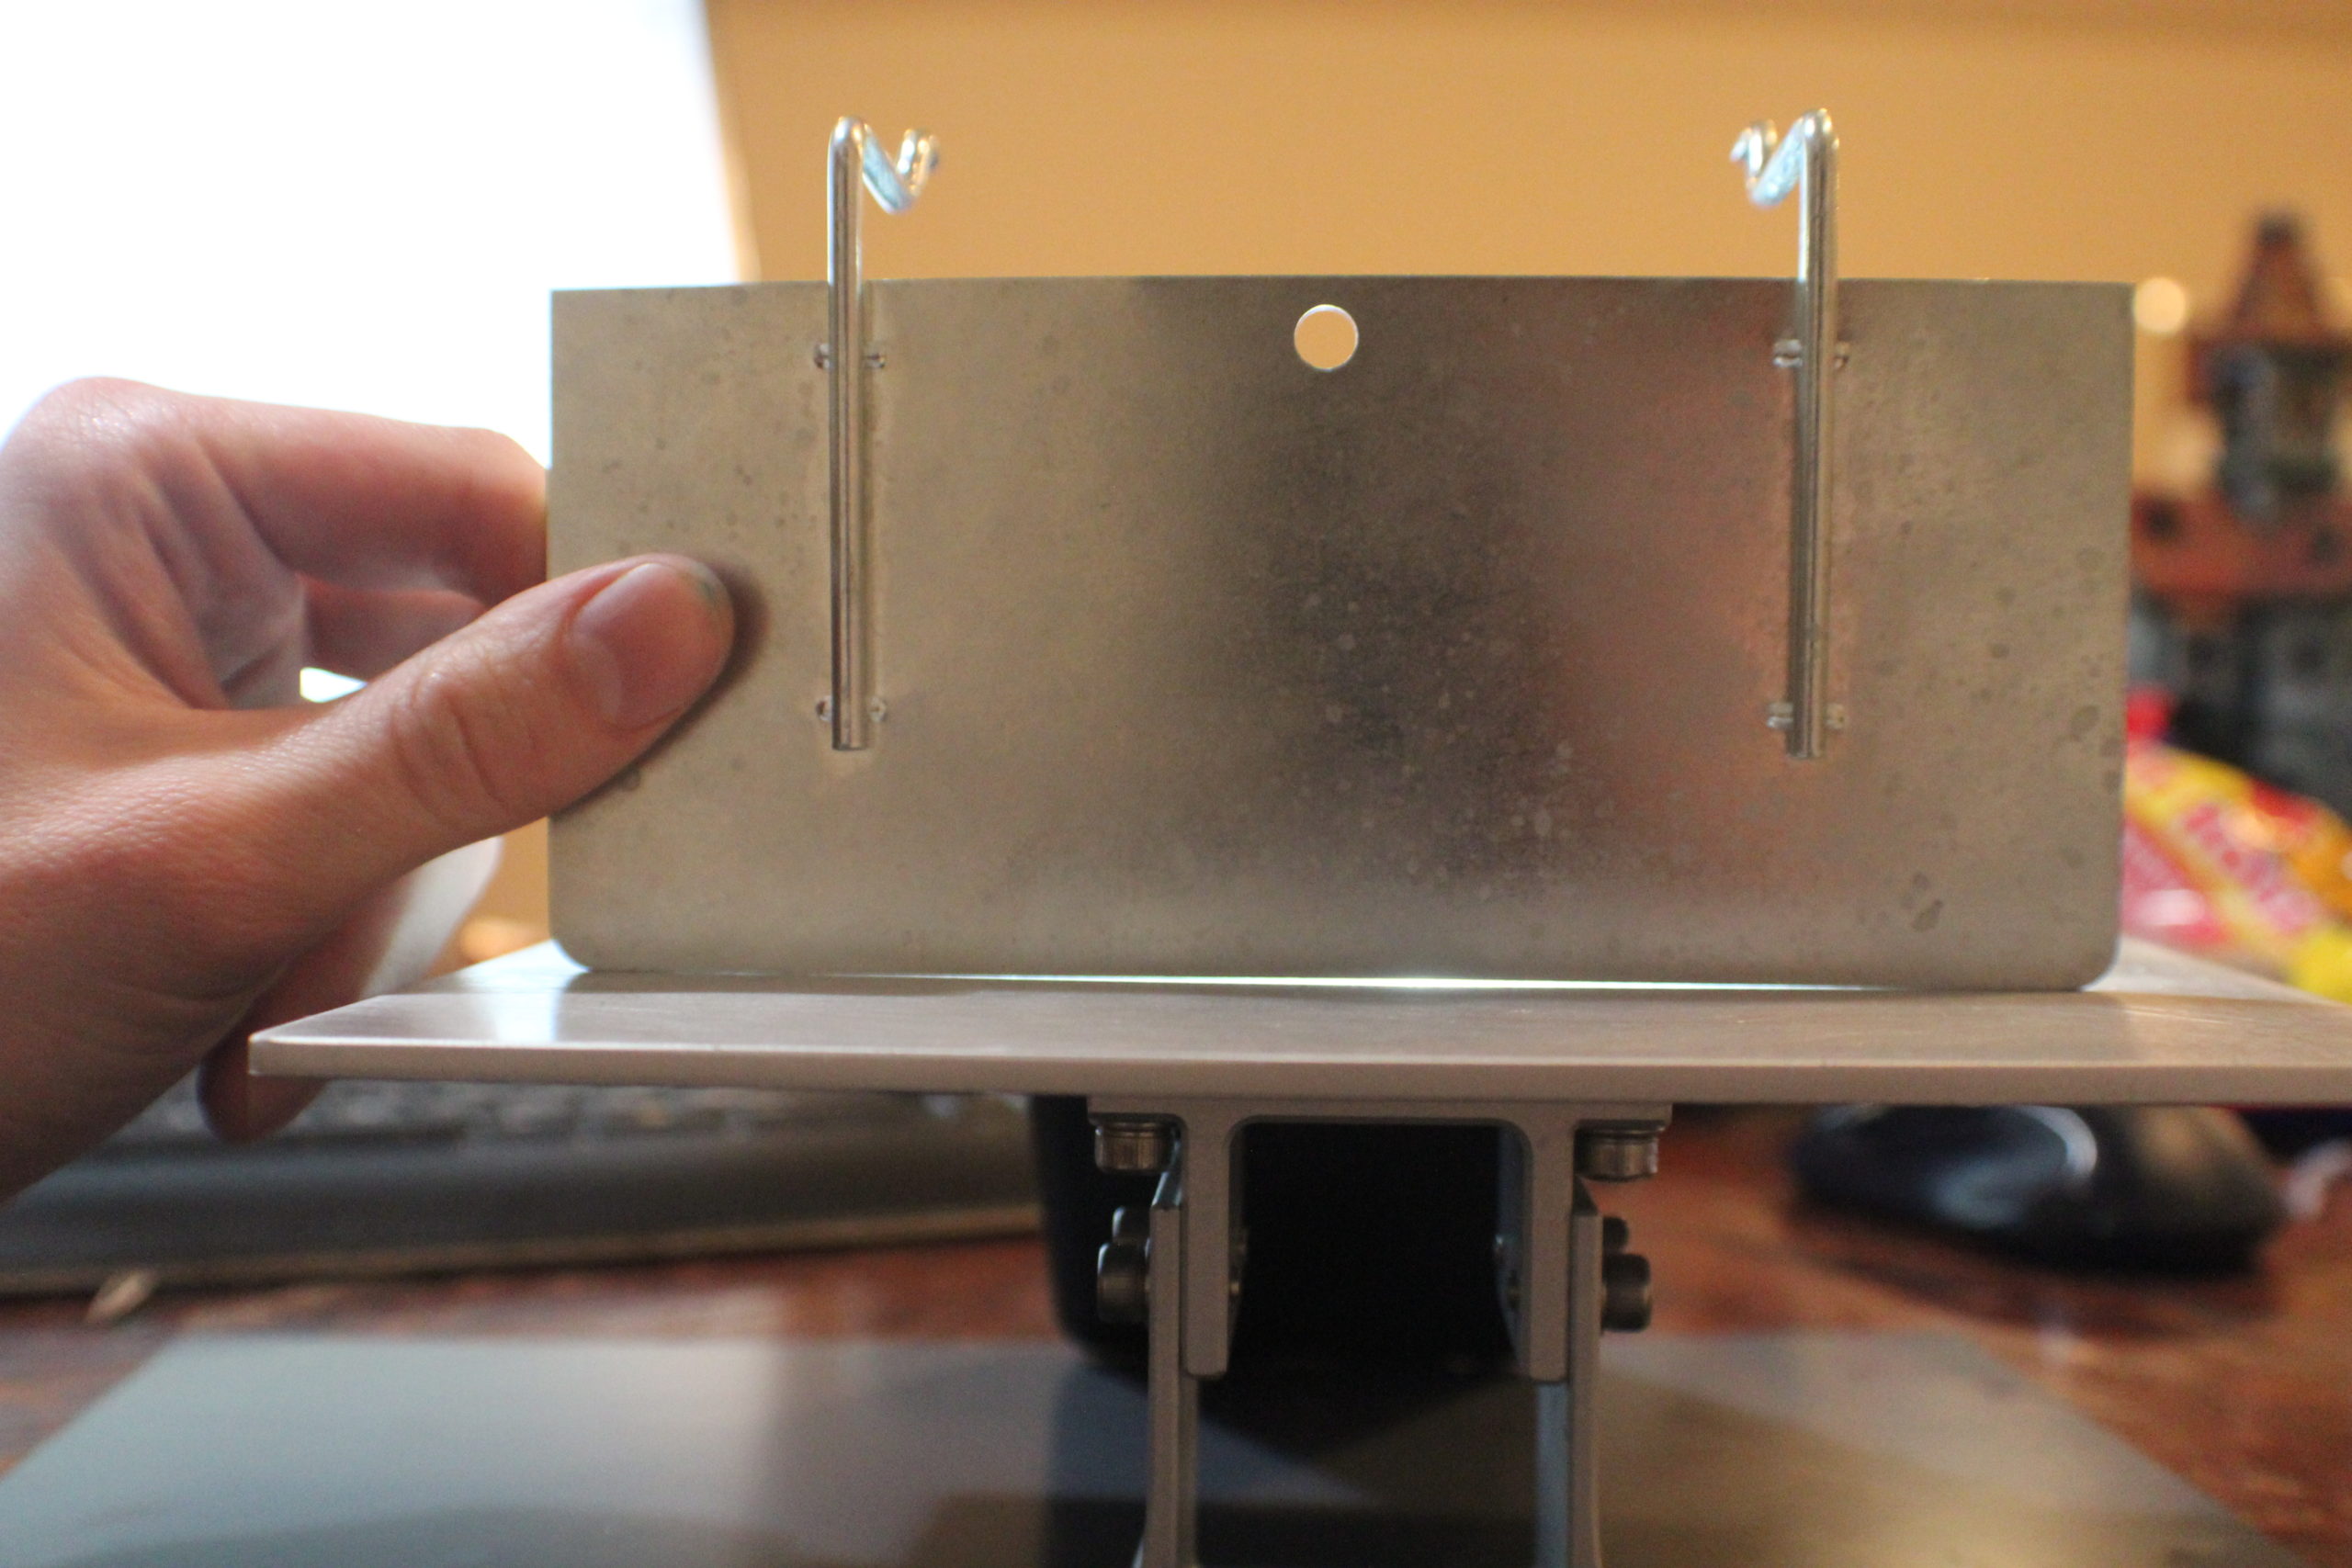
A little Japanese temple I made for a Christmas gift, after most of the painting was done. Issues, Upgrades, Maintenance, etc.Now for the not-so-fun stuff. I don’t know how common the warped build plate issue is. I reached out to Anycubic for comment and was told to use this link to submit a support ticket. If you purchased your printer from a third party seller, as I did, I would reach out to them and request a replacement. I’m not seeing many warped build plate-related posts anymore, so it seems the issue either wasn’t that common or people are now getting their replacements. If you’re getting failed prints, double check to make sure a warped build plate is the issue, and not your settings. Place a straight edge against the build plate. If you can see light shine through the middle, or if you can slide a piece of paper between them, you’ve probably got a warped build plate. I’ve seen people claim it doesn’t affect their prints and, yes, you will probably be able to get a few prints off without issues, but it’s going to be inconsistent.
I tried sanding my warped plate, which helped a little. I placed a sheet of low grit sandpaper (100-300 grit) against a flat, glass mirror, then wet sanded the build plate against it, sanding in a circular motion. This took a fair amount of time, but it did help a little. I also saw a video that recommended spray painting the surface of the build plate before sanding so you could see where the warping is, based on where paint is left over after some sanding. While sanding did help a bit, I would highly recommend reaching out to Anycubic for a replacement. Even though I didn’t buy from them directly, mine was still replaced free of cost and now it prints perfectly! The only potentially disastrous issue is the lack of screen protection on the Mono LCD. Every once in a while I would get punctures in my original Photon and resin would leak onto the screen and cure during a print. This could be scraped off easily with the edge of an Exacto knife. Due to the build size on the Mono X, I suspect the FEP has more room to lift during printing, which can cause far more resin to leak in the event of a puncture. Additionally, cured resin is supposedly much more difficult to remove without damaging the screen. If you’re extremely careful and rarely get failed prints, this won’t matter to you. But if you want to be safe, you can always add a screen protector. I ordered this Super Shieldz protector from Amazon, which is cheap and works very well. There are several good YouTube videos detailing how to add a protector. I didn’t cut mine to size, I just place directly over the screen and added some scotch tape on the sides. I certainly could have applied it more carefully, and had a few air bubbles, but it does not seem to affect print quality.
I did notice a slight puncture in my FEP, but decided to see just how bad the resin leaking issue was for myself before my replacement FEPs arrived. This was after adding a screen protector, of course. As you can see, a tiny hole resulted in a pretty substantial leak, but the screen protector did its job. So, I would highly recommend adding one to be safe. 
I knew what would happen, but I did it anyway…for science! Finally, if you’re having issues removing prints form the build plate there are a number of magnetic, flexible build plates available that come highly recommended. I haven’t had the chance to try any yet, but from what I’ve seen Wham Bam appears to be a very popular option and I will probably pick one up at some point. Luckily, the good far outweighs the bad when it comes to the Mono X. And most of the issues I’ve seen can be easily avoided. Overall, the Mono X prints really well, which is what I’ve come to expect from Anycubic. It’s also much faster. Now that I’ve replaced my warped build plate and gotten my settings mostly dialed in, I would give this printer a 9/10. It’s easy to use and a solid option for anyone looking to get into resin printing or interested in printing much bigger models. 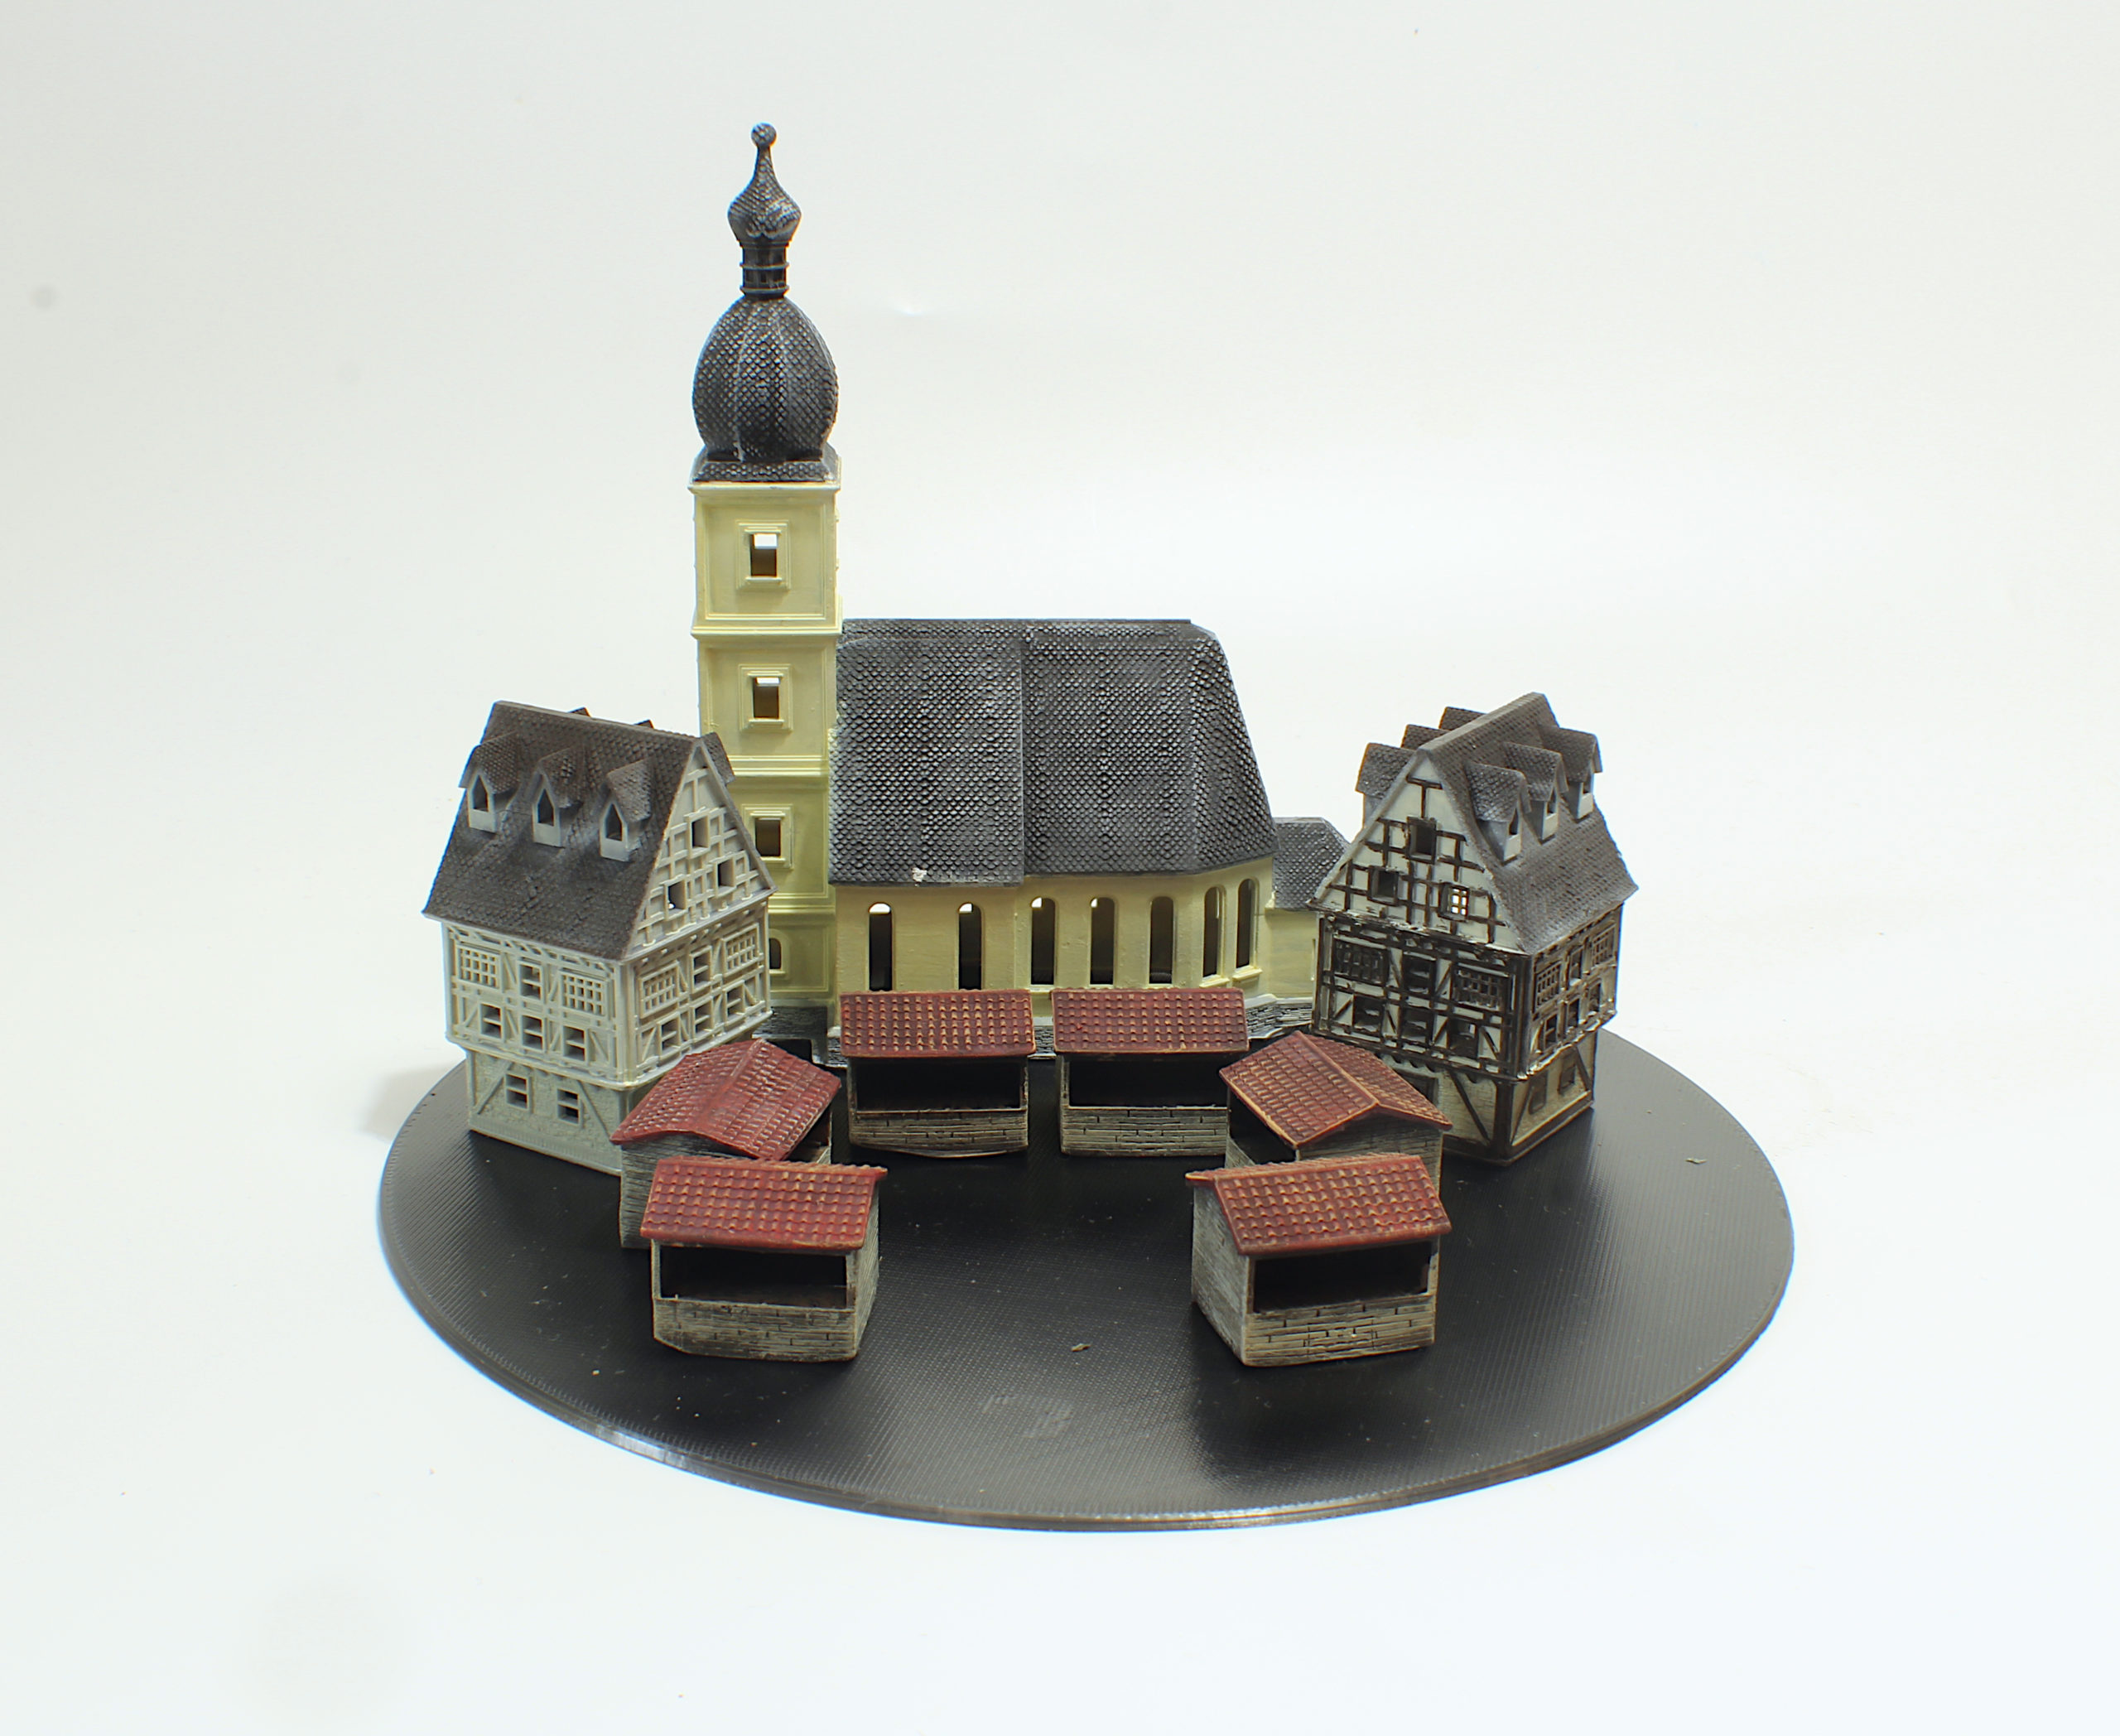
Some of my prints after some painting. If you want to see more pictures of cool things I 3D printed, check out my Instagram. Quote request Are you looking to buy a 3D printer or 3D scanner? We're here to help. Get free expert advice and quotes from trusted suppliers in your area. Powered by Aniwaa Printing via 3DPrint.com | The Voice of 3D Printing / Additive Manufacturing https://3dprint.com January 26, 2021 at 08:32AM
https://ift.tt/369vRY3
Long-awaited Fuse 1 SLS 3D Printer Released by Formlabs https://ift.tt/2MrDSQU Today, Formlabs announced the release of its long-awaited selective laser sintering (SLS) 3D printer, the Fuse 1. It is a new class of printer, a bench top industrial system, featuring what the company calls Surface Armor technology and a new Nylon 12 powder. The Fuse 1 also has a 70% powder refresh rate and, compared to traditional industrial SLS printers, the Fuse 1 is dramatically less expensive, coming in at $18,499. 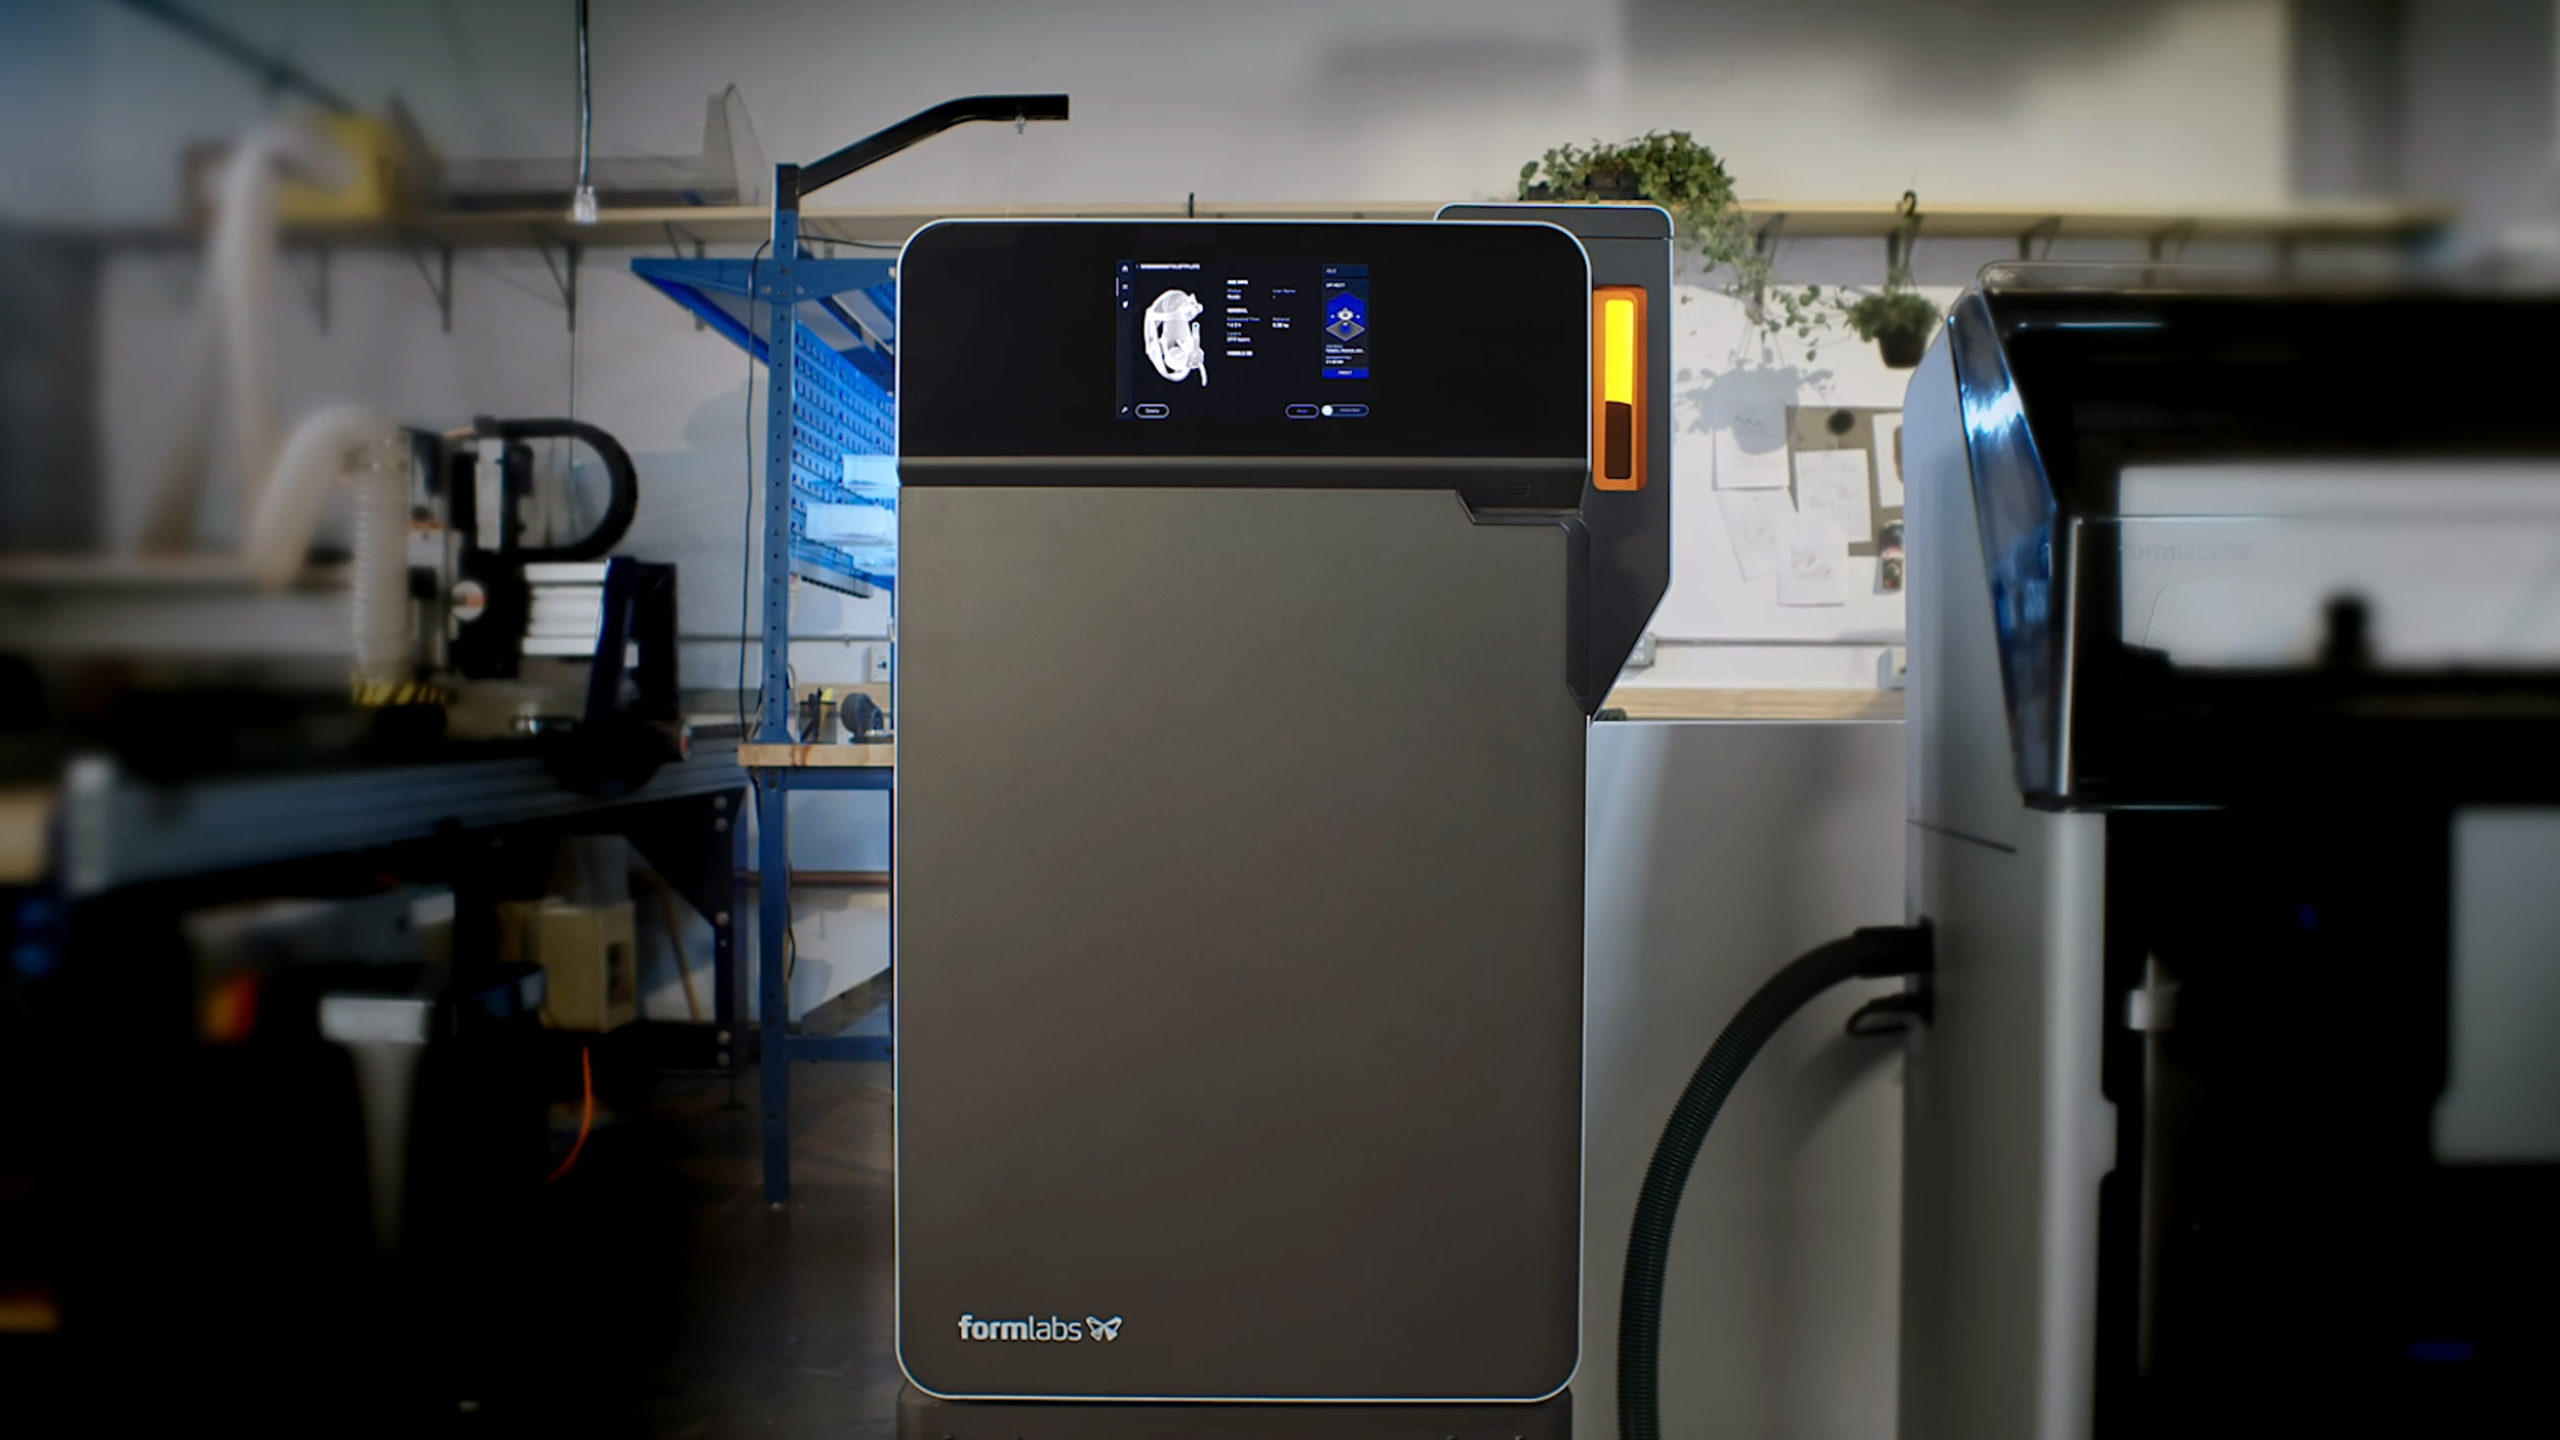
The Fuse 1 SLS bench top 3D printer from Formlabs. The patent-pending Surface Armor technology is a semi-sintered shell that shields the surface of the part while offering a reliable, high quality surface finish and high refresh rates. 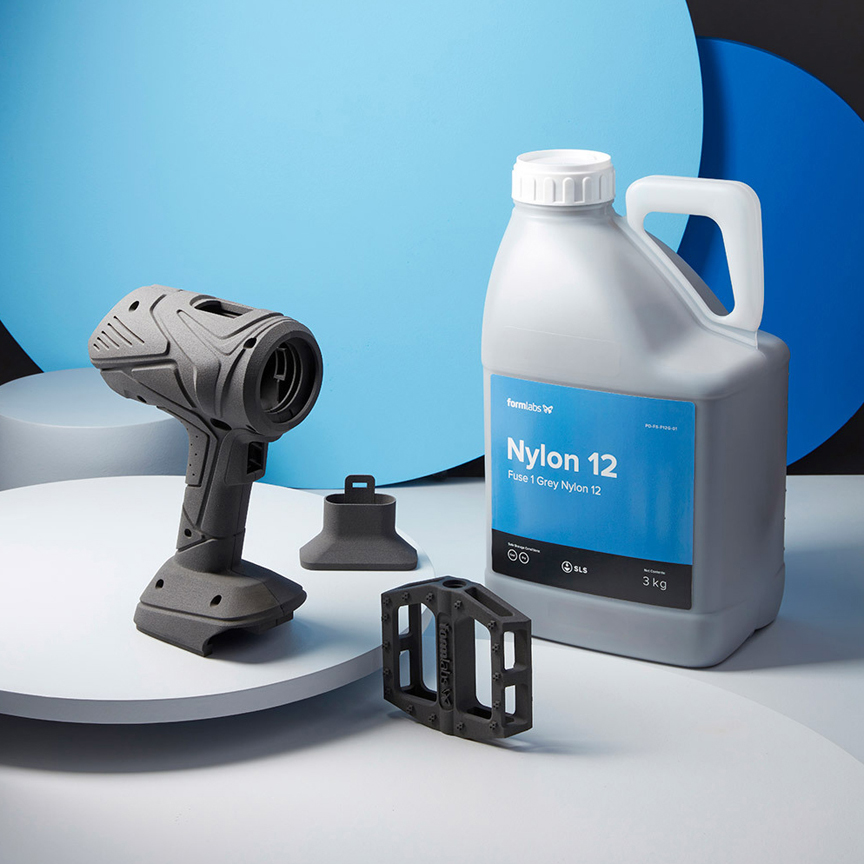
The new Nylon 12 powder material for the Fuse 1 SLS 3D printer. The Fuse 1 from Formlabs is not the only company in the desktop powder bed fusion and SLS segment. 3DPrint.com executive editor Joris Peels has been following the progress of this technology and recently noted, “Sinterit and Sintratec (in which the Langer family who owns EOS is an investor through AM Ventures) are growing in the desktop and inexpensive space, making machines between $5,000 and $20,000. There are also new entrants, such as WeMatter and NaturalRobotics.” Peels also observed that it has taken Formlabs quite some time to release the Fuse 1, deriving a conclusion that quality, low-cost SLS/PBF additive manufacturing machines are not as easy to design and manufacture as you would think. But Formlabs has finally accomplished this after seven years of development with the bench top Fuse 1, which includes a post-processing system called Fuse sift. The Fuse sift system, Surface Armor technology, the new Nylon 12 powder are all part of fulfilling the company’s promise of an end-to-end bench top SLS workflow for engineers and product design teams. 
End-use parts 3D printed from Nylon 12 powder on the Fuse 1 3D printer. According to Formlabs CEO and Co-founder Max Lobovsky, “SLS 3D printing shouldn’t be solely for those with big budgets, it needs to be accessible so all companies --from startup to big manufacturer — can benefit from the design freedom and high productivity SLS 3D printing provides.” SLS 3D printing technology has been used by engineers and large manufacturing outfits for rapid prototyping and printing end-use parts, but due to the complex nature and high-cost of SLS machines, many small-to-medium sized businesses (SMBs) have been left out. Formlabs is hoping that the Fuse 1 will change things forSMBs looking to reap the benefits of an affordable bench top SLS printer with workflow optimization features. 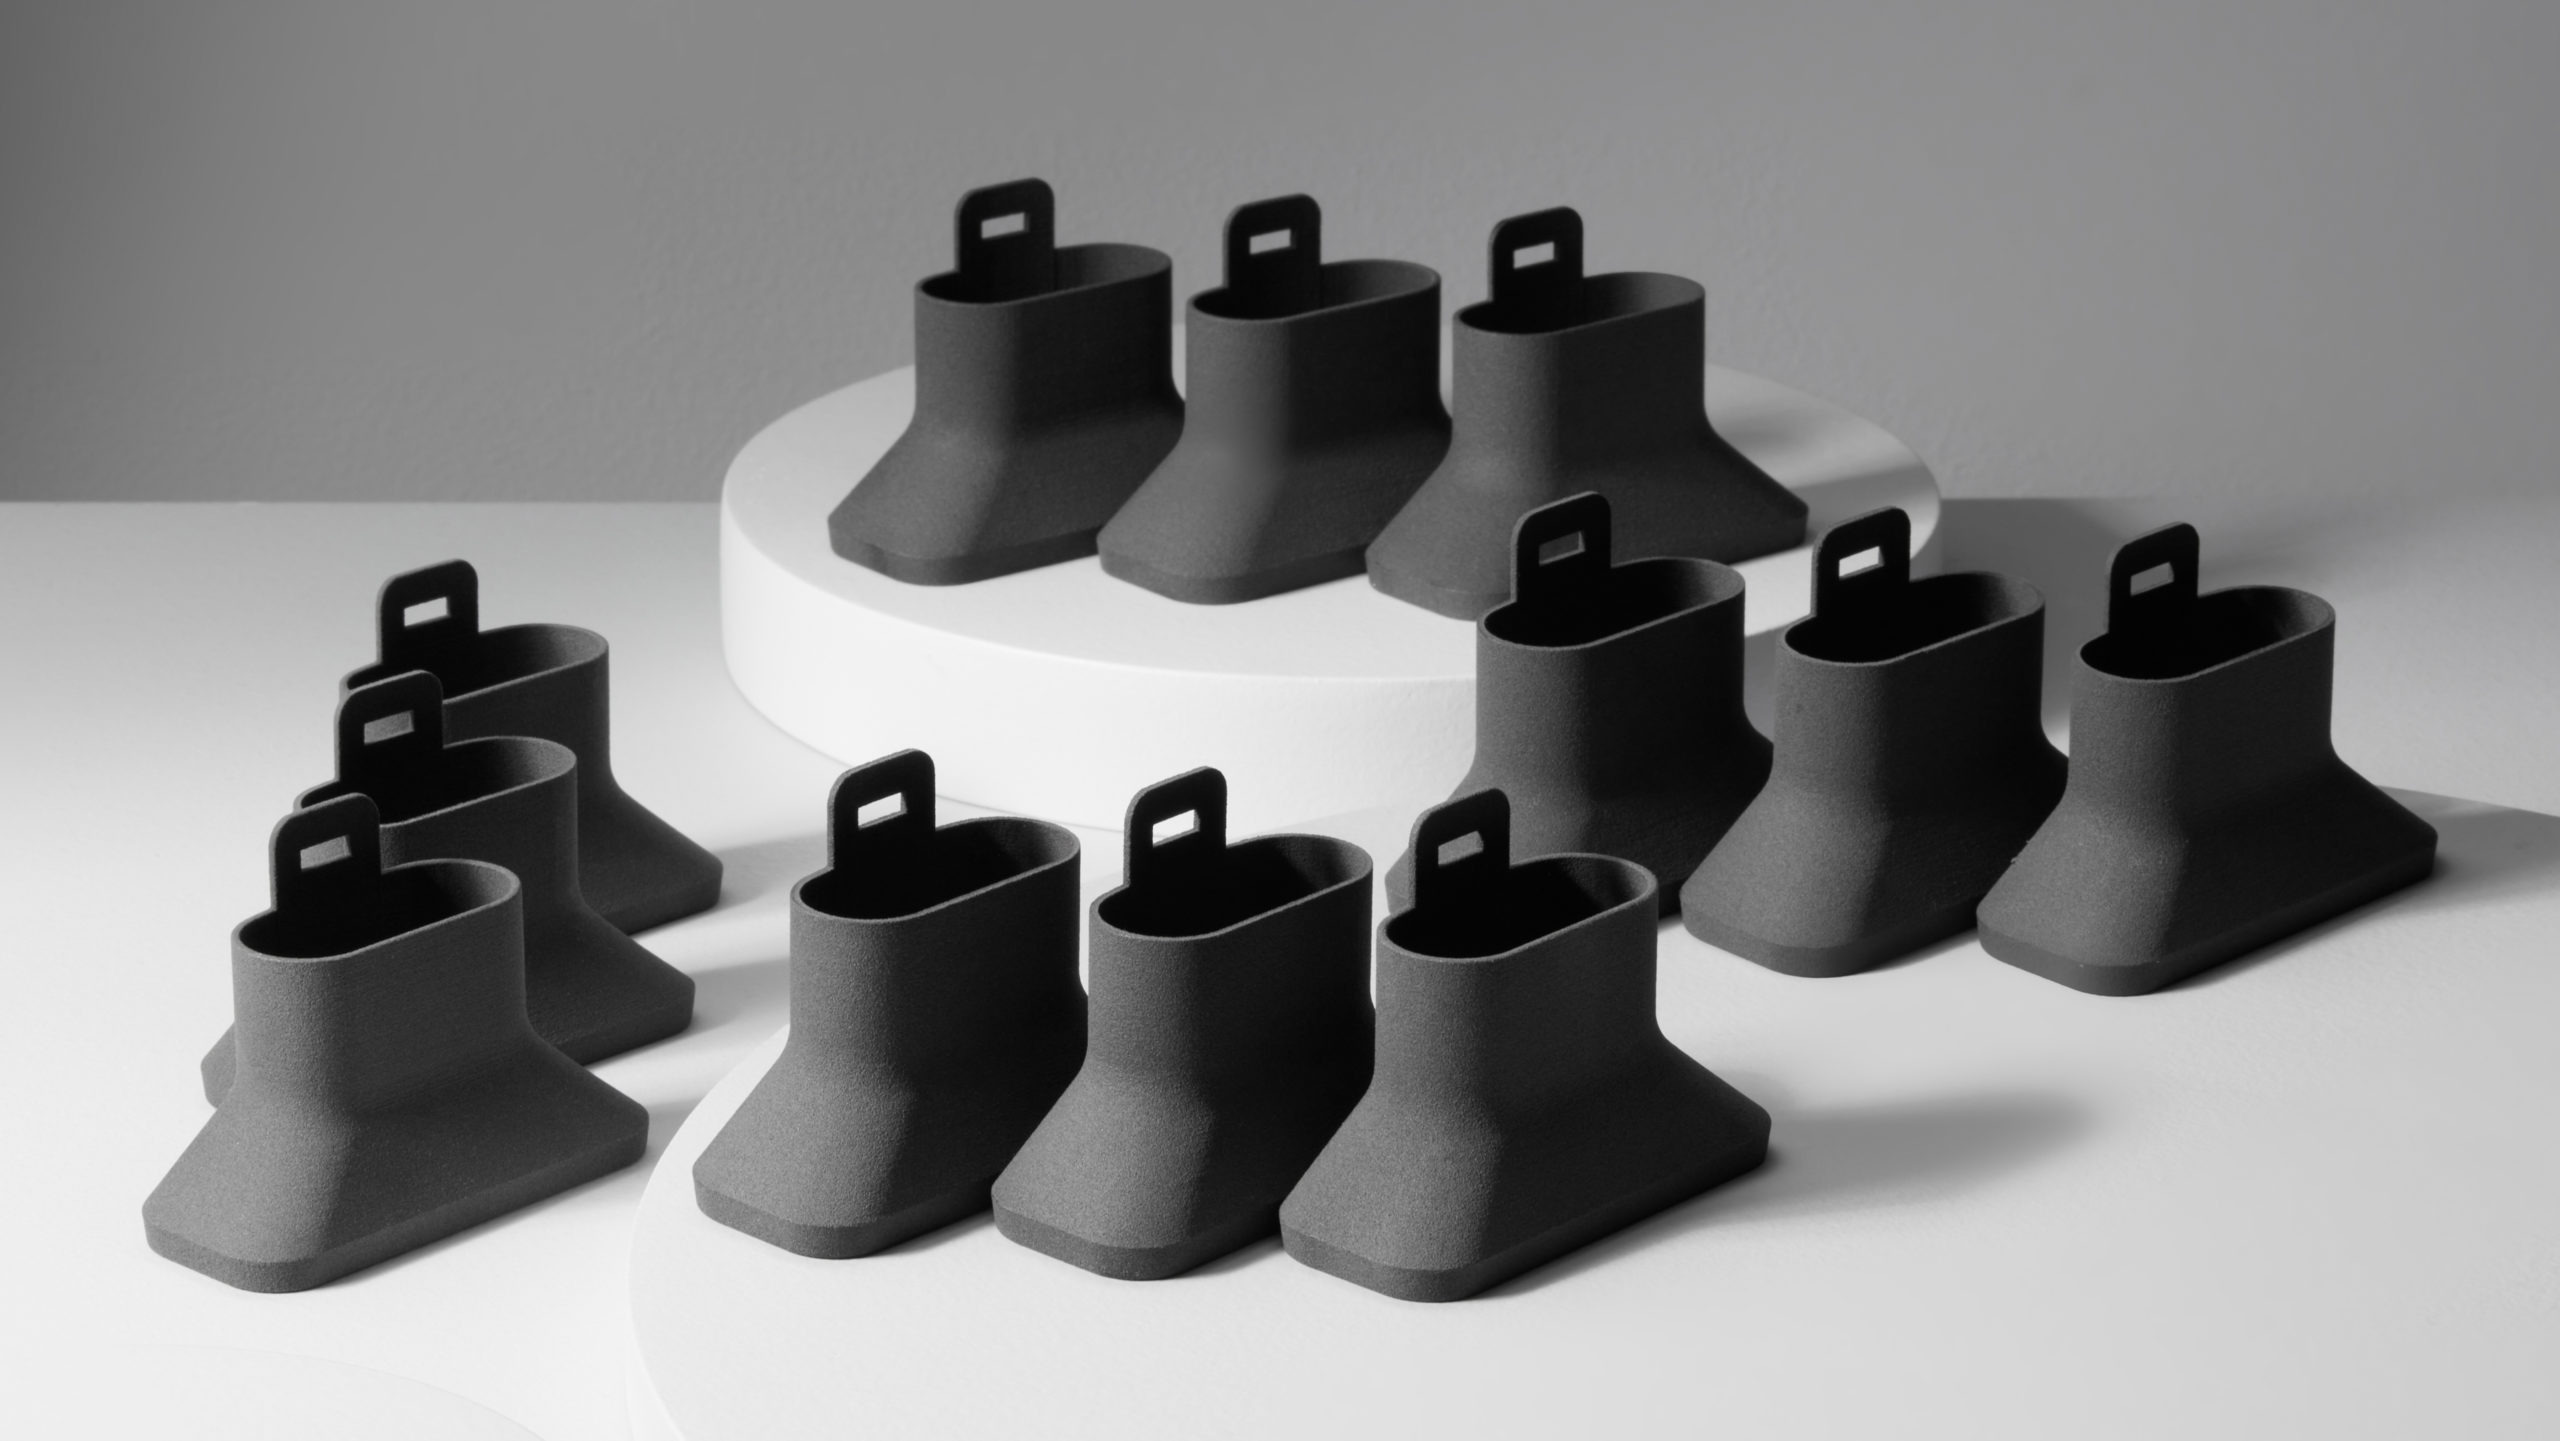
Production-ready parts printed on the Fuse 1 3D printer could end the dependence of SMBs on outsourcing to injection molding firms for production-ready parts. Smaller companies that outsource part production to injection molding companies for manufacturing could speed up their time-to-market by implementing a rapid prototyping workflow provided by the Fuse 1. The modular build chamber allows for continuous printing, which reduces downtime. Printing with 70% recycled powder saves money on materials, as does the material refresh rate (a minimum ratio of fresh powder needed to print) of 30 percent for minimal material waste. The Fuse 1 would allow many smaller companies to encapsulate their entire product development process from concept to manufacturing end-use products from Nylon 12 powder, and might open up the floodgates for SMBs interested in a low-cost SLS bench top 3D printer for prototyping and production. Printing via 3DPrint.com | The Voice of 3D Printing / Additive Manufacturing https://3dprint.com January 26, 2021 at 08:02AM
https://ift.tt/3iOz2JV
Can 3D Printing Help the Auto Industry Usher in a New Era for Coachbuilding? https://ift.tt/2YgASd6 The car industry is becoming excited about 3D printing, with players rushing to acquire systems. Mass customization cases, such as with Mini, are being piloted to get to grips with the technology. Car parts are being designed and tested, while printers are arriving on more and more shop floors. Some hypercars now sport 3D printed parts and they’re appearing on more ordinary vehicles, as well. What you may not know is that, for years, one-off supercars have had many 3D printed parts. These vehicles where a wealthy individual goes to Pininfarina, for example, and then has a unique Ferrari made. These one-offs can cost many millions and are works of art. They’re also a rare example of coachbuilding. In the early days of the automobile, coachbuilding was the norm. Coachbuilders created the entire body of the car, including the interior on top of the rolling chassis. The rolling chassis—which is made up of the engine, drivetrain, chassis and wheels—was then married to the coach portion of the car. Often, these coachbuilding companies had started with carriages and were then able to transfer their wood and metalworking skills to the car industry. Coachbuilders made a lot by hand forming metal and wood individually. So, separate details or designs for single customers were possible, as were more serially-produced models. The symbiosis of the coachbuilder and the automobile manufacturer ended in the 1960s, with the popularization of the unibody chassis. Some names live on in the models of cars such as the Volkswagen Karmann Ghia or through units of car companies, such as Bentley’s Mulliner. Some firms, including Belgium’s Van Hool, are large manufacturers of busses, where a similar coachbuilding norm still subsists. But, at a time of great change there is also opportunity for innovation. We often see flocks of innovative ideas come to fruition simultaneously and enabling each other (e.g., the production line, combustion engine, suburbs, vulcanized rubber and the motorway service station). The current upheaval in the car industry is that of the electric car. This will change how vehicles are made and may be a great benefit to our planet, as well. But, if you look at the chassis of electric cars, it looks an awful lot like that of the rolling chassis of yesteryear. The batteries, electronics, motors—they’re all flat on the bottom of the car. This, in turn, means that the rest is later built on top. So, if this to be the general design paradigm for many electric cars, we could return to coachbuilding, right? 
Early Tesla Roadster Chassis. Image courtesy of Tom Donohue Many people want more creative, customized products. The car is already a mass-customized item made with millions of exemplars, perhaps in some cases; no two could be identical. So, why not let others manufacture the body, and make these bodies unique? Why don’t Bosch or Panasonic sell rolling electric chassis to partners so that, in turn, these partners can make cars on top of them? Molds for body parts could be 3D printed using voxeljet, any of the concrete 3D printing companies, LSAM from Thermwood, or similar systems. Standard components would then become relatively inexpensive. You could even make low volume stamping dies with 3D printing. Unique parts will be 3D printed in SLA or large-scale FDM and cast. Other parts could be printed directly by ExOne, MX3D, or another relatively inexpensive technology. Some parts could be printed directly through polymers. All in all, you could get pretty far toward a one-off coachbuild with 3D printing. Users can design their own car bodies and have unique interior layouts, as well. Whatever your heart desires could become your next automobile. You could have quirks and completely off-the-wall body shapes that go way beyond what the aftermarket does now. Micro car brands could cater to small groups of people or bring car manufacturing to countries that have had no access to it yet. Designers could commission cars of any and all designs quite inexpensively . Cars could become art again. Now, naysayers will probably have some questions about things like crash testing. Liability and just general safety could be tricky, I’ll admit. But, in some case and somehow, it will be possible to do this in a limited manner. For example, for the next UPS van it will be easier for UPS to design exactly the vehicle it wants with all of the features it wants. Maybe not everyone could do something like this, but it does open up the car market to newer entrants and ways of competing. By 3D printing components in this case, we’d be enabling a transition, by a part of the industry, to a new way of making automobiles. It is exactly through these innovations inside industries that we could play a disruptive role across many an industry. The feature image is another Gangloff Bugatti, courtesy of Rex Grey Printing via 3DPrint.com | The Voice of 3D Printing / Additive Manufacturing https://3dprint.com January 26, 2021 at 07:32AM
https://ift.tt/3iZaHRL
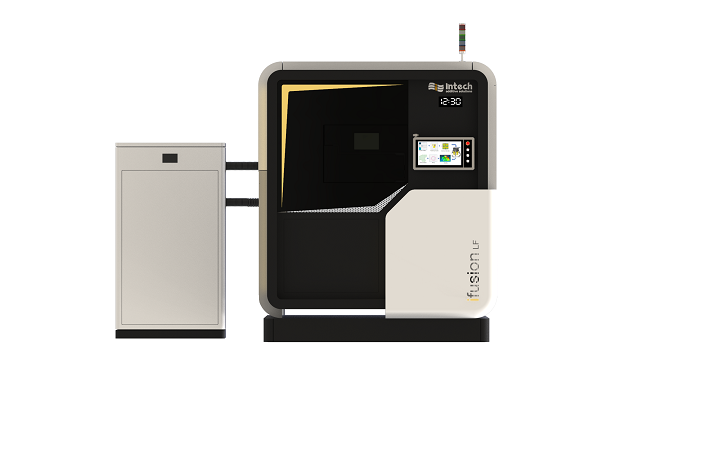
Intech Launches iFusion LF Series of Large-Format Metal 3D Printers https://ift.tt/3r5PYP1 Bengaluru-based Intech Additive Solutions Pvt Ltd. (Intech) is, according to its website, is one of the first metal 3D printing service providers in India; an OEM that successfully develops and manufactures laser powder bed fusion (LPBF) metal 3D printers. Two years ago, the company purchased a MetalFAB1 system from Additive Industries, which helped Intech expand its business as it was now able to scale for volume. Now, it’s launching the iFusion LF series of large-format metal 3D printers, which is a direct result over research and development efforts by Intech over the last four years. This metal AM range was completely developed and built at the company’s facility, and Intech says it offers “a high build rate for cost effective manufacturing.” With a 450 x 450 x 450 mm build volume, the new system is good for applications in the automotive and aerospace industries, as well as tool and die and general engineering needs.
The large-format 3D printers in the new iFusion LF series starts with a single 500W laser system, and can also be upgraded to a four-laser system with either 700W or 1000W lasers. The systems are integrated with the Intech’s own AMBuilder build preparation metal AM software suite, which has an easy-to-understand guided workflow to help users navigate the various stages of build preparation. For instance, with iFusion LF’s generous build volume, parts can be nested and stacked in a single run, which definitely increases productivity and lowering the part per cost; AMBuilder can help you position the parts, optimize the orientation, generate supports, and more. 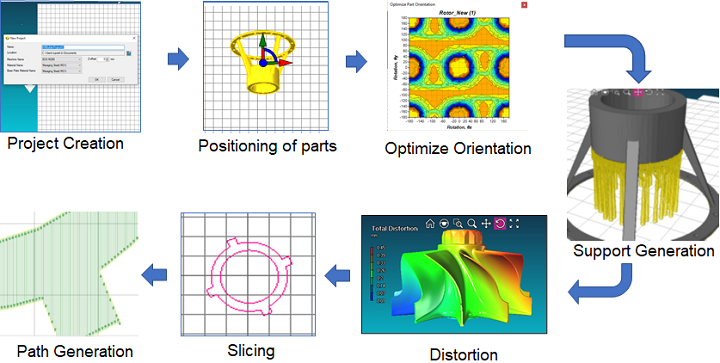 AMBuilder workflow AMBuilder workflow
Intech says that its iFusion LF series printers offer durability “at a competitive MHR and lowest cost per part (CPP),” and don’t require a large investment right off the bat. The company also announced that it has signed an agreement with Poeir Jets, the first company from India that designs, develops, and manufactures propulsion systems for micro-jet engines in unmanned aerial Solutions, unmanned aerial applications, and heavy-lift drones. Poeir Jets will be using Intech’s iFusion LF 3D printers to make larger parts for its heavy-lift drones. Quote request Are you looking to buy a 3D printer or 3D scanner? We're here to help. Get free expert advice and quotes from trusted suppliers in your area. Powered by Aniwaa 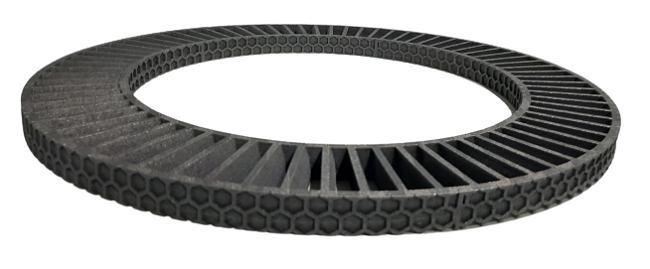 Part printed on the iFusion LF Part printed on the iFusion LF
Intech’s main objective is to help further develop an ecosystem in India for industrialization of 3D printing. So if Poeir Jets has good things to say about its new iFusion LF series, the word could spread to other aerospace companies, which definitely helps with the company’s goal.
(Source/Images: Intech) Printing via 3DPrint.com | The Voice of 3D Printing / Additive Manufacturing https://3dprint.com January 26, 2021 at 07:01AM
https://ift.tt/3cc7gp7
Towards Zero Waste and Failures: AdditiveLab’s Customizable Simulation Enables Increase in Metal Additive Manufacturing Efficiency https://ift.tt/3a3Z6g7 AdditiveLab’s Mariam Mir will be speaking at 3DPrint.com’s upcoming AMS online industry summit (Feb 9-10, 2021). Register here. Metal additive manufacturing (AM) process simulation predicts the potential production outcome and gives vital information on regions of manufactured designs that are prone to deformations, high stresses and heat accumulation. With more insight into potential manufacturing outcomes entire build configurations including part and support structures can be optimized to increase the process efficiency and to minimize manufacturing risks. 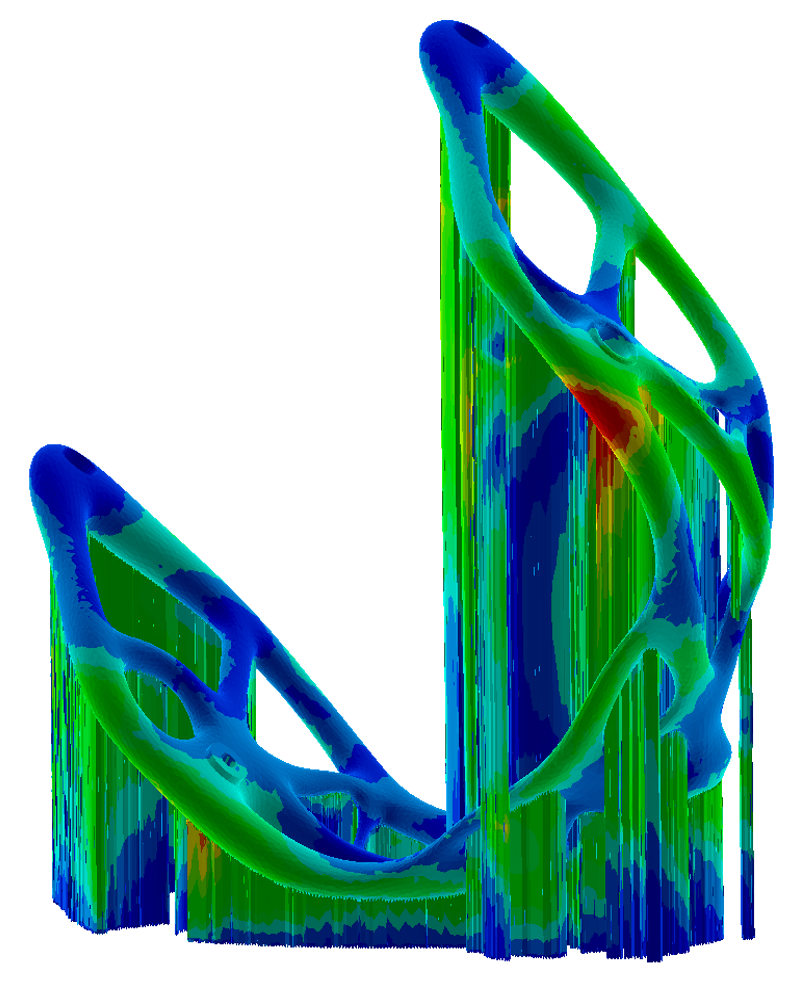
The predicted model in AdditiveLab indicates the regions in red as the region prone to the most deformation. Simulation for metal AM processes offers clear advantages to users, however, most simulation tools used in industry are designed to force the user to employ software specific simulation workflows. On the one hand, that makes it easy for users to quickly adapt the relatively complex simulation technology but on the other hand, due to the fixed workflow’s rigidity, advanced users are limited in creating customized simulation models which fit their exact needs. With such rigid simulation tools, advanced simulation users are not allowed detailed access to the simulation models and intermediate simulation results, and actual simulation parameters are often hidden from the user and are not manipulatable. This restricts users from adjusting the simulation models to better correlate with their production process. The opportunities for using intermediate data to extract conclusions, the possibility to create automated simulation workflows for various manufacturing scenarios and the possibility to create Intellectual Property (IP) within their enterprise are often not feasible due to these limitations. The software of AdditiveLab addresses these AM simulation needs; their product AdditiveLabRESEARCH is specifically designed for advanced users allowing them to create simulation models with high level of simulation customization. This is achieved by giving the user access to in-depth AM simulation functionality via a powerful, integrated Python Application Programming Interface called the “AdditiveLab Python API”. The AdditiveLab Python API allows users access to all underlying software functions and enables them to create customization of simulation models, development of new simulation models, automation of customized simulation workflows and subsequently creation of their own simulation IP, which can then be easily shared within the user’s organization. Users are able to access all available simulation results at every existing simulation step and can export them in various formats to other software tools. To elaborate the flexibility of creating optimizations using the AdditiveLab Python API, take the example of support optimization from one of AdditiveLab’s users from the dental industry. This customer case illustrates 40% support material reduction with optimization via the AdditiveLab Python API. The below illustrated part support configuration of the dental implant was generated with an established workflow at the user’s site that utilizes sturdy support structures in order to ensure failure-free manufacturing for a broad variety of dental implants on a daily basis. The supports are over-dimensioned to ensure daily production success, but subsequently, require more material usage, increased manufacturing times and longer manual post-processing. Even though the customer had their limitations in modifying the established workflow, they wanted to optimize existing support thickness to reduce material waste, machine runtimes and post-processing efforts to reduce costs. 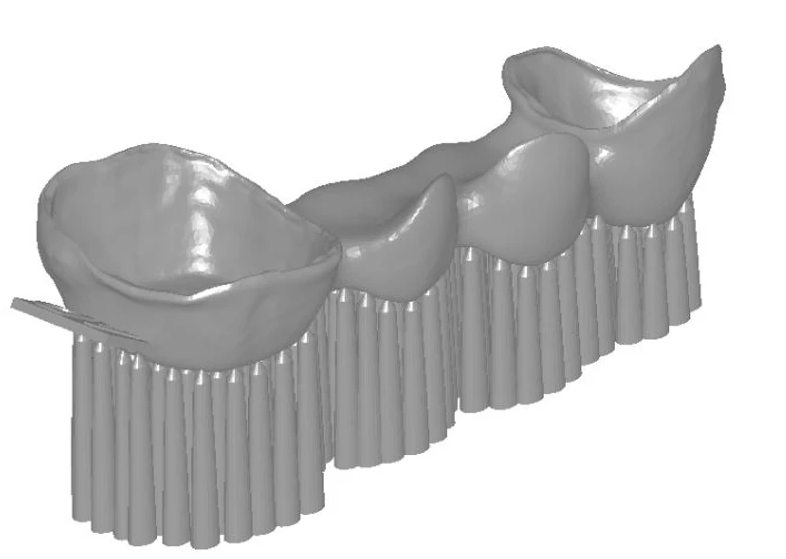
The figure above shows the originally designed support for the dental implant with the over-dimensioned, cone-like support structures. The customer employed the AdditiveLabRESEARCH software to determine which are the essential supports that are exposed to higher tension loads that could lead to failures during the production and compromisation of the manufacturing quality. During the AM process, residual stresses deform the part-support configuration which must be counteracted by the supports. Thus, it is vital to understand first which supports are exposed to higher loading and which ones are exposed to lesser loading and may have potential for volume reduction. Process simulations immediately indicate that different cones were exposed to different loads (tensions) as illustrated in the images below. With further analysis, the reaction forces occurring in the cone supports due to the tension loads are used as a measure to optimize the cone structures. 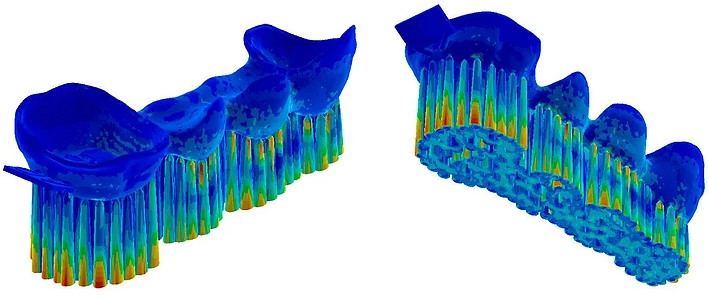
The figures above show the simulation results of the building process. The color-coding shows the tension loads at the bottom of the support structure with red indicating higher tension loads. After understanding the effect of the loads occurring on the cones during the building process, the cone diameter was iteratively optimized based on the tension loads via simulation algorithms written in the AdditiveLab Python API. One example result of the optimization with this algorithm is illustrated in the figures below: 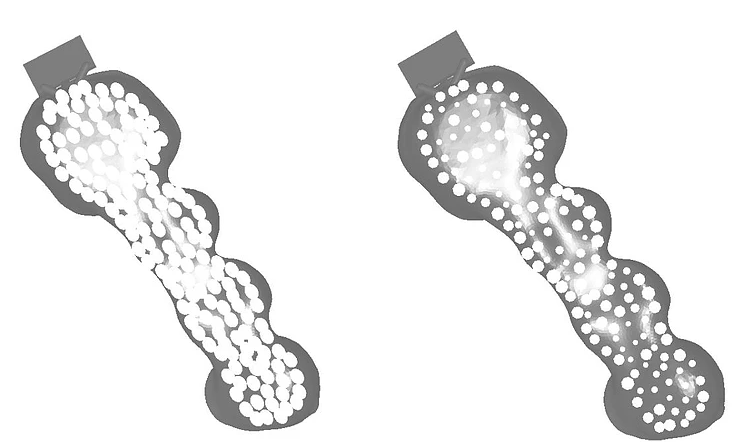
The figures above show the bottom view of the dental design with the originally designed support structures (left) and the optimized structures (right). The difference between the cone support diameters is illustrated with the optimized design needing 40% less material without compromising the structural integrity during the building process. This project illustrates a real case example where the AdditiveLab Python API was used to enable the user with customizable, beyond standard simulation features. In this example the particular challenge was to utilize simulation around an established workflow allowing the customer to reduce material waste without increasing the build failure risk. The customized simulation aided greatly in better performance of the AM process for the dental implant manufacturer. With using the AdditiveLab Python API, advanced simulation users, researchers and AM teams have the power at their disposal to create customized simulations, to optimize their processes and to create their own simulation IP. Discover more about AdditiveLabRESEARCH and AdditiveLab automated and simplified AdditiveLabLITE solution on our website and join us at AMS conference in the panel session 2, Design Software for AM to learn more about additive manufacturing simulation and other software tools you need for additive manufacturing. Printing via 3DPrint.com | The Voice of 3D Printing / Additive Manufacturing https://3dprint.com January 26, 2021 at 06:32AM
https://ift.tt/3a76wz0
Andrea Chronopoulos https://ift.tt/2YsZgZ7 The bright colours, no-nonsense black outlines and playful but thoroughly flat style of Andrea Chronopoulos’ work make it both distinctive and part of a modern tradition in illustration that we see a fair bit, but which is deceptively tricky to get right. In the correct hands, however, that flattened look—all simplified figures, geometric backgrounds and big hands—is superbly versatile, and clearly very commissionable. It works for brands, advertising, packaging, editorial; cute things, serious things; narratives and stand-alone images. As such, Chronopoulos’ client list includes the New York Times, Plansponsor, Bloomberg, GQ, Esquire, Family Meals, MIT Technology Review, Medium, Live Life Give Life, Pentagram London, EasyJet Traveller, Fred Perry and many more.
While we don’t necessarily hear as much about Rome in terms of its illustration scene as we might other cities in Europe, such as Berlin or the various cities in the Netherlands, the illustrator assures us that there’s a lot going on there. “I think that the illustration scene in Rome is growing a lot lately: there are many illustrators who live here, new schools are opening and more events are taking place compared to some years ago,” he says. “I hope that this will continue when things get back to normal and that could lead to a bigger community.”
Given the choice, his favourite sort of commissions aren’t dependent on a particular type of commission, client or sector—“Working with a variety of clients and in different fields is the most fun part of being a freelancer!”—but are those which mean he gets to look at something different, meaning he gets to learn something. Another key part of any brief, he says, is being allowed to express his “own personal style and approach.”
He adds, “Beginning requires lots of patience!” Printing via People of Print https://ift.tt/2DhgcW7 January 26, 2021 at 05:43AM
https://ift.tt/3pitWYA
Hinke Weikamp: Non-existing plants https://ift.tt/3sQUySG From her studio in Utrecht, Hinke Weikamp creates graphic prints from materials that she finds in nature. She intuitively isolates parts of plants to create new, “non-existing plants”. These parts are inked and placed under an etching press, leaving a shadow of the plant on the paper.
Printing via People of Print https://ift.tt/2DhgcW7 January 26, 2021 at 03:56AM
https://ift.tt/3caLlio
3D Printing for Preppers: Investment Casting with PolyCast Filament https://ift.tt/3a01HaI While disaster has not yet befallen my humble family, there is no shortage of emergencies globally and the COVID-19 pandemic has demonstrated just how useful even desktop 3D printing can be during disaster situations. Provided with the opportunity to review an Ultimaker S3 3D printer and several unique filaments, I thought I’d explore the 3D printing of simple goods that might be useful during emergency situations to get an idea for just how useful a desktop 3D printer might be. In addition to providing an overview of the subject, I’ve reviewed the Ultimaker S3 and spoken to Ultimaker about the use of desktop 3D printers in emergency and disaster scenarios. I also had an opportunity to test out some copper filament made by The Virtual Foundry, which was sintered by Sapphire3D. I spoke to the manufacturer about the material, as well as its myriad other unique metal filaments. 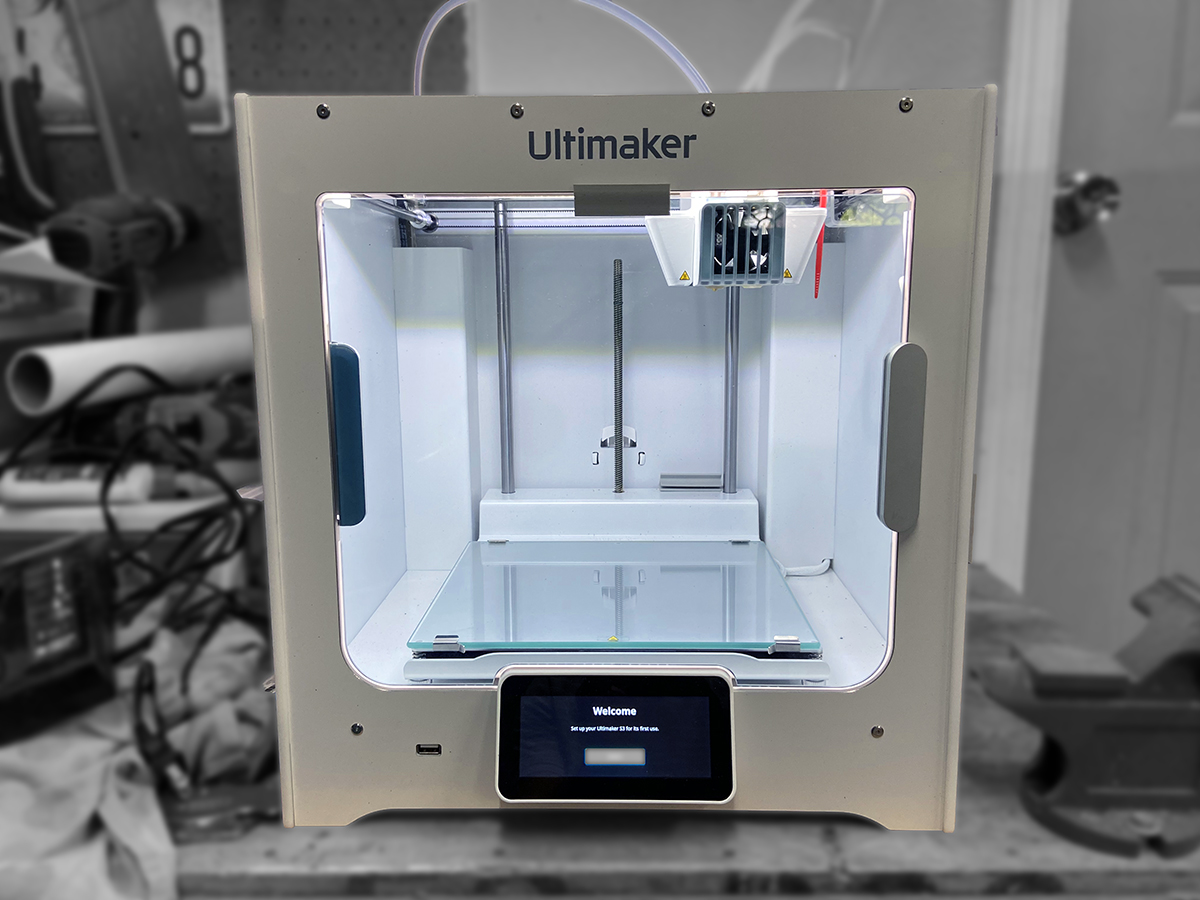 The Ultimaker S3 unit we reviewed. The Ultimaker S3 unit we reviewed.
While metal filaments open up some interesting options for making metal parts with a desktop 3D printer, it does require some additional equipment and expertise to be able to make adequate parts. There is, however, a 5,000-year-old process that has recently gotten a 3D printed makeover that anyone with a 3D printer can try at home, if they’re cautious. I am, of course, referring to investment casting. The oldest discovered item made with lost-wax casting is a 6,000-year-old amulet from the Indus Valley Civilization, a Bronze-age society in the northwestern regions of South Asia. The technique involves making a model out of a material, such as wax, before creating a mold from that model and then pouring molten model into the mold to create a solid metal replica. Obviously, there are more specific details involved than provided here and we’ll get into them a bit later. 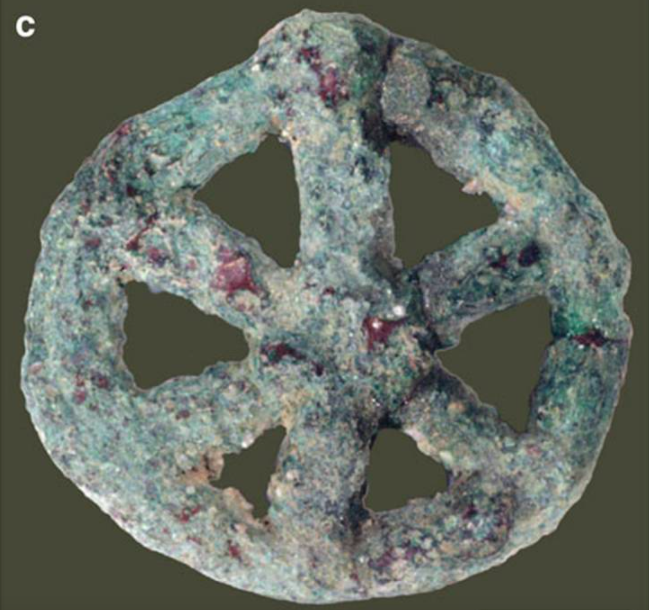 The oldest known piece made with lost-wax casting, a 6,000-year-old amulet from Mehrgarh (modern day Pakistan). Image courtesy of Nature Communications. The oldest known piece made with lost-wax casting, a 6,000-year-old amulet from Mehrgarh (modern day Pakistan). Image courtesy of Nature Communications.
As one of the oldest metal manufacturing methods, it exists in many forms and, though models were initially craft by hand using clay or wax, 3D printing has lowered the barrier for artistic skill required to prepare these designs. Now, it’s possible to take a model from an online repository, generate a replica of a physical object with 3D scanning, or use CAD tools to design something to cast. Moreover, a number of 3D printers and materials exist for just such purposes. For professional applications, such as jewelry or dental crowns, vat photopolymerization (digital light processing [DLP] and stereolithography[SLA]) or inkjet 3D printing (Solidscape wax printing) are usually the technologies of choice, as they can achieve much higher resolution with the right materials. However, low-cost material extrusion (fused filament fabrication [FFF]) and DLP systems are capable of producing models for casting, as well. As an FFF printer, the Ultimaker I reviewed had many fewer options to choose from in terms of materials compared to cheap DLP machines. Typically, DIY casting enthusiasts have actually used your standard PLA or flexible filaments for printing their initial models. However, there are a couple of filaments engineered specifically for casting on the market. The two most notable are MOLDLAY from Kai Parthy and PolyCast from Polymaker. 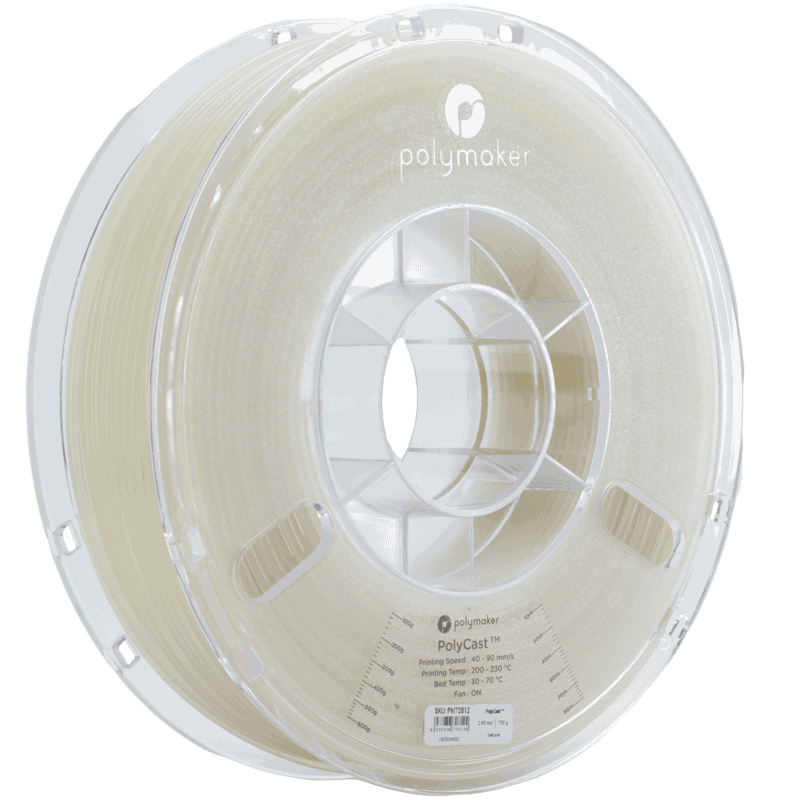 PolyCast 3D printing filament for casting from Polymaker. Image courtesy of Polymaker. PolyCast 3D printing filament for casting from Polymaker. Image courtesy of Polymaker.
The team at Polymaker was kind enough to send me a free sample of their Polycast material to try out. This filament is designed to have what is called low “burnout,” in that, when cast, there is as minimal amount of ash left. That way, when the liquid metal is poured into the mold, it won’t receive any defects from any debris in the mold cavity. For this reason, it’s also important to post-process any prints, sanding off any support structures and polishing them smooth. This will ensure a smoother casted object, with fewer defects. By this point in the review process, I had sufficiently clogged my second nozzle, so no longer had access to dissolvable supports. I did not want to risk having too many defects from support structures made from the PolyCast, so I printed objects without overhangs. These were still meant to be practical in case of emergency. I chose a wrench and surgical retractor, the same models as those I had made from PLA in a previous article in this series. 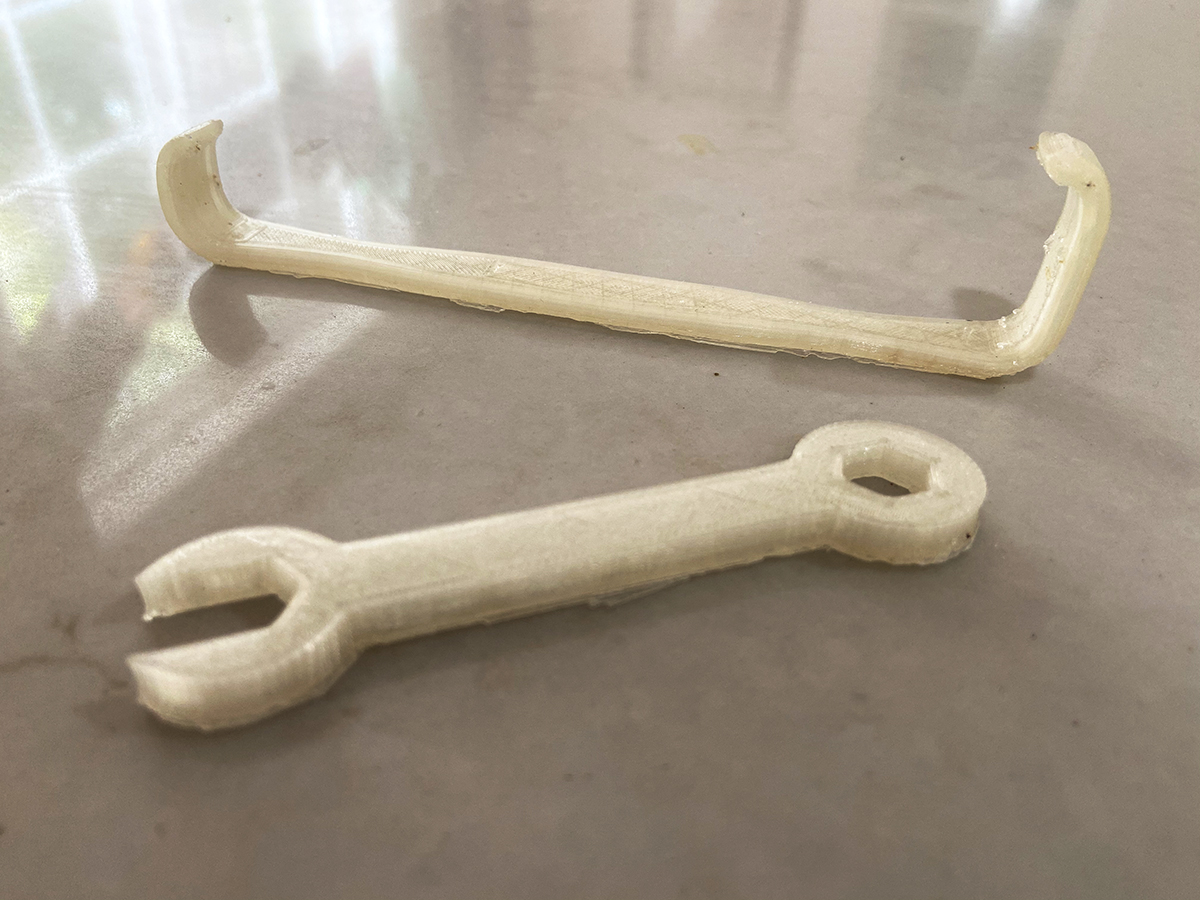 A surgical retractor and wrench 3D printed from PolyCast. A surgical retractor and wrench 3D printed from PolyCast.
Printing them was easy, as easy as PLA. Because the material was in a sealed bag with desiccants, there was no issue with moisture. I simply added the PolyCast printer profile to Cura and, upon starting the Ultimaker, the profile was loaded. After loading the filament, the printer had no issues at all. The difficult part came when I had to cast the prints. With a toddler and baby at home, quarantining during a deadly pandemic, it’s not easy or safe to create your own casting station, but it was something I considered. I will explain how some people have approached performing their own casting below (somewhat interesting) before getting into how I went about it (less interesting). This isn’t meant to be a guide, as I didn’t conduct the casting myself, but should be informative enough for readers to get a sense of how it is performed. Based on numerous accounts online, it’s not difficult to do your own casting, if you take the proper precautions, and it is pretty feasible in an emergency situation. In fact, as the video below demonstrates, it’s possible to make a backyard foundry for under $20, to create ingots from aluminum cans. This video demonstrates you can even make one with a soup can: Once you’ve got a model you’d like to cast, you have to make a tree. This wax structure will hold the figure in place and burn out with the model during casting. This process, known as spruing, is typically performed with a wax rod and wax wires that are melted together; however, it is also possible to 3D print the sprues directly with your model if you have the CAD skills (or automated software). With the positive pattern made of the final part, the next step is to create a negative. You can purchase casting kits that come with all of the equipment needed, but you can also buy and make much of what’s needed for quite cheap. Basically, you need a container and a medium that can withstand the heat of molten metal that will be poured into your mold.  Plaster process for investment casting with a 3D printed pattern. Image one shows a 3D printed part within a drywall tub. Image two, that tub once the investment plaster has been poured in. Image three, the mold removed from the tub. Images courtesy of user scottiek on Instructables. Plaster process for investment casting with a 3D printed pattern. Image one shows a 3D printed part within a drywall tub. Image two, that tub once the investment plaster has been poured in. Image three, the mold removed from the tub. Images courtesy of user scottiek on Instructables.
For the container, I’ve seen one DIY caster use a drywall tub and enough investment plaster to protect the tub from the heat. The model is then placed into the container and immersed in investment plaster, a toxic material that requires that you wear protective eyewear, gloves, an N95-style respirator and a well-ventilated area. Some DIYers have made their own investment plaster by mixing hobby-grade plaster with fine silica sand. If you use a larger container, you’ll end up taking your plaster mold out of the container and performing subsequent steps. However, if you use a small enough, steel container, this can be your flask, which will end up going into a kiln with the plaster and 3D printed pattern. Key to a good final cast is the elimination of air pockets from the slurry, which requires the use of a vacuum chamber. One caster, Adam Zeloof, relied on a mechanical pump connected to a coffee tin before pouring it into the container you’re using for your mold. Another method is to clean the 3D printed part with isopropyl alcohol right before coating it with the investment plaster. Both of these techniques are meant to prevent bubbles from forming in the next step. This is when you place your 3D print, with sprues, into your container and fill the area with investment plaster. The plaster then hardens overnight. Once you have hardened the plaster mold around your 3D printed pattern, you can heat it in a furnace or kiln to burn out the pattern, leaving a negative that you will then fill with molten metal. Yep, that means we’re almost at the direct manufacturing step. This requires heating metal up to its melting temperature, whether by backyard forge or purchased kiln, and then pouring it into the mold. 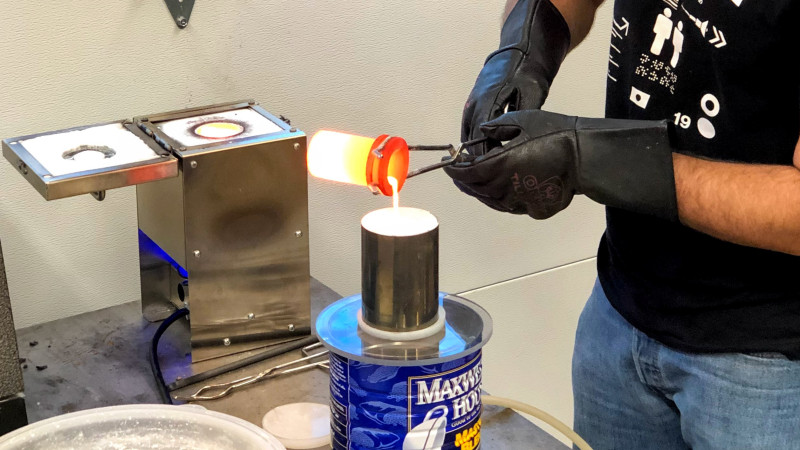 Adam Zeloof pouring molten metal into an investment plaster mold, within a steel flask and atop his coffee can vacuum chamber. Image courtesy of Adam Zeloof/Hackaday. Adam Zeloof pouring molten metal into an investment plaster mold, within a steel flask and atop his coffee can vacuum chamber. Image courtesy of Adam Zeloof/Hackaday.
Zeloof, mentioned above, explains that there are several techniques for achieving the best metal part because simply tilting the liquid metal into the mold may not result in an even coating and pour. His method of choice involves using the same DIY vacuum chamber made from a pump and coffee can. Once the metal has cooled, the mold can be dropped into a bucket of cold water. The plaster mold is broken apart to reveal a metal replica of your 3D printed part, plus sprues. Finally, you’ll need to saw off the sprues and polish the part. It is a somewhat involved process, particularly if you haven’t done it before, but, if you have the supplies and the work area, it doesn’t seem all that difficult, once you get the hang of it. Although, there is obviously a lot of trial-and-error involved and expertise to actually doing an adequate job. Then again, I haven’t done it! What I did was find the closest casting business. Because I live in a remote part of the country, I actually had to mail my 3D printed parts to Reinmuth Bronze Studio a couple hours north of where I live and have it professionally cast. In a SHTF scenario, a two-hour drive might not be too bad for an emergency part. When I worked for a medical clinic in a rainforest in Bolivia, this would be pretty standard for carting a patient out to the city when the necessary equipment or expertise was unavailable in the middle of the jungle. Of course, it all depends on the scenario.  My final parts cast in bronze. My final parts cast in bronze.
The casting of these two parts in bronze cost $118. They arrived in great condition and, as I have learned, due to the presence of copper in bronze, they may even have some anti-bacterial properties. If I were a prepper, though, I would definitely want to begin building my own forging and casting station, where I could melt aluminum cans in my backyard. Printing via 3DPrint.com | The Voice of 3D Printing / Additive Manufacturing https://3dprint.com January 25, 2021 at 09:01AM |
Categories
All
Archives
April 2023
|


 For the past two years, Hinke has mainly worked with moss; a material that remains soft. She inks a piece of moss, runs it through the etching press, and then continues on the same sheet with a new piece of moss. For example, with sixty different pieces of moss, Hinke builds one new organic shape that hints towards a plant or branch.

 Nature is a great source of inspiration for Hinke. She has always enjoyed collecting stones, dried flowers and twigs, as well as visiting botanical gardens. “For a while I had a vegetable garden at my studio home, where I could often be found. This makes you very aware of the growth and shapes of plants. I find roots of plants, algae and seaweed fascinating” says Hinke.
 Currently, she is working on a new series of mono-prints entitled Vases, where a vase becomes visible through her use of organic shapes. Hinke discovered mono-printing during her first year of studies in Graphic Design, and has loved the process ever since. She states; “Every print is unique. You can’t think of it as crazy as I put it under the etching press. Ink responds to structure, I love to experiment with it.”

 RSS Feed
