|
https://ift.tt/2HRnZLG
How to Use Facebook Ads to Improve Your Video Views https://ift.tt/2ycXuRj
Wondering how the Facebook suggested video feed can help? To explore a creative way Facebook ads can improve your video views, I interview Paul Ramondo. More About This ShowThe Social Media Marketing podcast is an on-demand talk radio show from Social Media Examiner. It’s designed to help busy marketers, business owners, and creators discover what works with social media marketing. In this episode, I interview Paul Ramondo. Paul is a Facebook ads expert who vlogs about digital marketing. His agency, RamondoMedia, helps people generate leads and sales using Facebook ads. His course is called Funnels 101. Paul shares how Facebook’s suggested video feed increased watch time of his vlogs to 100%. You’ll also discover Paul’s step-by-step process for setting up Facebook ads to maximize video views. 
How to Use Facebook Ads to Improve Your Video Views featuring insights from Paul Ramondo on the Social Media Marketing Podcast. Share your feedback, read the show notes, and get the links mentioned in this episode below. Listen NowListen now: Play in new window | Download Subscribe: Apple Podcasts | Android | Google Play | Stitcher | TuneIn | RSS Here are some of the things you’ll discover in this show: Facebook Watch TimePaul’s Story In 2008, Paul loved going to local music shows. He wasn’t a musician but wanted to be involved in any way he could. So he started running shows for a local event-management company. At the time, print media was important but also quite expensive. Although Facebook wasn’t widely used in Australia, MySpace was huge, especially in the music scene. So Paul got his start in social media marketing running promotions for local shows through MySpace. The platform was free, whereas a traditional print magazine ad cost $300. This work sparked Paul’s love for marketing. In fact, at around the same time, he chose to study marketing when he went to university. After Paul finished his degree, he started working at a social media startup agency in Perth. In that role, he created organic content mostly for Facebook but also for other social platforms. He also started playing around with Facebook ads. Back then, Facebook ads were basic sidebar ads with limited targeting options. At first, Paul didn’t really know what he was doing, but after he began to understand how ads worked, he was absolutely hooked. He became even more excited about his work after the Facebook pixel became available and he could track what people did on websites. Paul was especially interested in tracking ads’ impact on eCommerce. As an example, the ability to accurately track the revenue your ad spend generated as well as other metrics was exciting. From that point forward, Facebook ads became his primary focus.
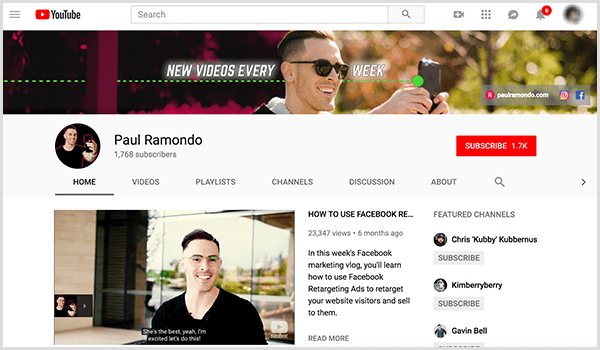
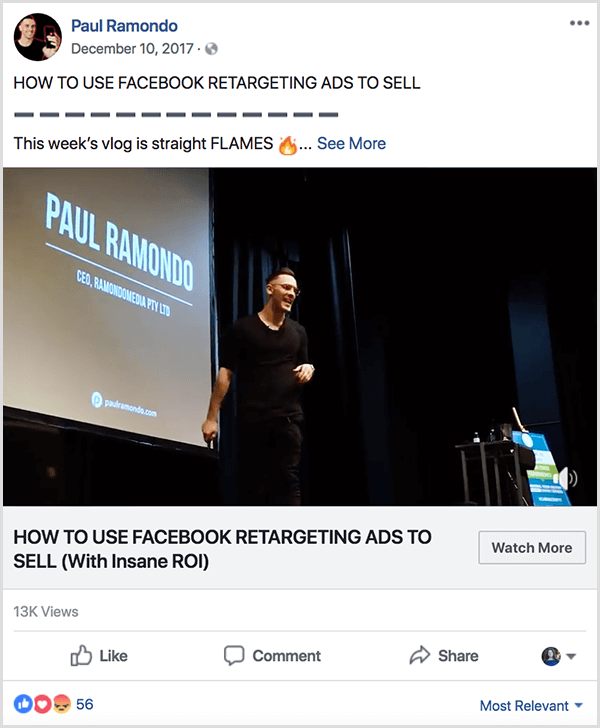
Before Paul started his company, he worked at different agencies and on the client side. For one client, Paul built a funnel that used Facebook to reach a qualified audience. The funnel took the audience through awareness, generating traffic to blog articles, a lead magnet, and then conversion. By spending about $6,000, the funnel generated $164,000 worth of sales in a 34-day period. That experience also helped Paul realize he wanted to focus on Facebook ads. Listen to the show to hear more about Paul’s successful Facebook funnel. Paul’s Experience Increasing Facebook Video Watch Time About a year ago, Paul started vlogging on YouTube, mostly as a creative outlet. He was spending a lot of time creating content and at first pushed it out only to his YouTube channel. People were engaging with the content, but the reach was incredibly small. Paul was spending so much time creating his vlogs, he wanted more viewers and started repurposing his vlogs on his Facebook page. His YouTube channel had about 100 subscribers, whereas his Facebook page had about 4,000 followers. As soon as he started sharing his vlogs on Facebook, he began getting hundreds more views. Then Paul did a deep dive into the analytics, comparing his Facebook page insights to his YouTube subscriber analytics. People who were watching his vlogs on Facebook were watching 10% to 15% of each episode, or about 1-2 minutes of a vlog that averaged about 10-12 minutes. On YouTube, people watched on average more than 40% of the same episodes. Paul wondered why his YouTube audience consumed his content in a different way than his Facebook audience. He was especially curious why his Facebook audience watched less of his videos because he thought he had a much stronger relationship and relevance with that audience. He’d been creating content and building his Facebook audience for years.
While Paul was considering how to improve his Facebook watch time, Facebook video ads became really hot. Paul began wondering if turning his vlogs into inexpensive Facebook video ads to generate awareness would help. He wanted to optimize the ads so people watched 100% of his vlogs. With this goal in mind, Paul was thinking about the difference between the ways people consume content on Facebook versus YouTube. Because he’s somewhat part of his own target market, he started by examining his own mindset. Paul visits YouTube with the intention of watching TV and spends an hour or so checking out his favorite vloggers and channels. The videos are all high-quality, and he enjoys that. On Facebook, Paul approaches video differently because he doesn’t visit Facebook to watch TV. He wants to check his Facebook messages or scroll through his feed to see what’s happening. Also, he visits Facebook when he’s procrastinating or between tasks in his day-to-day life. He isn’t dedicating an hour or more to viewing content on the platform.
In Facebook’s suggested videos feed, a viewer is more consumption-oriented. They’ll keep watching videos because they’re watching for entertainment. Also, in this feed, if you watch a video all the way through, the feed automatically loads another video as long as you don’t click off the screen. Paul saw the suggested videos feed as a way to reach people in a video-viewing mindset and take advantage of low-cost video ads. In Facebook Ads Manager, Paul found a video ad placement option for the suggested videos feed (a new option at the time). Using his existing targeting parameters for a cold Facebook audience, Paul tested video ads in this feed. With these ads, Paul’s goal was for the audience to watch 100% of the videos (or at least more than 95%), which is a massive feat for 10- to 12-minute videos. He ran a test for about 20 days and spent $207.27 on ads targeting cold traffic in his target audience. During that period, the campaign generated 455 video views at 100%, so the cost was about 45 cents per view. I then ask why you would want someone to watch 100% of a vlog. Paul says he wants to build the subscriber base of his YouTube channel. Also, to build his relationship with his audience, Paul focuses his vlog content specifically on building brand equity. Video is one of the best tools for personifying your brand. He tries to entertain but also to educate and provide value.
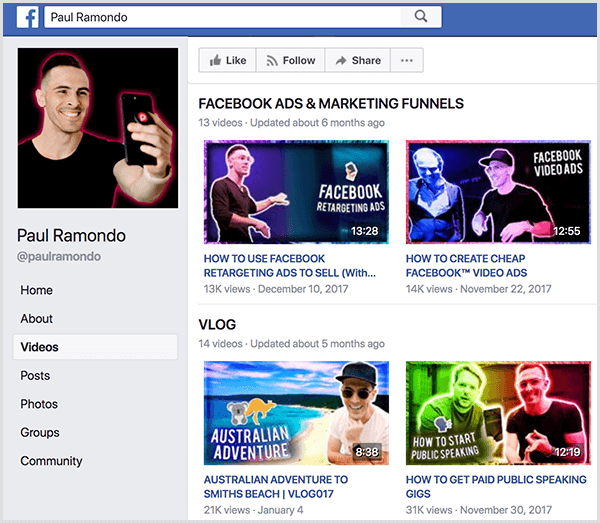
With the video ads, Paul was targeting cold traffic within the demographic and sociographic limitations of his audience. Because he’s run thousands of dollars’ worth of ads for his own brand and had years of trial and error, he understands whom his content resonates with the most. However, you can also target warm traffic with this type of ad. Listen to the show to hear my thoughts on Facebook video watch times. Paul’s Facebook Video Ads Strategy Paul’s video ads strategy begins before he even uploads the video. You have to prepare the video in a way that optimizes it for viewers. Then he chooses a video to promote based on how it performs organically. Only then does he open Ads Manager and start promoting videos with an ad campaign. Optimize Videos: To start, before you even upload your video, make sure the thumbnail grabs people’s attention and has less than 20% text. On YouTube, the text doesn’t matter, but Facebook will penalize you for having a video thumbnail with too much text. Specifically, you’ll pay more for your ad and get less reach. With this in mind, Paul has two thumbnails for each video. The YouTube thumbnail has huge text that grabs attention because that approach is encouraged on YouTube. For Facebook, Paul reduces the text on the same thumbnail significantly so that the text takes up no more than 20% of the image.
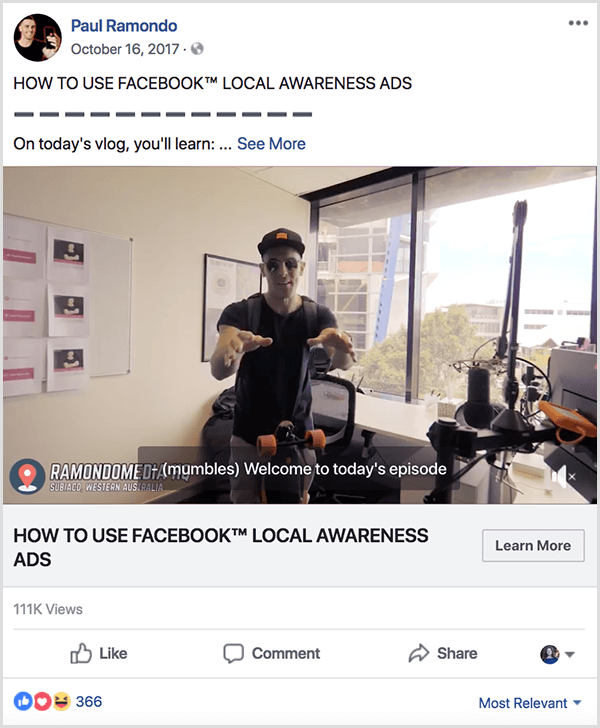
Paul also uses Rev, a transcription and captioning service, to create an SRT file that adds subtitles to his videos. For Paul, adding subtitles is a best practice. Good subtitles will grab the attention of people who can’t listen to your audio and keep them interested because subtitles provide context. Choose a Video: After uploading video, Paul uses the organic performance to test whether putting money behind some content is worthwhile. For instance, say you post four videos, and one is an absolute standout. This approach is like a split test because it makes more sense to put money behind the best-performing content. Otherwise, you could be potentially leaving views on the table. Promoting an existing post has other advantages, too. In your data, all the video views are collated. If you run separate video ads, you have data in two places. However, when you promote an existing post, the organic and ad data accumulate in one place. The organic video views are also a primer for increased engagement with your ad. For example, say a video receives 50 reactions, 4 shares, and 11 comments through organic engagement. After you turn that video into an ad, that organic engagement stays with the video post, which encourages people you reach via the ad to watch the video because other people already like it. When you use an existing post, you do need to keep in mind that you can’t edit the post to turn it into an ad. Make sure that the copy is ready to become an ad in your original video post, because after you click Publish, you can’t change the existing post, even organically. Although you could repurpose the content and create a new ad, you will lose all the historical data and engagement.
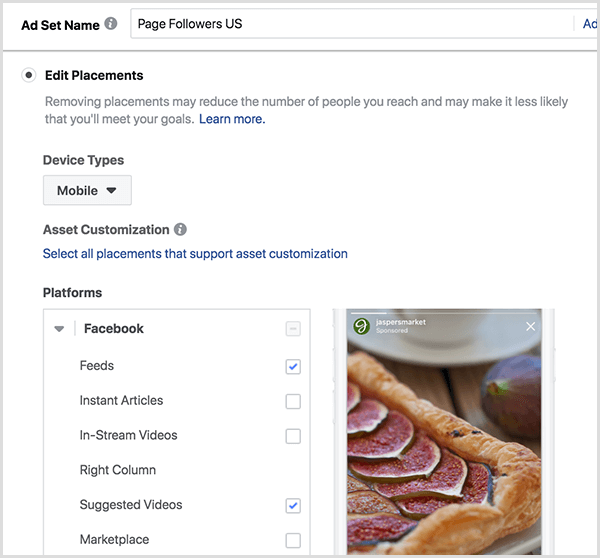
Create the Campaign and Ad Set: When you’re ready to turn a video into an ad, remember the overarching goal dictates what you do at the campaign level, the ad set level, and the ad level. In this case, the goal is for people to watch the content all the way through. After you create and name a campaign in Ads Manager, you choose the Video Views campaign objective. Next, create the ad set and set up the audience targeting. To keep it simple, you can target people who like your Facebook page. If you have an international audience, you can target people worldwide. If your audience is focused in a specific country like the U.S., you can select that country instead. In the ad set, after the Audience section, you see the Placement section. By default, Facebook selects Automatic Placements. However, Paul strongly recommends the Mobile placement option because it offers the best deal. To change the placement setting, click Edit Placements and clear the checkmarks next to everything but the Mobile device type. Paul thinks desktop placement is much more expensive than mobile because people use Facebook on their mobile phones much more often than on their desktop computers. This creates a supply-and-demand issue. If you have a high supply of attention on mobile, then you’ll naturally reach more people for less money.
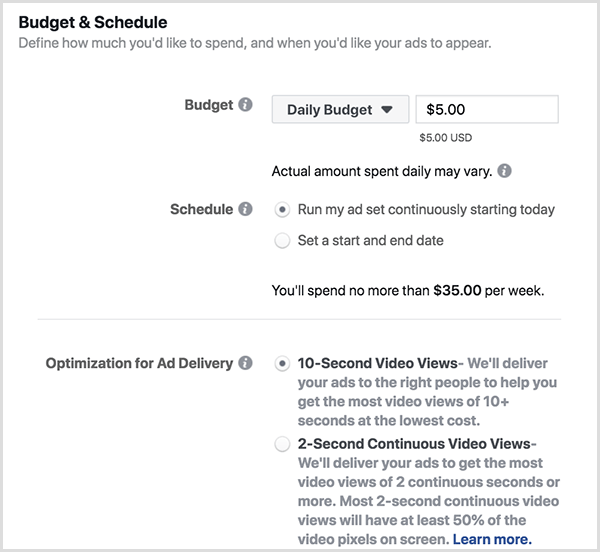
Also, while you’re on the go, watching video on your phone is much easier. When you’re on the train or the bus or doing whatever you do when you step away from your computer, you have your mobile device. When you have downtime and want to check out Facebook or YouTube, you’ll be on your phone, not your laptop. The exception to using mobile placements is when you’re retargeting a small group of people at the bottom of an eCommerce funnel. After you set the placement to Mobile, you see all the different platforms on Facebook’s advertising network where you can run ads. Clear all those options except Suggested Videos and Feeds. Note that Facebook won’t let you select only Suggested Video; you have to turn on Feeds, too. You also need to set your daily budget or a lifetime budget. If an eCommerce funnel has a budget of $10,000 to $20,000 for media, Paul usually starts with a $5 to $10 daily budget at most. He starts with a low amount because he doesn’t want to spend an unnecessary amount on an audience that may not be the best.
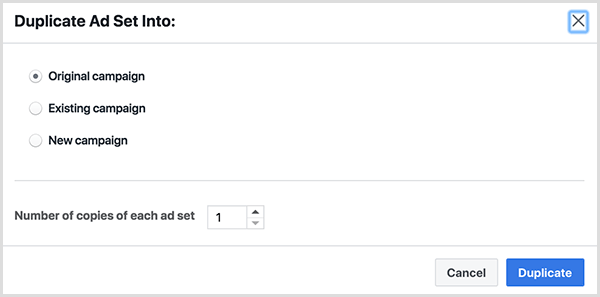
With this small amount of money, you want to test which audiences respond and at what cost per 100% video views. You can then optimize your audience targeting later in the campaign. For now, this low amount gives you the data you need to test and improve your audience targeting. After you find your optimized audience, you can increase the amount you spend per day. In the Optimization for Ad Delivery section, Paul always likes to choose the 10-Second Video Views option. With this option selected, Facebook will deliver your ads to people who will help you get the most video views at 10 seconds or more for the lowest cost. At this point, you’re done setting up targeting for the ad set. Create the Ad: To create your ad for the ad set, you start by selecting Use Existing Post. As discussed earlier, you already uploaded a video that’s optimized with a thumbnail and subtitles, and that video has done well organically. Your ad is promoting the video to build on its organic success. After you select Use Existing Post, you simply select the video you want to promote and publish the ad. If you like, you can add a call-to-action button. Test Your Audience Targeting: Before you start testing different audiences, Paul recommends creating the campaign, ad set, and ad, and then publishing the ad following the process he just described. This way, you know all the variables in the campaign are consistent. After you publish the initial ad, duplicate the ad set one or two times, and do an AB or ABC test with different audiences.
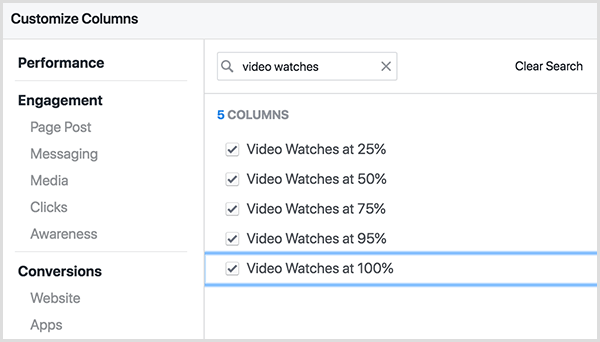
Basically, you split test the same ad creative with different audiences at a $5 daily budget. The purpose is to see which ad set performs best based on your overarching goal. To illustrate, your A audience might be people in the U.S., the B audience might be people outside the U.S., and your C audience might be a lookalike audience. Paul recommends running these ads for 7 days. Facebook needs time to generate data outside the learning period of the ads. You also need enough data to determine which audiences are performing and which aren’t. By waiting 7 days, each ad set has time to accumulate more than 1,000 impressions. When you’re ready to analyze your audiences, you’ll see which audience did the best job of achieving your goal, which in this case is 100% video views. To see how well your audiences achieve that goal, you need to see a few columns that Facebook Ads Manager doesn’t display by default. Those columns are Video Watches for 25%, 50%, 75%, 95%, and 100%. To customize your data columns, click the drop-down menu below the Ad Sets tab and select Customize Columns. On the screen that appears, type “video watches” in the search bar at the top. Select the checkbox for each video watch percentage, and you’ll then be able to see how many people watched the video to 25%, 50%, 75%, 95%, and 100%.
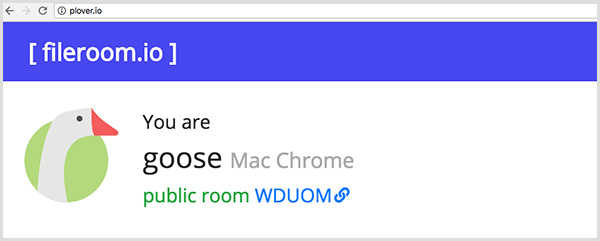
These columns can tell you which ad is the best performer, especially if you’ve been spending the same amount of money across all ad sets that you’re split testing. From there, you might optimize your campaign by shutting off the audience with the lowest watch percentage. You can also export this data to a CSV file, open it in Excel, and calculate the cost per 100% video views, because the goal is for people to watch the videos 100% of the way through at the lowest cost. To calculate cost per 100% video views, simply divide the amount spent by the video watches at 100%. You can then see which audience achieves the cheapest 100% video views. Listen to the show to hear Paul and me discuss horizontal versus vertical video. Discovery of the WeekPlover gives you an easy, cross-platform way to share files with people on the same WiFi network. To share a file with Plover, visit Plover.io, and you appear as a certain animal, such as a badger or goose. Anyone else on your WiFi who has Plover also appears as an animal. After you select your recipient’s animal, you simply select the file you want to share. You can send a file to multiple people at once, too.
Because Plover is browser-based, it works whether you’re using iOS, Android, Windows, or macOS. For instance, you don’t have to all be using Apple devices, as you do with Apple’s AirDrop. Also, AirDrop has different levels of privacy that make sharing a bit more complicated than Plover does. Plover says it stores files for transfer temporarily. With that in mind, use caution when sharing files that may contain confidential material. Also, although you could use Plover to share files on a public WiFi network, sharing files on a password-protected network is preferable. Plover is free and doesn’t require you to sign up. You can simply find someone to share a file with and try it. Listen to the show to learn more about Plover and let us know how the service works for you. Key takeaways from this episode:What do you think? What are your thoughts on Facebook video views? Please share your comments below. 
Social Media via https://ift.tt/1LtH18p June 15, 2018 at 05:06AM
0 Comments
Leave a Reply. |
�
Amazing WeightLossCategories
All
Archives
November 2020
|


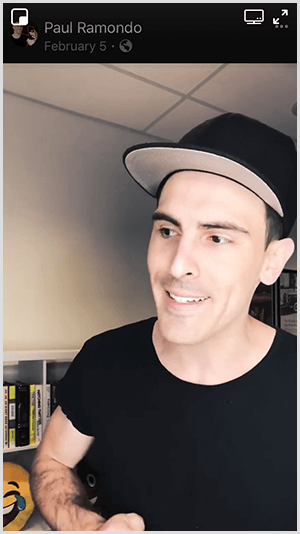 When Paul did spend substantial time watching videos on Facebook, he wasn’t in the news feed but the suggested videos feed. He might be sitting on the couch with his phone and start watching a good loop of videos for about 45 minutes. His views were all organic, and a few ads appeared in between them. The suggested videos feed was Paul’s aha moment.

 RSS Feed
