
|
http://ift.tt/2eRSzcb
How to Manage Facebook Groups: 8 Management Tools http://ift.tt/2xtN1Qq
Are you taking advantage of Facebook’s group management tools? In this article, you’ll discover how Facebook group admin tools can help you create a stronger, more engaged Facebook community. How to Manage Facebook Groups: 8 Management Tools by Kristi Hines on Social Media Examiner.
#1: Turn on NotificationsYou can receive two types of notifications from your Facebook group: notifications about posts (discussions) and notifications about member requests. At least one of your Facebook group’s administrators or moderators should receive notifications about both, or have one person in charge of new discussions and one in charge of member requests. Staying on top of your notifications helps you keep an eye on discussions within your group and moderate any that don’t belong. It also ensures that you can accept members into your group as quickly as possible so they can start engaging in the community. To turn on notifications about new posts, click the Notifications button below your group’s cover photo and turn on notifications for all posts. Select All Posts from the Notifications drop-down list to turn on group notifications. Note that this option only lets you know about new posts to the group. If you want to monitor the comments for a post that look like they could get out of hand, go to that post, click the arrow at the top right, and turn on notifications for when new comments are added. Turn on notifications for a specific post in your Facebook group. To turn on notifications about new member requests, click the three dots button below your group’s cover photo and choose the Manage Group option. Select Request Notifications on the left and turn on the option to get notified of new member requests to join. Turn on notifications from people asking to join your Facebook group. Administrators or moderators will now get the following notification when new members request to join: Receive a notification when someone asks to join your Facebook group. #2: Ask Pending Members Qualifying QuestionsIf you want to improve the quality of engagement in your Facebook group, make sure that members who join your group are, in fact, interested in the topic. One way to do that is to ask qualifying questions to pending members. You can ask up to three questions when people request to join your group. Ask prospective Facebook group members to answer qualifying questions. To set up a list of questions, click the three dots button below your group’s cover photo and choose Manage Group. Select Member Requests on the left and click Settings at the top right. Click Settings under Member Requests to set up pending member questions. Create up to three questions to ask prospective members. Add up to three questions of pending members. When new member requests come in, you can see prospective members’ answers to your questions. This allows you to quickly determine which people are the best fit for your group. See how pending members answered your qualification questions. #3: Filter Pending Member RequestsTo make it easier to approve members who want to join your group, Facebook will show you more details about prospective members. You can quickly glance at member requests and approve members based on a variety of personal information, including demographics, job information, family details, join date on Facebook, mutual friends, other groups they belong to, and other details that members have publicly shared on Facebook. Use these details to filter or sort members for a faster approval process. If prospective members haven’t answered your qualifying questions, you can request that they do so in order to be approved. View personal information about users who want to join your Facebook group. #4: Remove Problem MembersIf you have an issue (such as harassment or spamming) with particular members in your group, you can remove them, as well as their past activity. Click the three dots button below your group’s cover photo and select Members. You can search for the member by name, click the Settings gear icon next to the member’s name, and select Remove From Group. Remove Facebook group members who are causing problems. You then see additional options such as deleting the member’s posts and comments from the last seven days, declining invites by that member, and blocking the member from your group altogether. You can delete members’ posts, comments, and invites when you remove them from your Facebook group. You can also review group members who have been flagged in the group or reported to Facebook. Click the three dots button below your group’s cover photo and select Manage Group. Under Reported to Admin, view members who have been reported to the admin or flagged by other members, and members who have been reported to Facebook as violating community standards. From here, you can contact the members individually to discuss the situation or remove them from your group, along with their recent activity. View Facebook group members who have been reported to the admin or flagged by other members. #5: Improve DiscoverabilityFacebook group settings are more robust, allowing admins to add details about the group to create a better community and help ideal members find it more easily. Provide additional details about your Facebook group to make it easier for people to discover it. Recent improvements to group settings include the ability to add a group type to help members get to know what your group is about or the type of content your group posts. Choose a group type to let users know more about your group. You can also add up to five tags to let members know what topics the group covers. Add up to five tags for your Facebook group. Groups with a local focus such as local businesses can add locations so members can find groups in that area. Add a location in your Facebook group settings. #6: Link to Your Facebook Page or Another GroupYou can link your Facebook page to your Facebook group, allowing you to post in the group and comment on posts as your Facebook page. All users who have access to manage your Facebook page also have admin rights for your Facebook group once you’ve linked your page to the group. 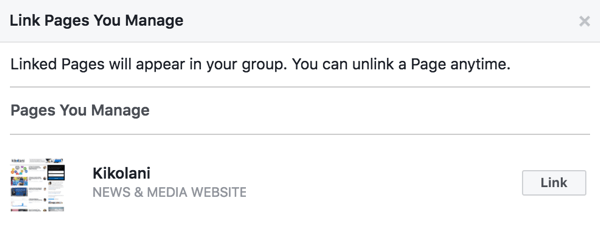
Link your Facebook page to your group. This feature is great for businesses that want to engage with the group as their Facebook page instead of as their personal profile. To do this, select your Facebook page before creating a new post in the group. Select your Facebook page when you create a new post in your group. Or select your Facebook page before making a comment on a post. Comment in your Facebook group as your page. Your linked Facebook group will also appear on your Facebook page under the Groups tab. Your linked group will appear on the Groups tab of your Facebook page. In addition to linking a page, you can link your Facebook group to other groups. Click the three dots button below your group’s cover photo and select the Link Existing Group option. Link your Facebook group to other groups. This will ultimately allow you to recommend that members of one Facebook group join the other as a related group. Use the Settings link at the top right of the box shown in your group’s news feed to manage your linked groups and remove any, if necessary. Click Settings to manage your linked groups. Similar to setting a username for your Facebook page, you can customize the website address for your Facebook group, which will ultimately change your group’s website address from “http://ift.tt/2xu9fBS” to “http://ift.tt/2h1Y9cm.” You also get a similar email address ([email protected]) that you can use to send posts to the group. Get a custom URL and email address for your Facebook group. #7: Schedule PostsFacebook group admins and moderators can schedule posts to appear at popular times to ensure they reach the most members possible. In the Write Post box in your Facebook group, create a post and click the clock icon next to the Post button to schedule it for a future date and time. Schedule a post in your Facebook group. To manage your scheduled posts, click the three dots button below your group’s cover photo and choose Manage Group. Then select Scheduled Posts on the left to see all of the scheduled posts for your Facebook group. When you click the arrow at the top right of the post, you get the option to publish now, reschedule, edit, or delete your post. View scheduled posts for your Facebook group. #8: Learn From Group InsightsIf your group has more than 250 members, you can view analytics about your group’s activities. Click Group Insights in the left sidebar menu of your group. Growth Details First, you get a quick glance at your group’s rate of growth, post engagement, and member demographics. Beneath those numbers, view insights into your group’s growth details. Use the Growth drop-down menu to see the total number of members and membership requests over a span of 28-60 days. Get an overview of your Facebook group analytics. Engagement Details When you click Engagement Details, you can view insights into discussions within the group, starting with the number of posts over the last 28-60 days, depending on the date range you selected. Analyze this data to determine if your community is gaining or losing momentum. View engagement data for your Facebook group. Next, you see the number of active members in your group, along with popular days of the week and times of day that members are visiting and participating in your group. Use popular days and times to determine when to schedule posts to your group for maximum reach, and when you need admins or moderators to be alert to new posts and comments. Find out days and times when members are most active in your Facebook group. Next, view the top posts within your group, along with insights into the number of comments, likes, and views the post received. Click on these posts to go directly to those discussions. See insights for the top posts in your Facebook group. Member Details Click Member Details to see which members in your group are the top contributors based on the number of new posts and comments on posts they’ve created. Find out the top contributors for your Facebook group. Below this list, you’ll find general demographics about your group members, including age, gender, and location. This data is particularly useful for businesses that want to determine if their target sales demographic belongs to the group. View demographic data for Facebook group members. Download Details Last but not least, click the Download Details link at the top right of your detailed group insights to download a report that covers your insights for the last 28-60 days. Download insights for your Facebook group. In your spreadsheet, you can see all of your group insights for further analysis. This data includes:
Download your Facebook group insights as an Excel file. Conclusion As you can see, Facebook has vastly improved group admin features to ensure that admins and moderators can create a better community. What do you think? What Facebook group admin feature is the most useful to you? Let us know in the comments below! Social Media via http://ift.tt/eZnnjC September 12, 2017 at 05:03AM
0 Comments
Leave a Reply. |
�
Amazing WeightLoss Categories
All
Archives
November 2020
|
 RSS Feed
