
|
http://ift.tt/2tfTH2d
How to Easily Edit Video: A Simple Guide http://ift.tt/2tfYEYP
Looking for a powerful tool to keep video production costs down? Whether you’re publishing video to your vlog, blog, or social media, editing your footage helps you present a consistent experience to your viewers. In this article, you’ll discover how to edit your video content with a free tool so you don’t break your budget. How to Easily Edit Video: A Simple Guide by Peter Gartland on Social Media Examiner.
#1: Start Your Video ProjectNote: While this article uses HitFilm Express to illustrate the editing workflows, the tactics I share can be transferred to just about any video editor with an adjustment for interface differences. HitFilm Express works on both PC and Mac. It’s free and there are no watermarks, file size restrictions, or length limitations. To download and install the software, head to http://ift.tt/1f1kNil and click Let’s Do This and then Get HitFilm Express Free. You’ll have to share a link to the software on Twitter, Facebook, or Google+ to get the download link. After you’ve completed your share, follow the on-screen instructions to install the software on your machine. When you first open HitFilm, you see the home screen. You’ll see the HitFilm Express home screen when you open the program. To start a new project, click New in the upper-left corner of the screen. Click New to start a new HitFilm Express project. Now you need to choose your project settings. The default settings are fine, but if you’re a bit more advanced, you can play around with the other settings. Select the settings you want to use for your HitFilm Express project. One cool option is that you can create square videos. Just select the Instagram template from the drop-down list. HitFilm Express offers a template for creating a square Instagram video. The square option is great for creating videos for Instagram specifically, but it can also work well on platforms like Facebook and Twitter, where users often view videos in portrait mode on their mobile devices. After you choose your project settings, click Start Editing. #2: Import Your Media FilesThe editor may look a little confusing at first, but once you know your way around, it’s pretty easy to use. The HitFilm 4 Express editing window can look a little intimidating at first. The first thing you need to do is import your media files, the raw files that you’ll edit to create your video. These files will most likely be a mix of images, videos, and audio files. To add your files, click the Import button on the Media tab (in the lower-left corner of the screen) or simply drag and drop your files. To add files to your project, click the Import button. All of the files you imported will appear on the Media tab. 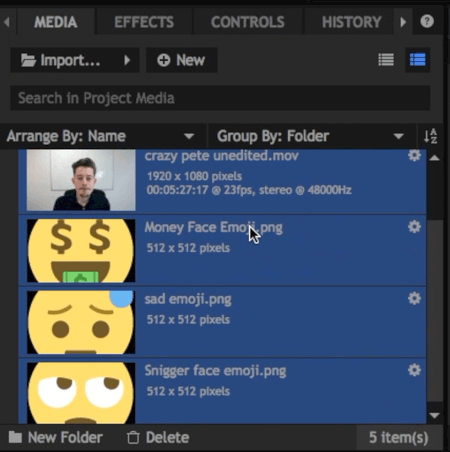
All of your imported files appear on the Media tab. #3: Trim Footage and Add It to the TimelineNow click the video file you want to edit first. It will open in the Trimmer section in the top-left corner of the screen. When you select a file on the Media tab, it opens in the Trimmer section. In the Trimmer section, drag the slider to scrub through the raw video. Use the In and Out buttons to select which parts of the video you want to use. Scrub through the raw video and use the In and Out buttons to designate which part you want to use in your project. After you’ve selected your in and out times, drag that portion of the video to your timeline in the lower-right corner of the screen. While editing your file in the Trimmer first isn’t always necessary, it’s helpful if you want to work with only a small scene in a long raw video file. Drag your edited footage from the Trimmer section to your HitFilm Express timeline. Important note: You may see the pop-up below. If your imported video is a different quality from the video size you selected in Project Settings, click Yes to make sure everything matches up. Click Yes if you see this pop-up message. #4: Build Your Video in the TimelineYour timeline makes up your video and once you have footage in your timeline, you can play your video in the Viewer at the top right. You’ll notice the video and audio are split into different “tracks” on the timeline. This allows you to layer footage and images on top of each other, and edit the audio and video separately if needed. Edit Individual Tracks Once you have footage in the timeline, you can edit it from there, too. If you want to trim the starts and ends off each clip, for example, click and drag in from the left or right. You can trim your video footage in the timeline by dragging and dropping. If you want to create a “jump cut”-style video where you edit out pauses, use the Slice tool, shown below. The Slice tool lets you edit out pauses in your video. To delete part of a clip (as shown below), select the Slice tool and click the beginning and end of the portion you want to cut. Then click the Select tool (the arrow icon), click the clip you want to cut, and press Delete on your keyboard. Finally, drag the footage back together. Notice how HitFilm snaps footage together to make it even easier. Use the Slice tool to delete a portion of your footage. To make your editing as accurate as possible, use the Zoom feature. It lets you zoom into your timeline so you can see exactly where the cut needs to be. The HitFilm Express Zoom feature makes it easy to zero in on your timeline. Don’t worry about making mistakes. Open the super-handy History tab to undo any edits you’ve made. Use the History tab to undo edits to your video project. Add Files to the Timeline To add another media file to your project, drag a clip from your media library so it appears above your original video file in the timeline (audio files go below). Drag another media file to your timeline. Using the Viewer in the top right, you can resize and reposition to change how the files look in the finished video. If you set start and end points in the timeline, you can see when the new tracks begin and end. If you want to get a bit fancier and have new tracks or scenes transition on-screen, open the Effects tab. Pick one of the available transitions, and drag and drop it onto the timeline at the start of the clip you’d like to transition. Drag and drop a transition onto your timeline. Add Text to Your Video The final technique I want to cover is how to add text. On the Media tab, click the New button and select Composite Shot from the drop-down menu. On the Media tab, click New and choose Composite Shot. In the dialog box that opens, give your composite shot a name and click OK. Add a name for your composite shot and click OK. In the Viewer, you can now create your own composite shot. To add text to it, click the Text icon. Click the Text icon in the Viewer. Then draw a text box and type your text into it. When you’re finished, highlight the text you added. Create a text box and type in your text. In the lower-left corner of the screen, open the Text tab (to the right of the History tab). You can edit the colors, fonts, and point size, and use any fonts you’ve installed on your computer. You can choose from a number of formatting options for your text. When you’re happy with the text you added, click to return to the Editor tab. Return to the Editor tab in your timeline. Your new composite shot is now listed along with your other media files. Just as you would do with any image, drag and drop your new composite shot onto your timeline. Drag and drop your composite shot onto your HitFilm Express timeline. Pro Tip: Edit by Sound When you’re editing video, a big time-waster can be watching your video over and over to find the bits to cut out. A good filmmaking practice for avoiding this is to make a noise (often a loud double clap) while recording to signify which take was the best. For example, suppose you mess up a line three times but get it right the fourth time. If you double clap immediately after the fourth time, that sound will show up as a peak in your audio that you can use as a guide to cut the other three takes without having to watch them. Interesting fact: Using this method, a lot of editors actually edit their videos in reverse starting at the end! #5: Export Your Final VideoWhen you’re finished creating your video, you’re ready to export it. First, click the Export Contents icon to the left of your timeline. This will add your whole timeline to the Export queue. Click the Export Contents icon. If you see a pop-up box asking if you want to Export Your Video right now, click Go to Exporting, which will open up the Export tab. On the right side of the Export tab, you’ll see a list of presets to choose from. The YouTube 1080p HD MP4 option is a great standard option that will download your video in a HD format to upload where you like. Note: Although the preset is called “YouTube,” it’s not just for YouTube; you can upload the video to other platforms if you want. On the left, you’ll see your export queue. Click the Output path to change the filename and select where the file will be saved. Your export queue appears on the left side of the Export tab. Click Start Exporting at the bottom of the screen to export your file. Click Start Exporting at the bottom of the screen. You’ll see the progress bar start to go up as the file is downloaded to where you specified on your computer. Check out the video below to find out more about how to use HitFilm Express. VIDEO . Time-Saving Keyboard Shortcuts It’s important to become efficient with video editing. The first vlogs we did took almost all day to edit, but now the process only takes between 30 mins and 2 hours, depending on length and complexity. Here are some of my favorite HitFilm Express keyboard shortcuts to make editing much quicker: General
General Timeline
Viewer Panel
Editor Sequence Timeline
Conclusion There is a ton of different video software available, but HitFilm Express is one of the most robust free solutions. This article just scratches the surface of what it can do, so it’s worthwhile to download the program and try it out for yourself. If you’re doing a regular vlog where you have the same sound effects, intro/outro slides, backing music, and so on, you’ll save time if you have a template file. Create your first video from scratch and then use it to create your template. For future videos, you can just duplicate the template file on your computer and drop your latest clips into it. What do you think? Do you have any additional video editing tips to share? What video editing software do you use? Let me know if you have any questions in the comments and share your plans for creating your next video. How to Easily Edit Video: A Simple Guide by Peter Gartland on Social Media Examiner. Social Media via http://ift.tt/eZnnjC June 27, 2017 at 05:02AM
0 Comments
Leave a Reply. |
�
Amazing WeightLoss Categories
All
Archives
November 2020
|
 RSS Feed
