
|
http://ift.tt/2inEaXr
How to Easily Broadcast Multi-Camera Live Video for Facebook Live http://ift.tt/2AMbHkS
Wondering how to integrate visuals and work with multiple camera angles? In this article, you’ll discover how to broadcast professional-quality live video to Facebook and YouTube. How to Easily Broadcast Multi-Camera Live Video for Facebook Live by Erin Cell on Social Media Examiner.
Why Brand Live Videos?Switcher Studio is a mobile production tool that lets you create professionally branded Facebook Live or YouTube Live videos. You can set up your iOS devices as cameras to offer multiple views of your live broadcast. To brand your live videos, showcase your logo and share images, links, or video clips with viewers. The app also lets you include lower-third graphics, add transitions, and choose from various layouts and angles to make your live videos more visually appealing. During the broadcast, view comments in real time to engage with your audience. Switcher Studios lets you go live to your Facebook timeline, page, group, or event, or to YouTube. In addition, custom RTMP lets you share to other live-streaming applications including Periscope, Livestream.tv, Twitch, and others. You can stream live, record, or both. By recording the stream, you can repurpose your content for other social media platforms. Wicked Sheets uses Switcher Studios to do their Facebook Live broadcasts. In the video below, the countdown at the beginning lets people know they’ll be going live shortly. The title card at the end shares tips about what was discussed during the broadcast.
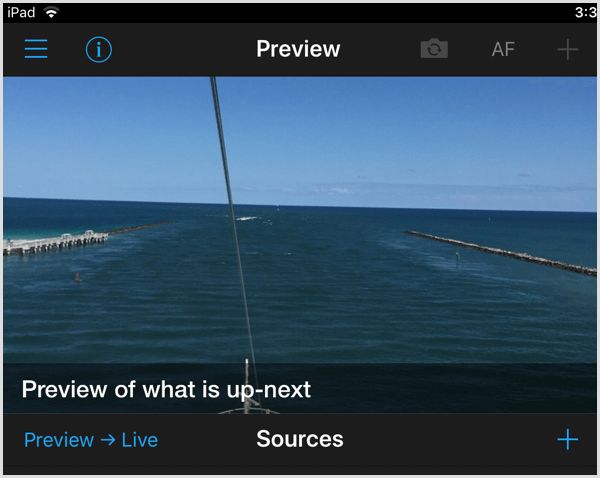
Here’s how to start branding your live videos for your business. #1: Connect Your iOS Devices to Switcher StudioTo get started with Switcher Studio, sign up for a 14-day free trial. When the trial ends, you’ll need to upgrade to one of the paid plans, which start at $29/month. Next, install the Switcher Studio app on all of the iOS devices you plan to use as cameras during your live broadcast. Each camera lets you show viewers a different angle. You’ll need to decide which device you want to use to control your video production. An iPad is a good choice because it has a larger screen for easier control. Sign into the selected control device and tap the Use as Switcher button. For all of the other camera devices, sign in and tap Remote Camera Mode to control your other devices for capturing various angles. Make sure all of the iOS devices are connected to the same Wi-Fi network. Once you’ve logged in on your control device, you’ll see the control panel. At first glance, the interface may look daunting, but the more you use it, the easier it is to manage. #2: Connect Your Facebook or YouTube AccountThe next step is to connect your Facebook or YouTube account to Switcher Studio. On the control device, tap the second icon in the lower-right corner to access the Outputs screen. Then tap the + icon to the right of Outputs. Next, sign into your Facebook or YouTube account. This is also where you can use a custom RTMP for your production. If you aren’t using the control device as a camera, you can select Director Mode. In this mode, each camera will capture its own independent video that will be composited when the session ends. Make sure you have enough storage to save the video on each device. Choose Advanced Selecting to access additional recording options. #3: Add Media Assets to Use in Your BroadcastThe Sources section on the left is where you direct your broadcast. Here you line up all of the content you plan to share during the broadcast such as your logo, images, video clips, lower-thirds, title images, and so on. At the bottom of the Sources control panel, you’ll find four icons. Tap the leftmost icon to toggle display of the preview window. If you plan to make changes to what you show on-screen during your broadcast, keep the preview window displayed so you can preview content before sending it to your live broadcast. The two icons in the middle let you enlarge or reduce the sizes of the images in the Sources section. Tap the far-right icon to get a link to share your live broadcast on Facebook. Be sure you do this so people are notified you’re live. Upload or Create Assets To upload assets for your live broadcast, tap the + sign. You can add photos and videos from your photo library, Switcher Studio-recorded/imported media, or create your own content using the app’s dynamic templates and sample images. If you want to create your own media directly in Switcher, select Titles or Lower Thirds, which are editable templates. You can adjust font, size, alignment, and text and background color as needed. Tip: When you create dynamic lower-thirds, select the Apply on Preview option so you’ll have the opportunity to preview it before it’s live on-screen. If you don’t select that option, the image will automatically show up live to your viewers when you tap on it during the broadcast. To edit, reorder, or remove assets, long-press on the image to open a pop-up menu with those options. If possible, arrange assets in the order in which you plan to display them during your live broadcast. Share Assets During the Broadcast During your live broadcast, tap the asset you want to show to your audience. You’ll then see a preview of it in the preview window at the top of the Sources section. When you’re ready to display it live, tap the Preview–>Live icon.
#4: Control Cameras and AnglesTap the first icon in the lower-right corner to access the Inputs section. This is where you control the cameras and angles. You can see the current camera views in the Sources section on the left. #5: Choose Transition and Multi-View EffectsSwitcher Studio has a library of effects for your transitions when you switch cameras, display images, or videos during your broadcast. In the lower-right corner of the screen, tap the third icon from the left to access transition effects. Your options include cut, cross dissolve, wipe, cube, and twist. It’s a good idea to pick one effect and use it for the entire broadcast, especially if you’re new to using Switcher Studios. Next, scroll down to access the multi-view layout options:
If you choose the picture-in-picture layout, the first image you select will be the main image, and the second image will be the smaller picture-in-picture image. Drag and drop the smaller image to position it in the preview window. #6: Adjust Camera SettingsTap the fourth icon to get more advanced camera control options including zoom, focus, exposure, white balance, and LED light. #7: Choose Which Device Will Broadcast AudioTap the fifth icon to view audio controls. Decide which device you’ll be using for the main audio and select it here. Be sure to check your audio before you go live to make sure you’re picking it up. #8: Go LiveBefore you go live, connect and check your cameras and microphone. You don’t want to be caught with no sound or trying to adjust technology after you’ve gone live. Also, check the positioning of your cameras for the angles and zoom options you want to capture. You do all of these adjustments in the Outputs section. Tip: Use tripods or mounts for your cameras and ensure they’re stabilized. You don’t want a camera to fall over during the live broadcast. The top-right part of the screen will show you what viewers are seeing during your live broadcast. It’s a good idea to go on a few minutes before you’re scheduled to go live to get everything set up. You can share a “Broadcast Will Begin Shortly” title image to let viewers know you’ll be going live soon. When you’re ready to go live, tap Rec + Broadcast to start sharing your live stream with your audience. When you’re live, tap the far-right icon in the lower-right corner of the screen to see live comments. Here you can engage with your audience, welcome them to your broadcast, and answer questions. Keep in mind that if you’re directing the production and you’re not on video, you can only respond verbally to these comments. If you want to respond in the comments, you’ll need another device with the live feed pulled up. Get to Know the Control Panel Menu Bar Here’s a rundown of the options on the top bar of the control panel, from left to right:
Conclusion Switcher Studio lets you move beyond arm’s reach of your iPhone or iPad for your live videos. Showing different angles of your product, location, or event will add interest to your live broadcasts. In addition to setting up your live broadcast ahead of time, you’ll also want to have an outline or schedule of your show prior to going live. Check out this resource if you need guidance for creating a live show format. What do you think? Are you ready to take your live videos to the next level and start branding? What features are you interested in trying? Please share your thoughts in the comments below. Social Media via http://ift.tt/1LtH18p November 16, 2017 at 05:04AM
0 Comments
Leave a Reply. |
�
Amazing WeightLoss Categories
All
Archives
November 2020
|
 RSS Feed
