|
http://bit.ly/2CYmGLd
How to Create Facebook Reach Ads http://bit.ly/2G8i3QX
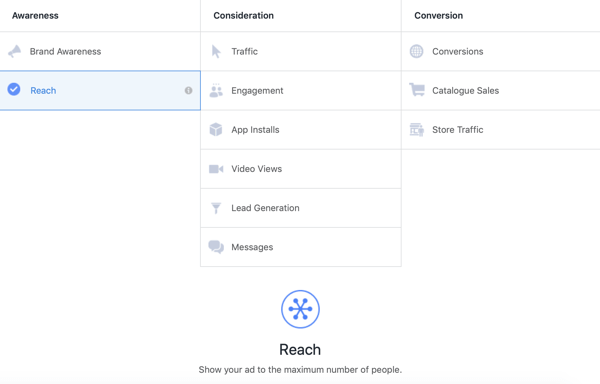
In this article, you’ll discover how to use Facebook’s Reach objective to target hyper-responsive custom audiences with your Facebook advertising. Why Use the Facebook Campaign Reach Objective?The first step in creating any Facebook ad campaign is to choose your objective. Based on the objective you select, Facebook segments your target audience into different ‘buckets’ based on whether they’re likely to perform the action you’re optimizing for. The objective you choose normally aligns with your goal for the campaign, such as Conversions to generate purchases or leads. With the Traffic campaign, Facebook will segment your audience to show your ads to people who regularly click links on Facebook—both ads and organic posts.
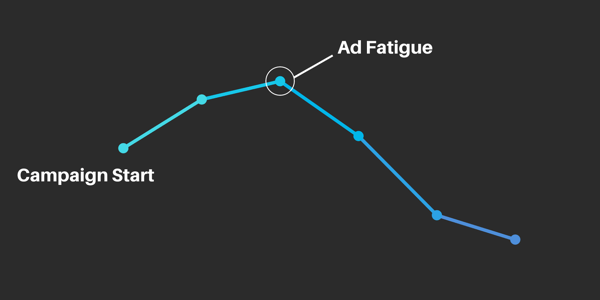
When using the Reach objective, the goal is to reach as many people in your target audience as possible. To get the best results from the Reach objective, you need to use it wisely. You’re not going to see great results if you use it to target large audiences such as lookalikes. The Reach objective is best used when you target smaller audiences and want to reach as many people in your audience as possible and keep your CPM low. An added benefit of using the Reach objective is that you can reduce the impact of ad fatigue by setting a frequency cap at the Ad Set level. (Find out more on how to use frequency capping later in this article.)
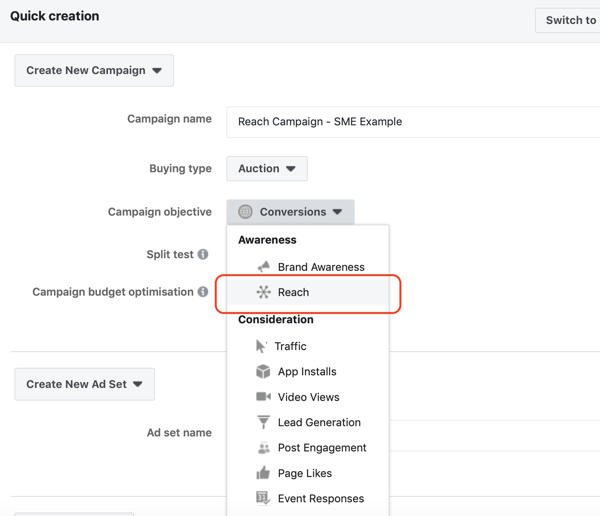
Now we’ll walk through how to create a website remarketing campaign using the Reach objective to target a hyper-responsive audience with a reminder ad. #1: Set Up a Facebook Advertising Reach CampaignThe ideal audience size for a Reach campaign is at least 1,000 people in your website custom audience. If you have fewer than 1,000 people, you’ll need to reduce your daily budget based on $1 per 100 people in your audience. To get started, navigate to Ads Manager and in the main dashboard, click Create Campaign. Choose the Quick Creation workflow, name your campaign, and from the campaign objective drop-down menu, select Reach.
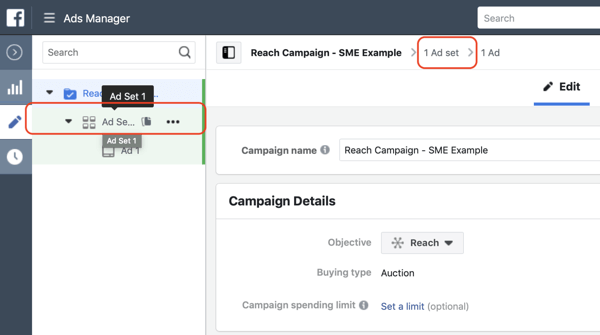
Leave campaign budget optimization and the split test feature turned off. Then name your ad set and ad, select your Facebook page, and click on Save to Draft. When the campaign opens in the right-hand preview, navigate to the Ad Set level. To do this, select the ad set in the review panel on the left-hand side or at the top of the creation window. Once you’re at the Ad Set level, ensure your Facebook page is selected.
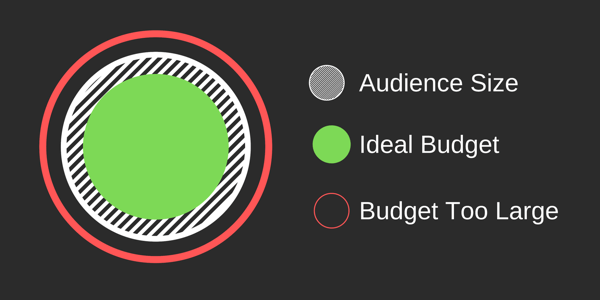
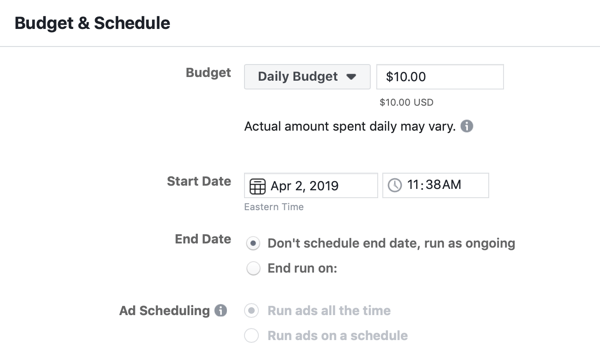
#2: Set Your Budget Based on Your Audience SizeThe next step is to set your budget in the Budget & Schedule section. As with all ad set budgets, your daily budget dictates how much of your audience you reach before you run into ad fatigue issues and your frequency starts to increase. The larger the daily budget, the more of your daily active target audience you’ll reach.
However, if you set your budget too high for your audience size, you’ll hit ad fatigue issues in a matter of days as your frequency continues to increase above 2. Because the Reach objective works best for targeting smaller audiences, it’s also a good idea to set small budgets. These won’t be your high-spending efforts like conversion campaigns targeting millions of people. A good rule of thumb for hot audiences is to start at a $10 daily budget per 1,000 matched people in your target audience. Because the duration of this audience is normally 3 days, it refreshes quickly, and coupling it with setting a frequency cap means you won’t encounter ad fatigue issues too quickly. In this example, you’re targeting a 3-day website custom audience with at least 1,000 people in it, so set a budget of $10 per day.
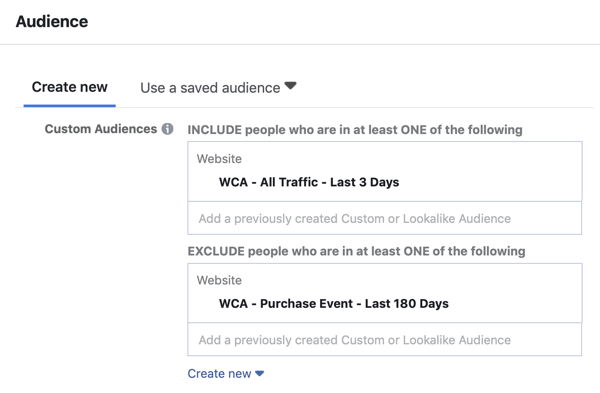
If you’re unsure what budget to set, opt for the conservative side. It’s easier to scale up your budget than to decrease it and combat ad fatigue by setting it too high in the first place. #3: Choose Audience and PlacementsIn the Audience section, select your website custom audience from the Custom Audiences field. Then click on the Exclude condition and add in a website custom audience for purchases or leads because you want to exclude people from this audience who are already customers.
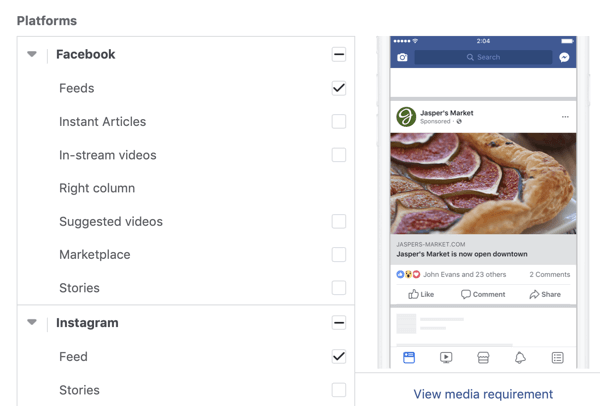
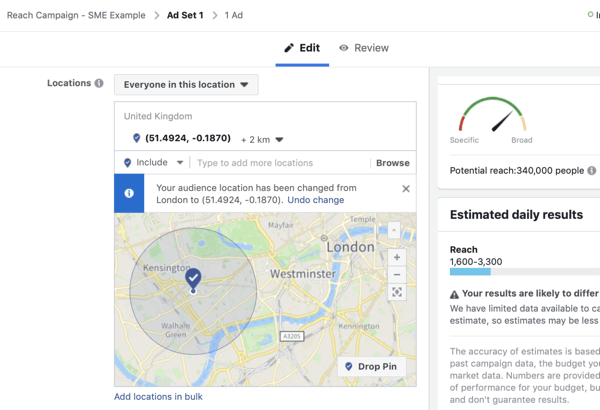
Next, set your location if you want to geographically constrain to whom you show ads based on country. Leave all other demographic and detailed targeting empty. Because you’re targeting a hyper-responsive audience of people who have already visited your website, you don’t need to narrow it further. In the Placements section, select Edit Placements and choose only Facebook Feeds and Instagram Feed. Select Instagram only if it’s relevant based on your buyer personas and whether your target audience actually uses Instagram.
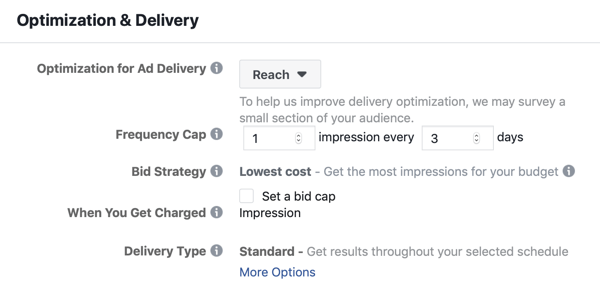
#4: Use Frequency Capping to Reduce the Impact of Ad FatigueLike your campaign budget, setting the right frequency cap is critical to ensure your campaign is as effective as possible. Frequency capping allows you to set the number of days that have to pass before someone sees your ad again, as well as the number of impressions you want to serve. The time duration you set will depend on the temperature of the audience. The hotter the audience, the lower the number of days you can set because they’re toward the end of the buying decision. You set your frequency cap in the Optimization & Delivery section. How you set up your frequency capping will depend on the time duration of your audience and how many times you want to serve an impression to someone. Again, it’s best to be conservative because you want to strike the right balance between being present in someone’s news feed and annoying them with the same ad again and again. In this example, it’s a 3-day website custom audience and you only want someone to see your reminder ad once, so set 1 impression every 3 days. This means that someone will only see your reminder ad once before dropping out of the campaign after 3 days and moving into a different website remarketing campaign with different messaging. Join thousands of fellow marketers. Receive the training and support you need to accomplish your marketing objectives!
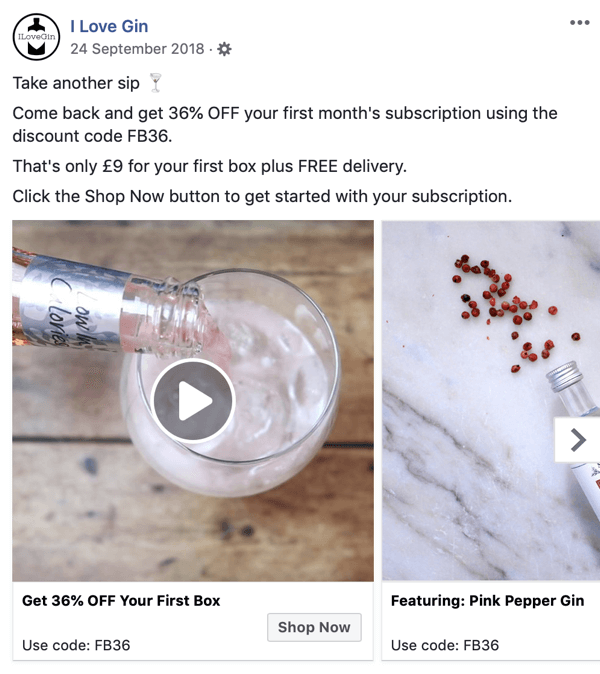
#5: Choose Your Ad CreativeMove to the Ad level by selecting the ad in the left-hand preview column or at the top of the creation window. Because this campaign is being served to people who have visited your website in the last 3 days, excludes anyone who is already a customer, and is only targeting people who haven’t decided to inquire or buy yet, you want to show them a reminder ad to hook them and bring them back to your website. Reminder ads are one of three ad types you can use in your website remarketing campaigns to drive people back to your website and convert them into customers. The contents of your ad will depend on what offer you present to your target audience at this stage. It could be an opt-in for a webinar, sales call, or product-based ad offering a first-purchase discount featuring your most popular product or product categories. Regardless of the offer, start your reminder ad with a hook asking your target audience to come back and take another look, as in this example from a gin company. Depending on the offer, you can directly link the first sentence of the copy to your product or service.
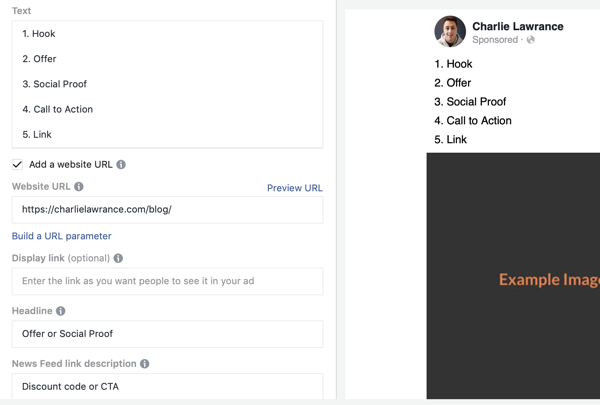
In the rest of your ad copy, under the first sentence, state your offer again and any social proof such as “Join thousands of happy customers.” Finally, state your call to action (CTA) with a link to the relevant page on your website. Next, set your creative. I’ve found that no specific ad format works better than others for reminder ads. Therefore, you can use the single image, video, or carousel format. It all depends on what creative assets you have in your business. Because you want this to be a direct-response ad with a link to your website, click the Add a Website URL checkbox and enter a headline and news feed link description. Then select the most appropriate CTA button.
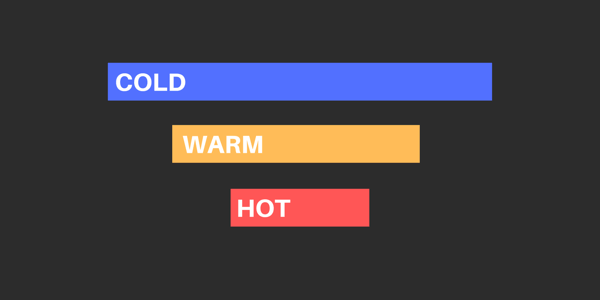
Pro Tip: If you’re struggling to come up with headline ideas or what to include in the news feed link description, try reiterating your offer or social proof as the URL headline and then include a discount code or CTA in the news feed link description. When you’re finished, ensure that your Facebook pixel is toggled on. If you forget and the pixel is turned off, Facebook will now show subtext under your ad when it’s live. Finally, click Review and Publish to set your new campaign live. As with any Facebook ad campaign, setting up the campaign is just the beginning. The real work starts when it’s live and gathers data. Analyze your campaign data and then make changes to ensure that it continues to deliver results over the coming weeks, months, and years. 4 Ways to Use Facebook Reach AdsAs with all Facebook ad objectives, you can use the Reach objective to target the three different types of audience temperature on Facebook: cold, warm, and hot. Because it’s best used when your target audience is small, you’ll find you use it most often when targeting hot audiences, which are the smallest of all of the audience temperatures.
Here are some scenarios of when you should use the Reach objective instead of Traffic, Conversions, or any other campaign objective. Target Cold AudiencesWhen writing about cold audiences, most people think of lookalikes. However, using the Reach objective to target these won’t be as effective as using other objectives such as Conversions or Traffic. This is because they’re too large, and although you’ll experience lower CPMs using the Reach objective, this will be negatively outweighed by the lower result rate you’ll experience due to a decrease in click-through rate. Instead, use the Reach objective when you want to target a geographically constrained audience such as a local audience because these audiences will be smaller. This is one to use if you run a local business such as a restaurant and want to reach the highest number of people within a set radius of your location.
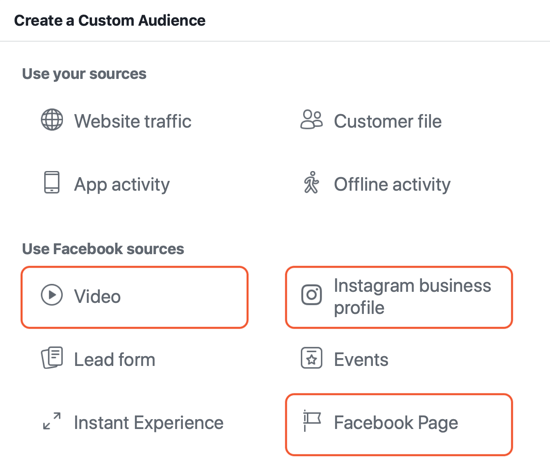
Target Warm AudiencesWarm audiences include engagement custom audiences such as video custom audiences and page or profile engagement custom audiences. When creating warm audiences, you can ensure a smaller audience size—and therefore the best suited to using the Reach objective—by choosing a small time duration window. With a video custom audience, for instance, you can create the most responsive small audience by choosing the highest level of engagement—95%—and then a short time duration—such as 30 days or less, depending on how many daily views you’re generating on Facebook or Instagram.
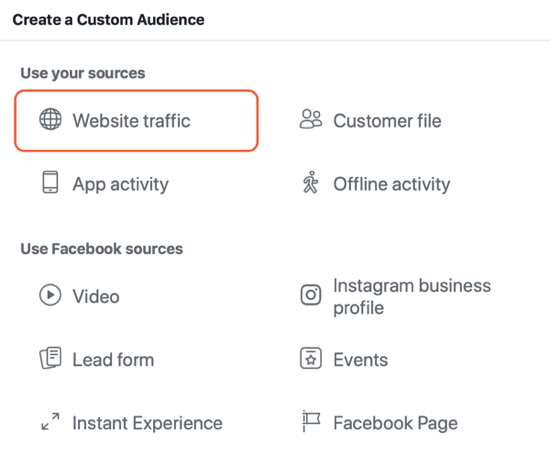
Alternatively, with page engagement custom audiences, choose the page/ad engagement condition and then set the time duration to the last 30 days or less, again depending on how many engagements you’re generating per day. Target Hot AudiencesThe most effective audiences I’ve discovered when using the Reach objective are hot audiences of website traffic. These are often the smallest, depending on how much traffic you generate to your website. They also benefit from being the most qualified and highly responsive because they’ve previously engaged with your business via your website. When creating a website custom audience of all website traffic, choose a short duration (such as 3 days) to create a very small but highly effective audience. When using the Reach objective, you’ll serve ads to more of them than you would with any other objective.
Promote Time-Sensitive OffersThe final scenario of when to use the Reach objective is when you have a time-sensitive offer such as a holiday promotion—Thanksgiving, Christmas, Halloween, Valentine’s Day, you name it. When you run a holiday promotion and want to get it in front of as many people in your target audience as possible in a short amount of time, use the Reach objective. ConclusionThe Facebook Reach objective is a great way to hit a large percentage of a small target audience. You can use it to target audiences of all different traffic temperatures but it’s best used when targeting hot website custom audiences coupled with a reminder-based ad. What do you think? Do you run Facebook ads using the Reach objective? What types of results have you generated from your campaigns? Share your thoughts in the comments below. More articles on Facebook ads:Join thousands of fellow marketers. Receive the training and support you need to accomplish your marketing objectives! Social Media via Social Media Marketing | Social Media Examiner http://bit.ly/1LtH18p April 8, 2019 at 05:04AM
0 Comments
Leave a Reply. |
�
Amazing WeightLossCategories
All
Archives
November 2020
|



 RSS Feed
