|
https://ift.tt/2u82rXm
How to Create a Messenger Bot Sequence for Your Live Video or Webinar https://ift.tt/2NGazq5
Wondering how to improve registrations and attendance? In this article, you’ll discover how to build a Facebook Messenger bot sequence to register and remind attendees of your live online events. 
How to Create a Messenger Bot Sequence for Your Live Video or Webinar by Dana Tran on Social Media Examiner.
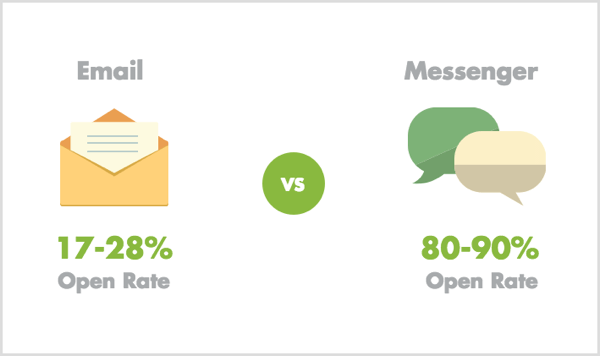
Why Use Messenger Bots With Live Events?Live video streaming is a fun, engaging way to connect with your subscribers and grow your audience. You can share your story and allow others to connect and engage with you in real time. Messenger bots allow you to create a personalized “choose your own adventure” experience. You can also leverage bots to provide people with relevant and helpful information on a platform where open rates are extremely high, often resulting in greater reach. By combining the power of Messenger bots with live video or webinars, you can benefit three ways. Increase Registrations and AttendanceOne of the challenges with both Facebook Live and webinars is getting users to register and show up. People might even forget that they registered for your live event. Messenger bots can act as a helpful assistant for your subscribers to remind them to join your live event at the right time. And message reminders outperform email reminders because:
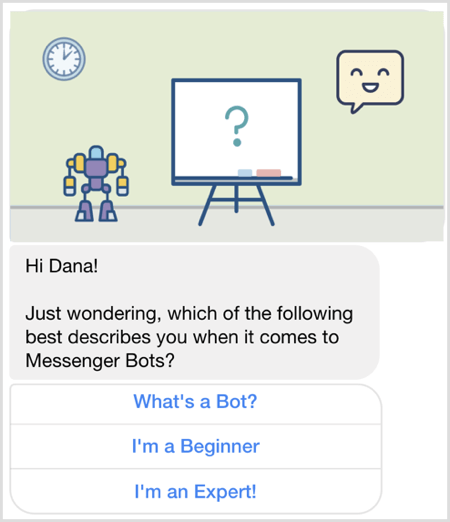
Learn About Your AudienceEven though Messenger bots are a great tool to send broadcasts and reminder messages, you can also use bots as a listening and research tool to learn more about your subscribers’ current pain points and struggles.
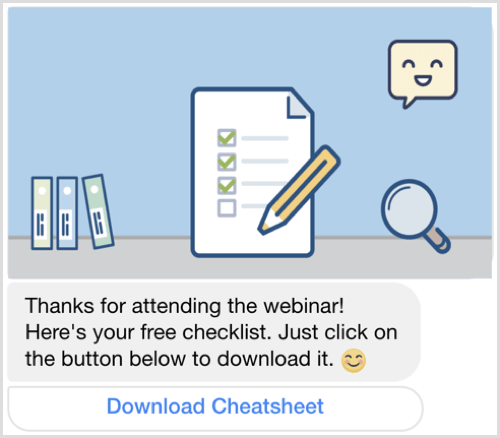
By asking questions before a live event, you’ll be able to customize your presentation to directly address your audience’s pain points, which might result in higher conversion rates. Prompt Users to Take ActionYou can also use Messenger bots to deliver a fill-in-the-blank worksheet or other helpful resources before the live event to encourage and convince users to attend. When you provide people with valuable information that solves a problem, they’re more likely to trust you and become fans of your business and brand. After the live event, you can use Messenger bots to send the replay link along with a thank-you bonus gift (e.g., PDF, how-to guide, etc.). You could even send a promotional offer to people who are identified as warm leads. (Just read over the Messenger Platform Policy to make sure you’re not breaking any rules.)
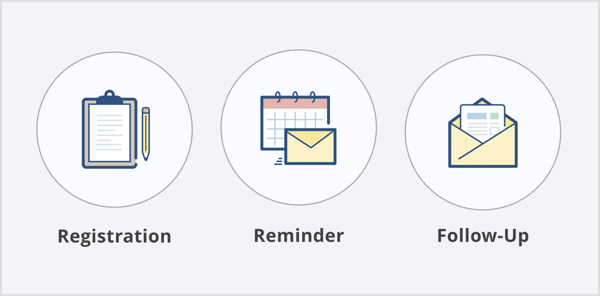
What a Live Video or Webinar Registration and Reminder Sequence Looks LikeIf you’re interested in leveraging Messenger bots to help promote your webinar or live video and increase engagement, you’ll need to set up three separate message flows:
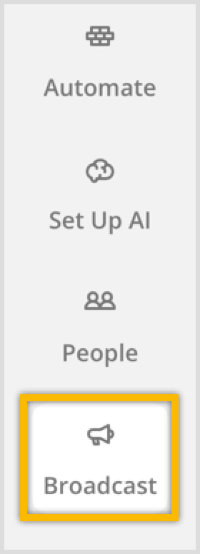
Now that you understand the different messages in this sequence, here’s how to build it with Chatfuel and ManyChat. Create a Live Video or Webinar Registration and Reminder Sequence With ChatfuelFirst, we’ll walk through how to create this sequence in Chatfuel. Build a Registration Message FlowLog into Chatfuel and click the Broadcast tab.
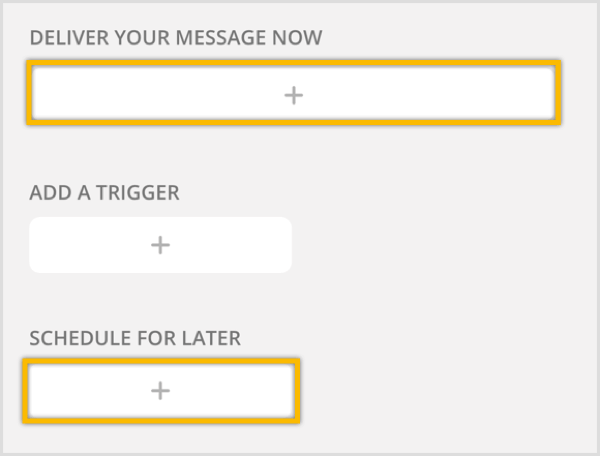
Note: If you haven’t previously used this tool, check out this video for details on how to sign up and build a simple bot with Chatfuel. Next, click the + button to create a new broadcast message to be delivered now or scheduled for a later date and time.
On the right, change the filter to send this message only to those who are marked as a subscriber.
Next, set the date and time for the broadcast. Because this broadcast isn’t time-sensitive, I recommend sending it out according to the user’s time zone (not the bot’s time zone).
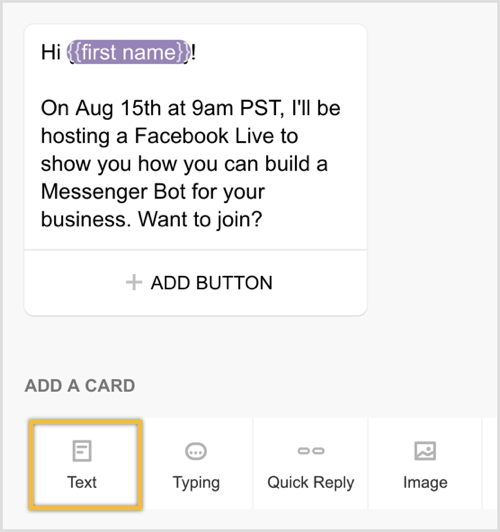
Next, click the Text button to create a text card and then add some details about your Facebook live or webinar. (Tip: Include the date, time, topic, and what users will learn by showing up.)
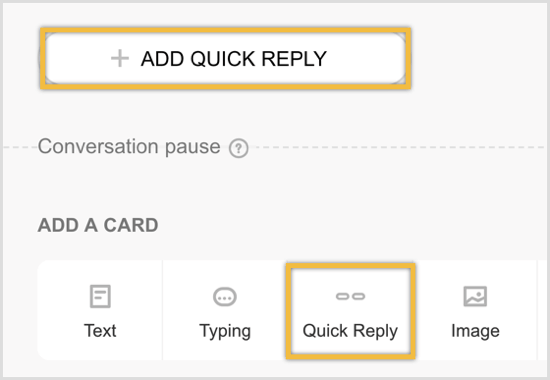
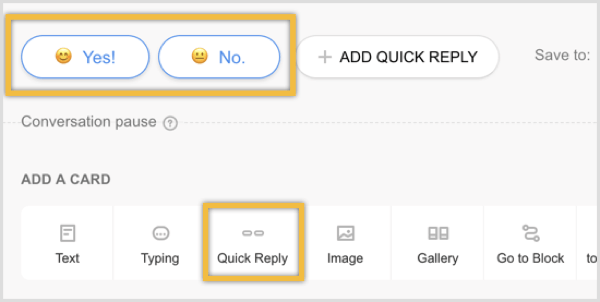
To allow users to register, you’ll need to create two quick reply buttons. Click to add a Quick Reply card and then click Add Quick Reply.
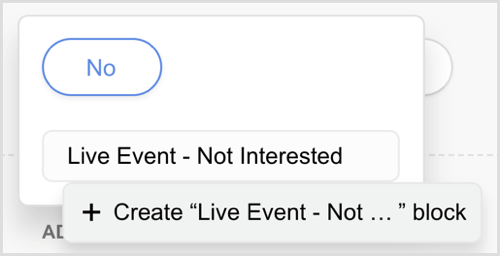
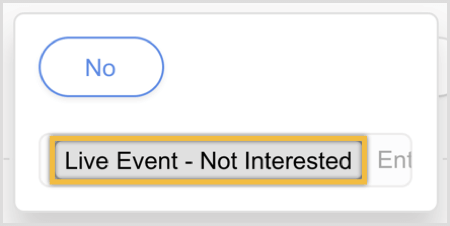
For the button name, type in “No,” and for the block name, type in “Live Event – Not Interested.” Then select the + Create “Live Event – Not…” pop-up to create your new block.
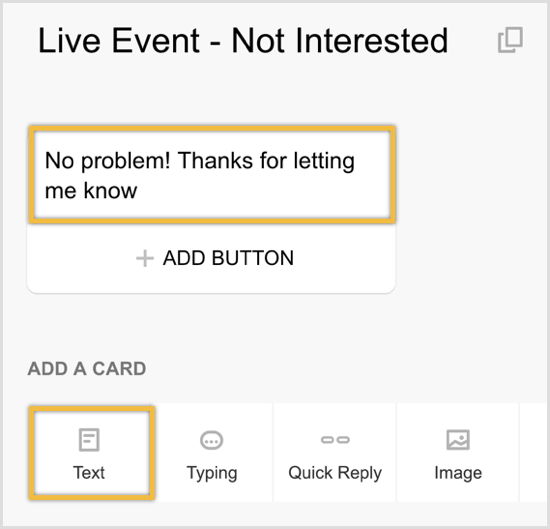
If you double-click on the new block “Live Event – Not Interested,” you’ll be redirected to the Automate tab where you can create the content for this new block.
Click to add a text card and type in “No problem! Thanks for letting me know.”
Next, head back to the broadcast you just created.
Now add another quick reply for “Yes.”
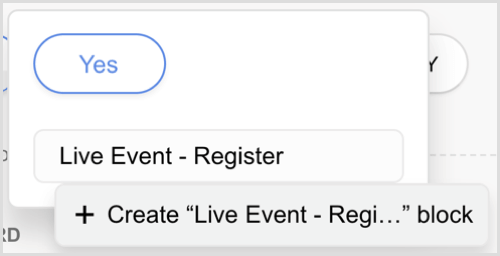
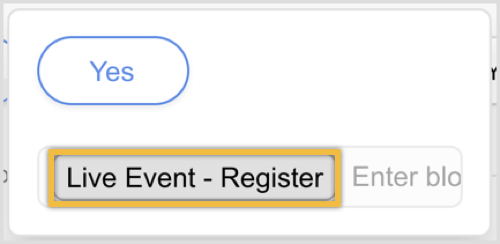
Then create another new block called “Live Event – Register.”
If you double-click on the new block “Live Event – Register,” you’ll be redirected to the Automate tab where you can create content for this new block.
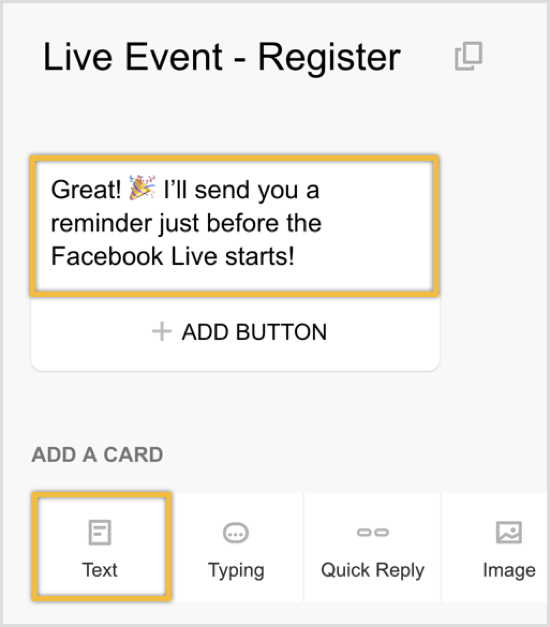
Click to create a new text card for the “Yes” block. Type in “Great! I’ll send you a reminder just before the Facebook Live starts!”
To send a reminder only to users who registered for the Facebook live or webinar, you need to identify the users who signed up. To do this, you use a Chatfuel feature called User Attributes. Under Add a Card, click the + icon on the far right.
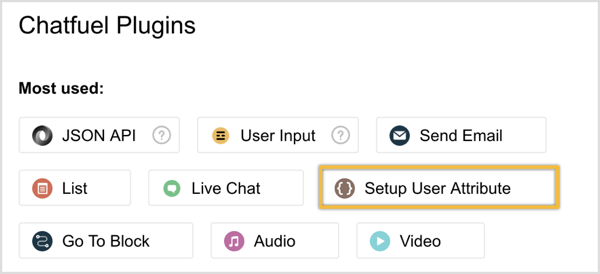
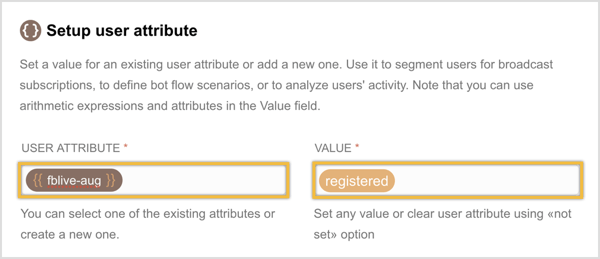
In the pop-up window with additional Chatfuel plugins, select Setup User Attribute. This plugin will allow you to identify and later segment any users who registered for the webinar.
Create a new user attribute (“fblive-aug,” for this example) and then enter the value “registered” for this user attribute.
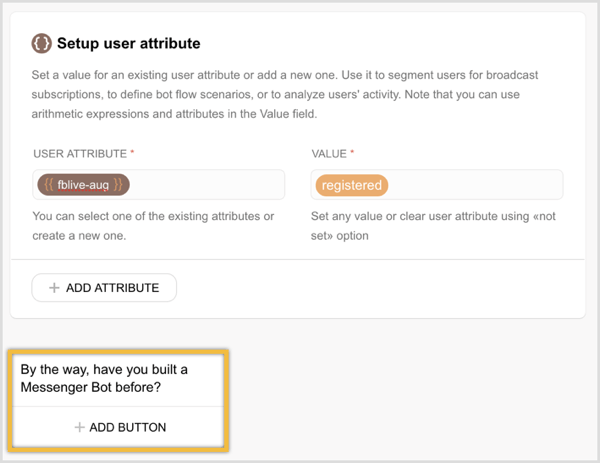
You can either end the registration flow here or ask users a question to learn more about them. To illustrate, suppose you’re running a webinar on how to build a Messenger bot. You could add a text card after setting up the user attribute to ask users, “By the way, have you built a Messenger bot before?”
Then to allow users to reply, offer two quick reply options: Yes or No.
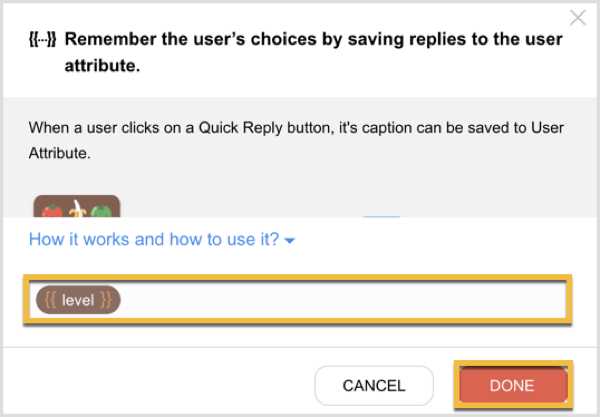
The user’s answer can even be saved to a user attribute called “level,” for instance. To do this, click the User Attribute button.
Then enter the user attribute “level” and click Done.
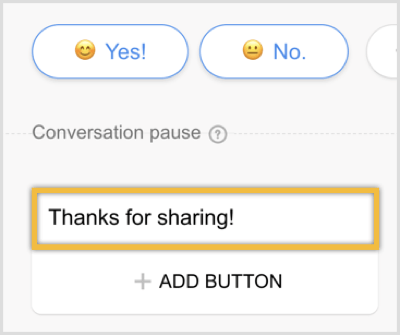
To finalize this “form,” add a text card below these quick replies to thank the user for sharing the information with you.
If you want to see how people replied to your one-question survey, simply navigate to the People tab. Note: the People tab is available only with the Chatfuel Pro Plan, which starts at $15/month. Then you can filter your audience list by level to see who replied yes or no.
Alternatively, you can click the Export button to download the user’s information into a spreadsheet for further analysis.
To send out this registration broadcast, all you need to do is go back to the broadcast and toggle the status from off to on.
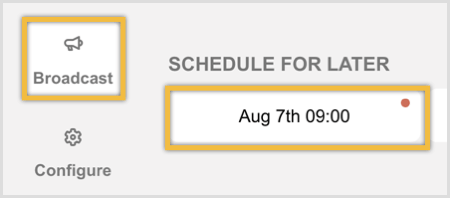
Build a Reminder Message FlowThe next step is to create the broadcast reminder that you’ll send out a few minutes before your Facebook live or webinar. Similar to before, navigate to the Broadcast tab and click the + button under Schedule for Later.
Change the filter to fblive-aug so that only users who registered for the Facebook live will receive the broadcast reminder.
Change the date and time to 10-15 minutes before your event and be sure to select the bot’s time zone.
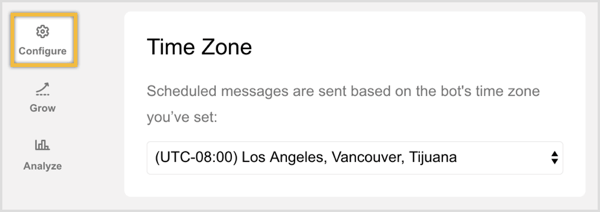
Tip: You can double-check that your bot’s time zone is set correctly by clicking on the Configure tab.
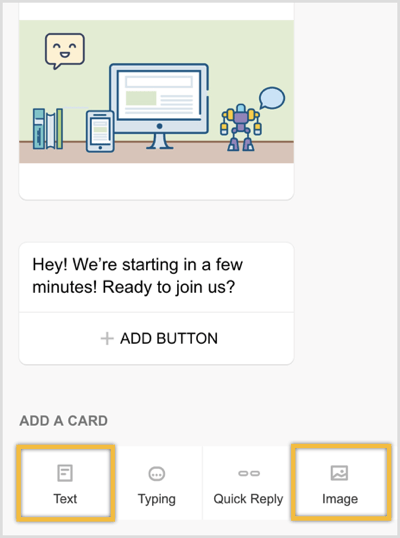
Now you’ll need to create your message. Simply add an image card (optional) and a text card to say “Hey! We’re starting in a few minutes! Ready to join us?”
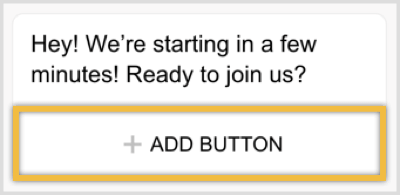
Underneath this text, click to add a button.
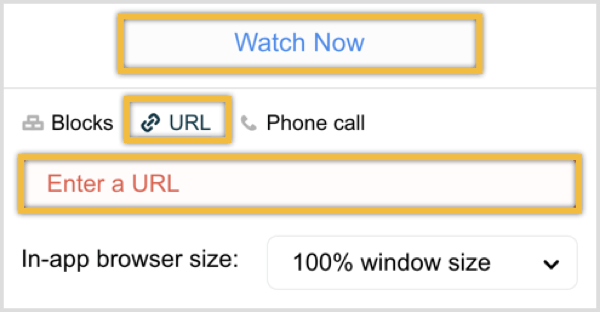
Enter “Watch Now” as the button name and choose the URL option. This is where you can enter the URL for your Facebook live or webinar.
Tip: You can create this broadcast in advance. A few minutes before you go live, simply navigate to the broadcast drafts, make any last-minute changes, and then toggle it from “off” to “on” to send out the reminder.
Build a Follow-Up Message Flow After the EventOnce again, navigate to the Broadcast tab and create a new broadcast.
Filter your list so you send this message only to those who registered.
Change the date and time. Because this follow-up message is not time-sensitive, I recommend sending it out according to the user’s time zone.
Create your follow-up message by adding a combination of text and image cards.
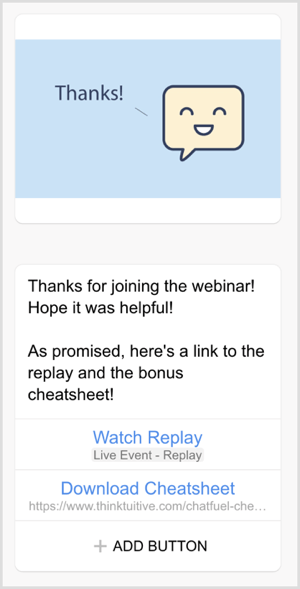
Your end message can look something like the screenshot below, where you have two buttons. One button takes users to watch the replay and a second button allows users to download their bonus gift (e.g., PDF, guide, video, etc.) for attending your Facebook live or webinar.
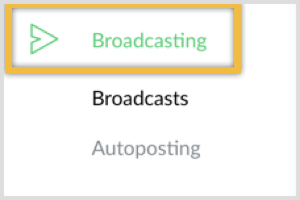
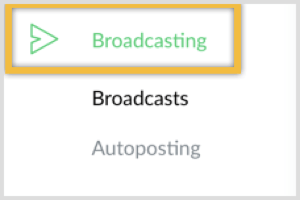
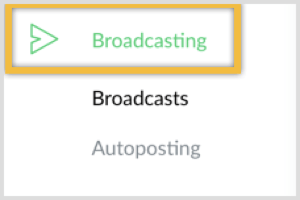
Another option is to include a call to action where you ask users to make a purchase. If you decide to include a promotional offer in this follow-up message, just make sure that you’re following Messenger’s policy and 24-hour window. Create a Live Video or Webinar Registration and Reminder Sequence Using ManyChatHere’s how to set up a sequence in ManyChat to promote your webinar or Facebook live and increase engagement. Build a Registration Message FlowLog into ManyChat, and in the left-hand menu, click Broadcasting.
At the top right, click the blue New Broadcast button.
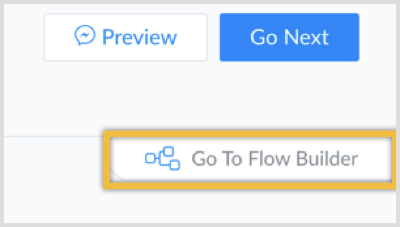
Note: If you haven’t previously used this tool, check out this video for details on how to sign up and build a simple bot with ManyChat. Make sure you toggle over to the Flow Builder.
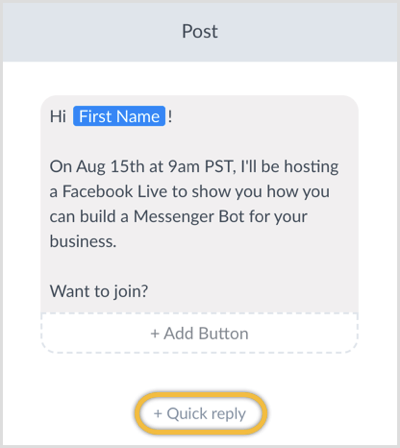
Then create your message by including the details about your Facebook live or webinar. (Tip: Include the date, time, topic, and what users will learn by showing up.)
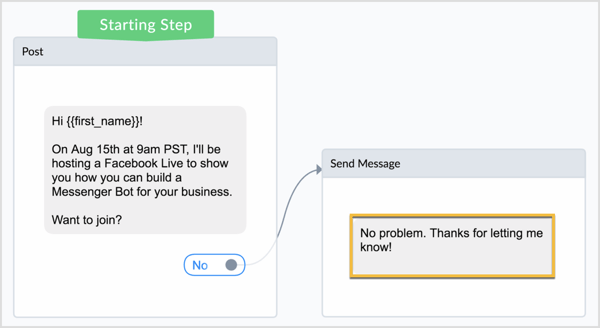
To allow users to register, you’ll need to add two quick reply options: Yes and No. Click the Quick Reply button and type in the text “No.” Then select Send Message as the action when a user clicks this “No” button.
This new message will simply say “No problem! Thanks for letting me know!”
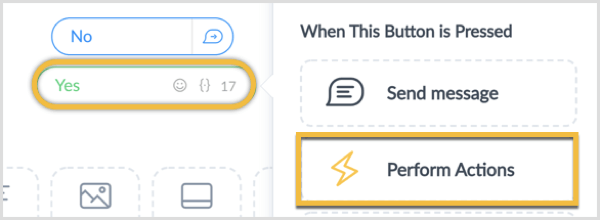
You’ll set up the second quick reply (“Yes”) a little differently. To send a reminder message specifically to users who registered for the Facebook live or webinar, you’ll need to identify the users who signed up. To do this, you’ll be leveraging a ManyChat feature called Custom Fields. Click Quick Reply and add a Yes button. Select Perform Actions as the action when the button is clicked.
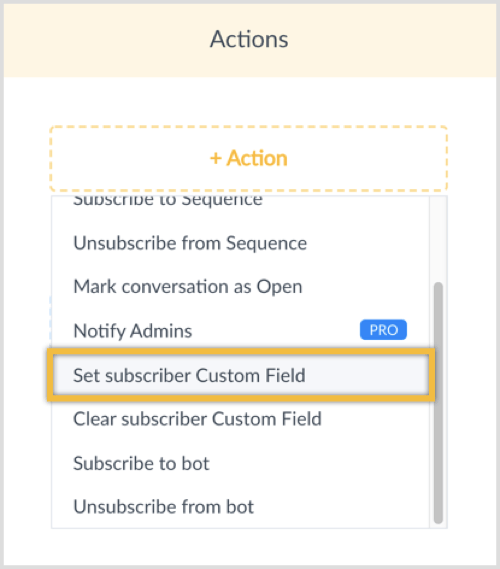
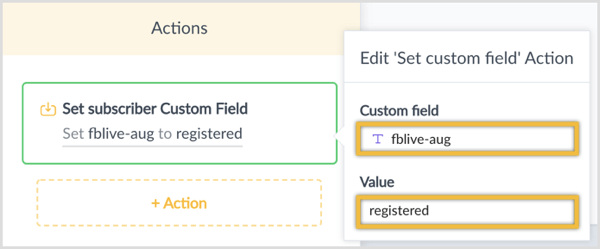
A new sidebar then opens. Click on the Action button and select Set Subscriber Custom Field from the drop-down menu.
Create a new custom field called fblive-aug for this example. Then set the value of this custom field to “registered.”
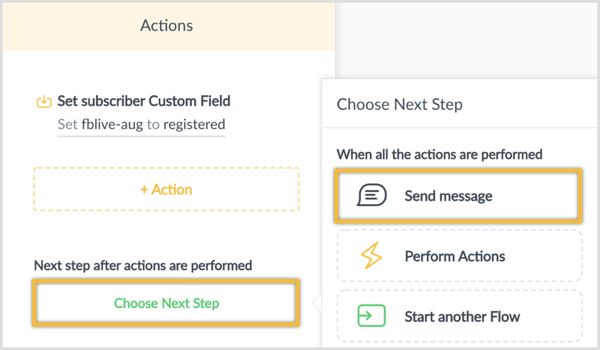
After the actions are performed, you’ll send the user a new message. Click Choose Next Step and select Send Message.
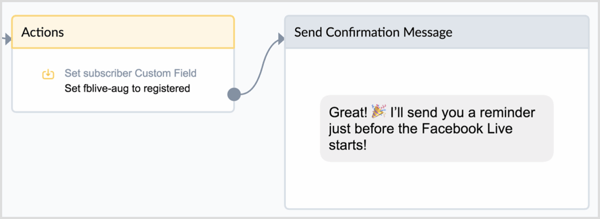
Then type in your message. This new message can have a text content block that says “Great! I’ll send you a reminder just before the Facebook Live starts!”
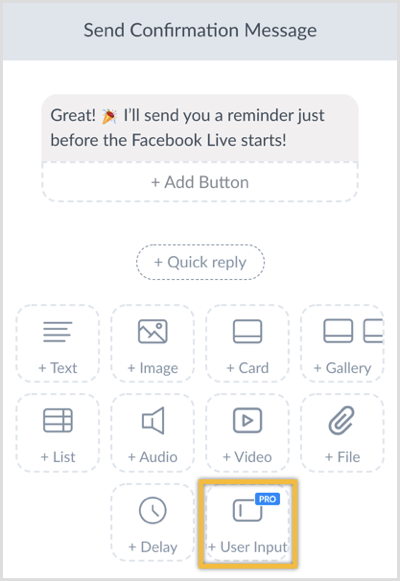
From here, you can either end the flow or build a simple form to ask users a question to learn more about them. To allow users to quickly answer, provide several quick reply options. To visualize this, suppose you’re running a webinar on how to build a Messenger bot. You could ask users, “Have you built a Messenger bot before?” For the confirmation message, click to add a new User Input block.
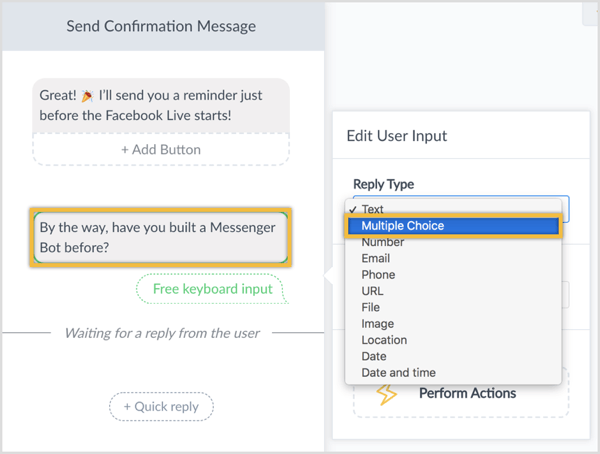
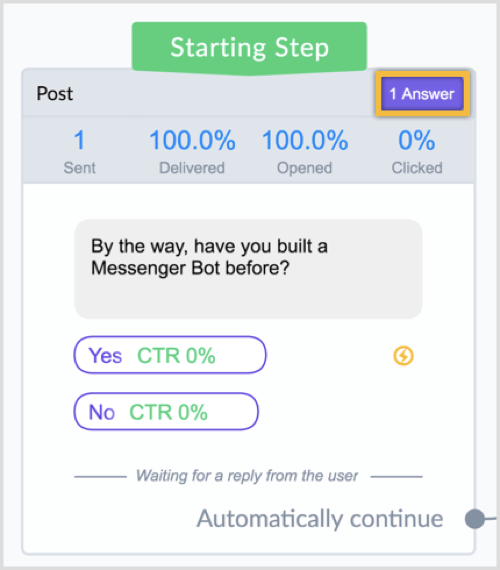
Type in the question “By the way, have you built a Messenger Bot before?” and select the Multiple Choice option.
Under Save Response to a Custom Field, save the answer as a custom field “level.”
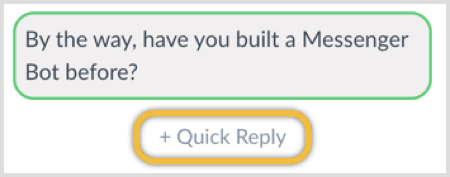
Then click the Quick Reply button to add two quick reply options: Yes and No.
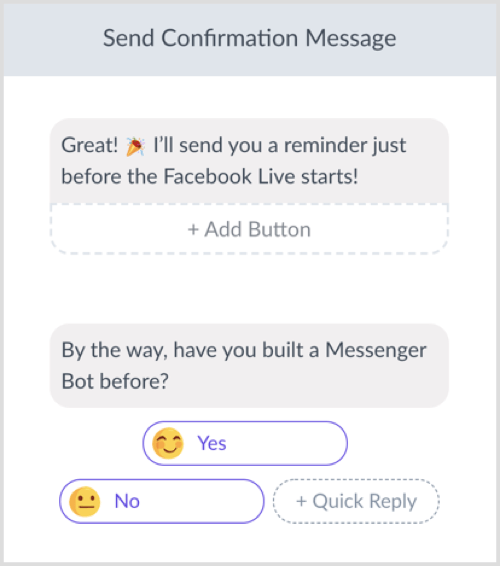
You should end up with something like this:
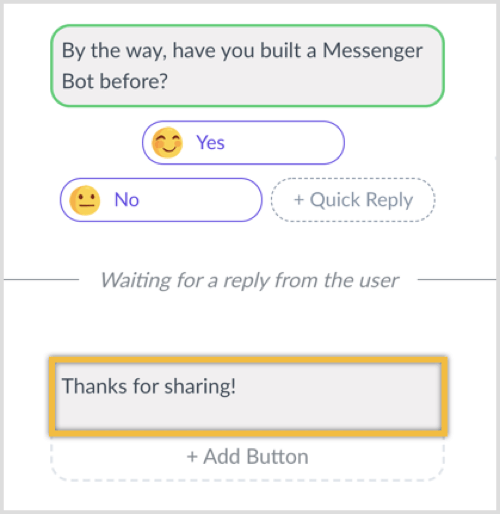
To finalize this one-question survey, simply add a text content block and thank the user for sharing this information with you.
Now that you’re done building the registration message, click Settings at the top.
Then click Condition to segment your audience and only send this message to those who are marked as a subscriber.
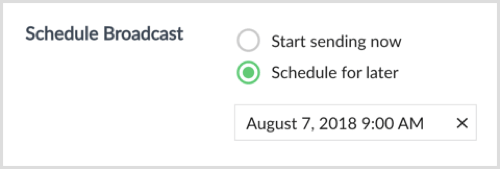
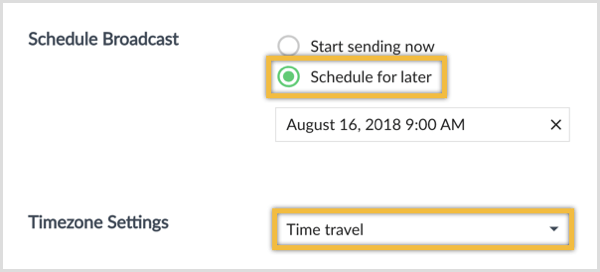
Next, schedule the broadcast to be sent at a later date and time.
Because this broadcast message isn’t time-sensitive, I recommend you select the Time Travel option to send it according to the user’s time zone.
To send out the broadcast, all you need to do is click the Schedule Message button at the top right.
Once you’ve sent out the broadcast, you can see how people replied to your question. Open the broadcast and click the purple Answer button in the top-right corner.
You’ll see a report with the answers or you can download the answers into a spreadsheet.
Build a Reminder Message FlowNow you’ll create the broadcast reminder that’ll be sent out a few minutes before the webinar or Facebook live. Similar to before, click Broadcasting in the left-hand menu.
Then click the blue New Broadcast button at the top right.
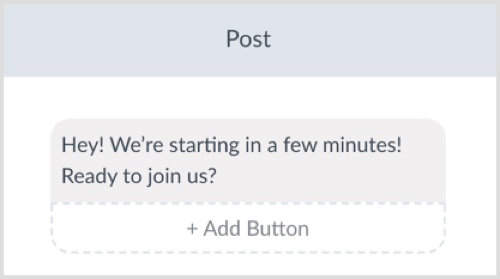
Now create your message. You can add a text content block that says “Hey! We’re starting in a few minutes! Ready to join us?”
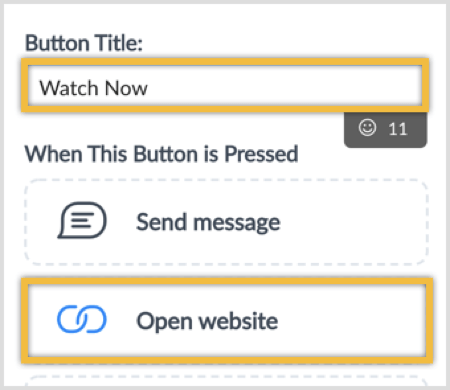
Type in “Watch Now” for the button title and select the Open Website option.
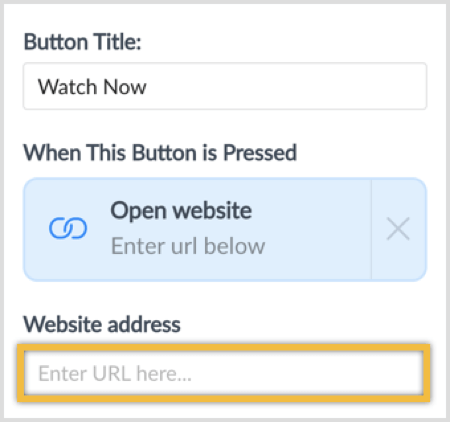
The Website Address field is where you can enter the URL for your Facebook live or webinar.
At the top, click Settings.
Now click Condition and change the targeting condition so only users who registered will receive this message reminder about the live event.
You can either schedule the broadcast to be sent at a later date or leave it as a saved draft. ManyChat will automatically save your work. You can tell by the Saved status next to the Preview button in the top right.
Tip: You can create this broadcast in advance. A few minutes before you go live, simply navigate to the broadcast drafts and make any last-minute changes. Then click Send at the top right to send out the reminder.
Build a Follow-Up Message Flow After the EventOnce again, navigate to the Broadcasting section in ManyChat.
Filter your list so you’re sending this message only to those who registered for the webinar or Facebook live.
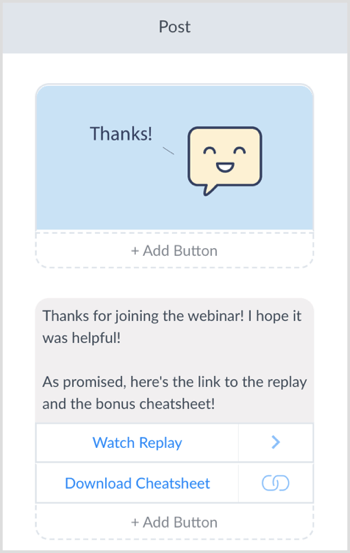
Create your message by adding a combination of text and image content blocks. It can look something like the screenshot below, where you have two button options. One button allows users to watch the replay and a second button lets them download their bonus gift (e.g., PDF, guide, video, etc.) for registering for the live event.
Another option is to follow up with a call to action where you ask users to make a purchase. If you decide to include a promotional offer in this follow-up message, make sure that you’re following Messenger’s policy and 24-hour window. Then click on Settings.
Next, add a condition to send this message only to those who registered for the event.
Then change the date and time. Because this follow-up message is not time-sensitive, I recommend selecting the Time Travel option to send the message according to the user’s time zone.
Finally, click the Schedule Message button in the top right.
Advanced Tips for Registration and Reminder Messenger Bot Sequences After the webinar or Facebook live, you can also send users a message to ask if they want to enroll in a free mini-course or challenge sequence where you provide more valuable content to further engage with them and build trust. In this tutorial, I kept it simple and only showed you how to use “fblive-aug” to segment users. However, you’re not limited to just one. You could create additional fields to store other information about the user (e.g., whether they clicked to watch the replay). Instead of providing users with a “yes” or “no” option when sending the registration broadcast, you can add a third option for those who can’t attend the event live, but want to watch the replay! What do you think? Do you use Facebook Messenger bot sequences? Will you build one to send broadcasts and reminder messages about your live online events? Please share your thoughts in the comments below. 
Social Media via Social Media Examiner https://ift.tt/1LtH18p July 11, 2018 at 05:08AM
0 Comments
Leave a Reply. |
�
Amazing WeightLossCategories
All
Archives
November 2020
|

























 RSS Feed
