|
https://ift.tt/2kRhUpu
How to Build a Facebook Messenger Bot Sequence https://ift.tt/2JfCoHd
Want to automatically deliver a series of messages with helpful content or task reminders to subscribers via a Messenger bot? In this article, you’ll learn how to build a Facebook Messenger bot to automatically send valuable and relevant content to subscribers. 
How to Build a Facebook Messenger Bot Sequence by Dana Tran on Social Media Examiner.
What Is a Messenger Bot Sequence?A Messenger bot sequence is typically a series of messages sent automatically to a specific group of users. However, a sequence can also simply consist of one message. Here’s how it works. First, your Messenger bot will subscribe users to the sequence. Then after a specific delay, it will send the first message to users enrolled in this sequence. After another specific delay, it will deliver the second message and so on.
Users can subscribe to a sequence in two ways:
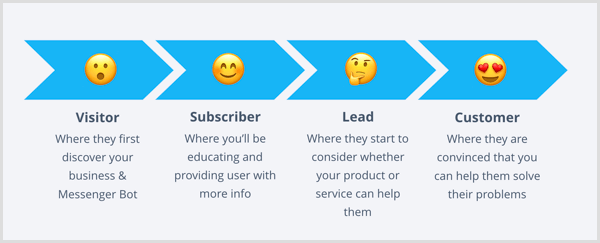
Why Use a Sequence? Sequences allow you to create multiple touchpoints to engage with subscribers, build trust and deliver value by telling a story, send out relevant information, and share examples of how you can help. Your goal should be to move users along the customer journey, converting your visitors into subscribers and subscribers into leads.
With the help of Messenger bots, all of these messages will be automated. However, the purpose of a sequence isn’t to completely outsource your engagement to a bot. The purpose is to automate some of the engagement and interaction so you have free time for more meaningful conversations. You’ll still need to jump in from time to time to answer questions, especially if the user decides to contact you using the live chat or customer chat widget feature.
What you shouldn’t do with sequences is to continuously send out promotional content and discounts (which isn’t allowed by Facebook anyway). 5 Ways to Use SequencesBefore talking about how to build a bot sequence feature with ManyChat and Chatfuel, let’s look at five types of sequences you can build.
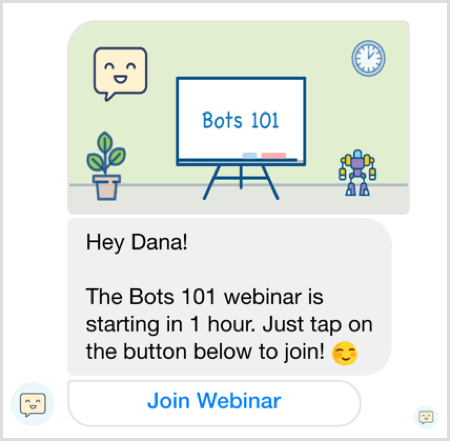
Webinar or Event Reminder Given that 90% of people read a text message within the first 3 minutes, messages sent using Messenger bots are a great tool for delivering time-sensitive information to remind people to attend your event. For instance, you can create a registration form in your Messenger bot and send out a reminder 1 day before the webinar starts. You can also send another reminder 1 hour before the webinar starts and provide users with a button and link to the webinar.
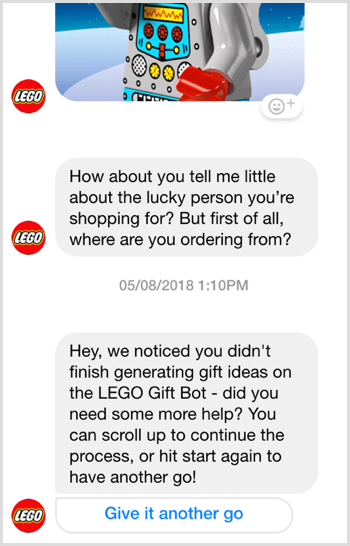
Automated Follow-Up As mentioned before, Messenger bots can automatically enroll users in a sequence after they perform a specific task, such as form or checkout abandonment. Here’s an example from LEGO asking users to continue the process of picking out the perfect gift:
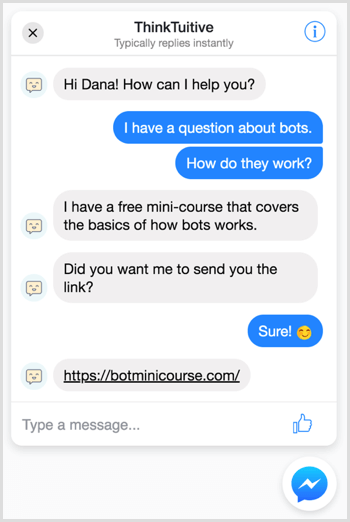
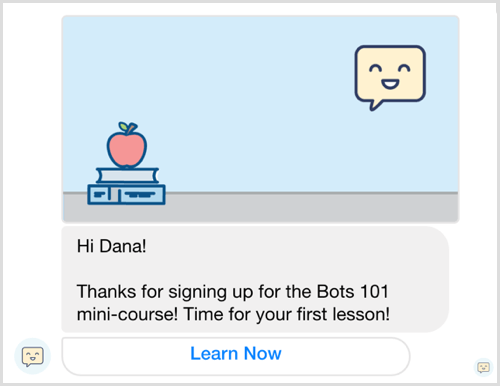
Mini-Course or Video Series You can also create an educational sequence to deliver a bite-sized piece of content each day for several days. This will allow users to progressively learn more about a specific topic without needing to set aside a large amount of time.
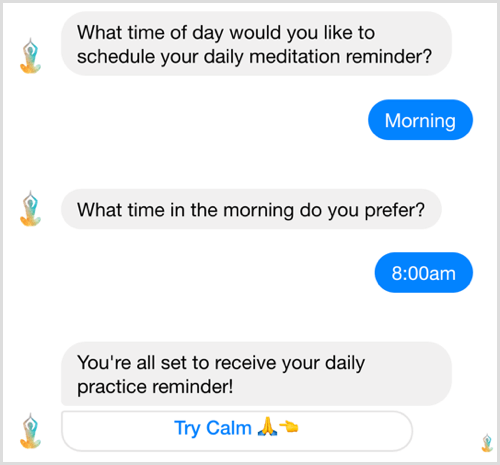
Challenge Another use case is daily challenge reminders. Given the high open rates of messages (80% to 90%), you can also use Messenger bots to deliver daily or weekly reminders to get users to perform a specific task. To illustrate, here’s a message from MeditateBot reminding you to meditate each day at a specific time of your choosing:
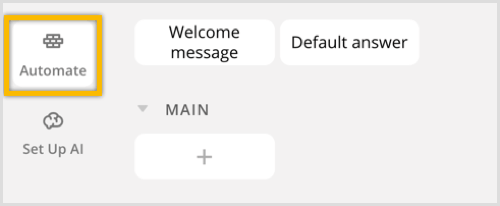
Welcome or Onboarding Last but not least, you can use a bot sequence for welcoming and onboarding new subscribers who are probably not familiar with your business, product, or service. You can build a Messenger bot and automatically enroll users in a sequence where you provide valuable bite-sized content to warm them up to you. Now that you know what sequences are and how you might use them in your Facebook marketing, you’re ready to set one up for your bot with Chatfuel or ManyChat. While there are many different types of sequences, this article walks you through how to create a mini-course sequence that delivers a lesson a day for 3 days. #1: Create a Messaging Sequence Using ChatfuelTo get started building your sequence, log into Chatfuel and click the Automate tab. Note: If you haven’t previously used this tool, check out this video for details on how to sign up and build a simple bot with Chatfuel.
Start by creating a new sequence. In the left sidebar, click + Add Sequence or Group and select Sequence from the pop-up menu.
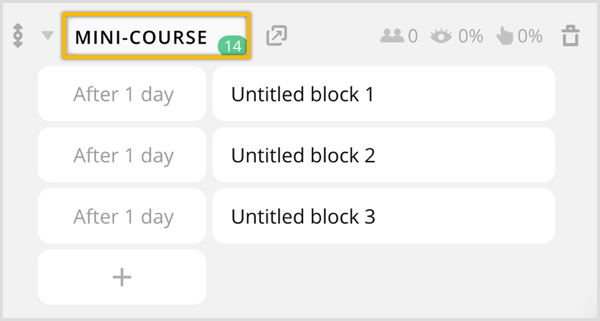
To keep things organized, enter a name for this sequence (Mini-Course).
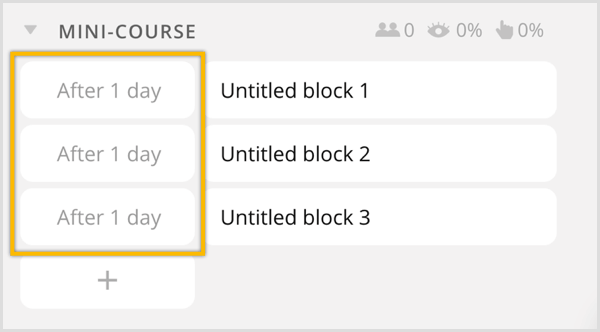
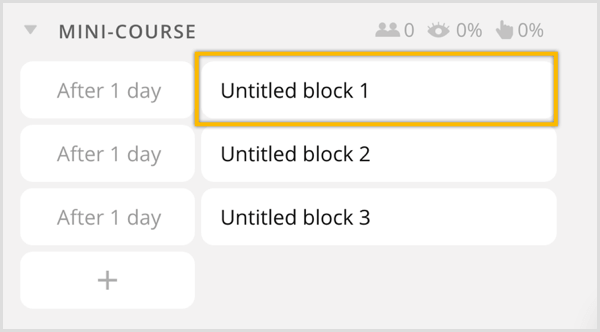
By default, Chatfuel will automatically create three blocks for your new sequence and each block will be sent a day after the other.
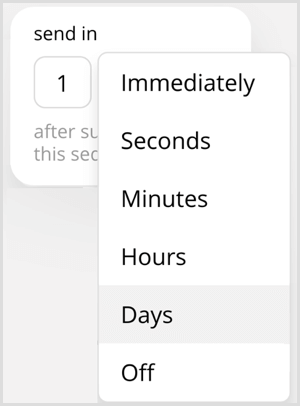
To change the delay between each message, just click the date in the first column and you’ll see the option to change it to Immediately or after a certain amount of seconds, minutes, hours, or days.
The next step is to rename each block. Click to open Untitled Block 1.
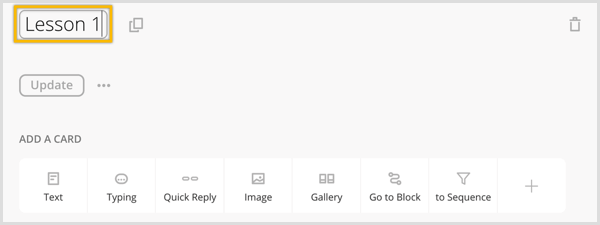
At the top, click the name of the block to rename it (Lesson 1).
Then simply add content by clicking the Image and Text cards.
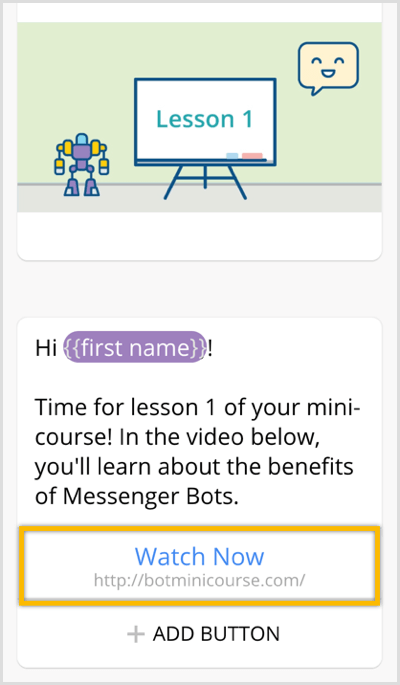
Your resulting message might look something like this:
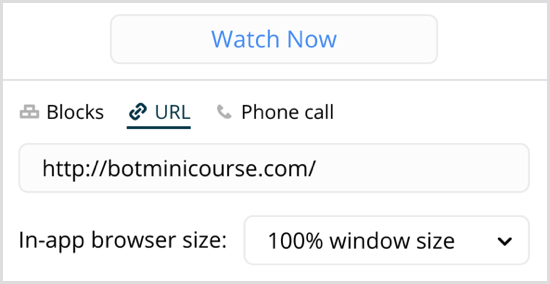
You can even add a button to take users to your site for more details or to watch a video.
As a best practice, I also recommend that you add a quick reply button at the end of each message in the sequence to allow subscribers an easy way to unsubscribe from the sequence. To add a quick reply button, click the Quick Reply icon under Add a Card.
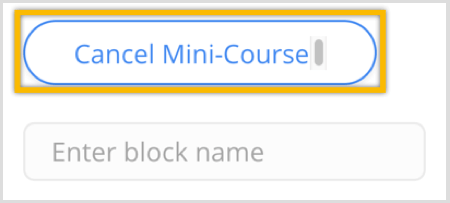
Then click the Add Quick Reply button. You’ll be prompted to enter the button name (Cancel Mini-Course).
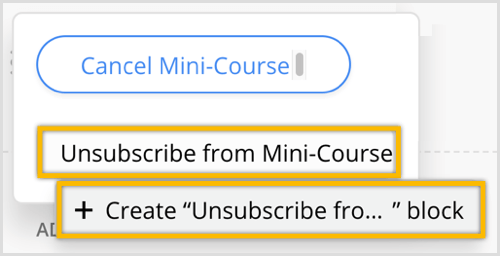
Next, enter the block name (Unsubscribe from Mini-Course) and click to create this new block.
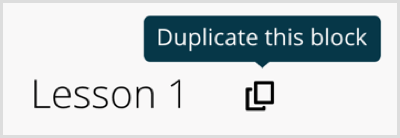
Now repeat the same steps for lessons 2 and 3. As a time-saving tip, you can also scroll up and click on the duplicate icon next to the block name to quickly create the blocks for lessons 2 and 3.
Now that you have the sequence set up, you need to build the two blocks; one to subscribe users into the sequence and another to unsubscribe users from the sequence. Click to open the Unsubscribe from Mini-Course block.
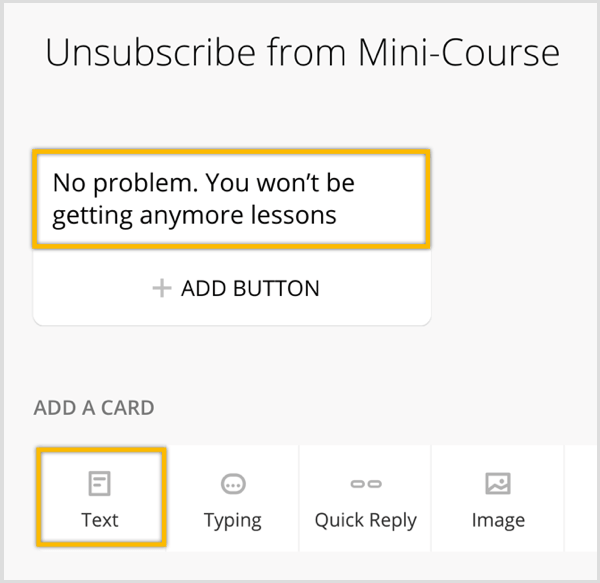
Add a text card and enter the message to send users who unsubscribe (No problem. You won’t be getting any more lessons.).
Next, click the + icon under Add a Card.
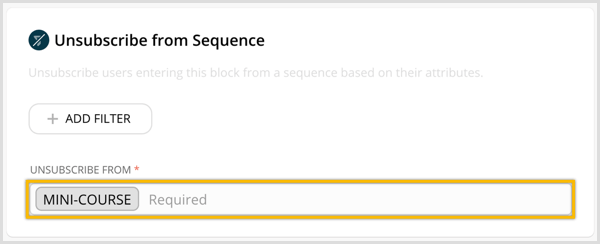
Click to add the Unsubscribe From Sequence plugin.
Then type in the name of the sequence.
Now click the + sign in the left menu to create a block to subscribe users to the sequence.
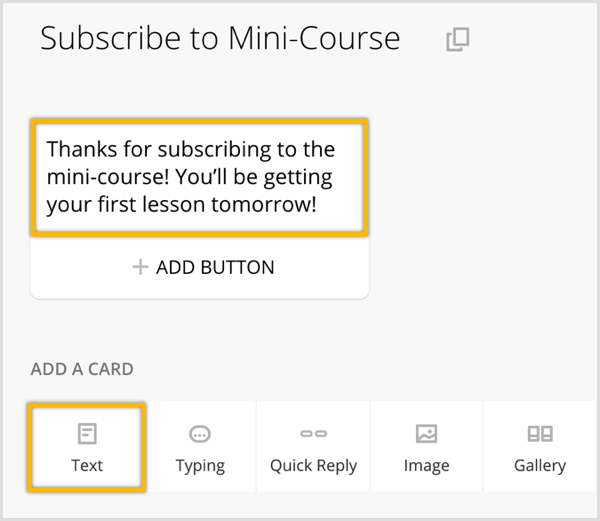
At the top, type in a name for the block (Subscribe to Mini-Course).
Next, add a text card and enter the message to send after someone subscribes to your mini-course (Thanks for subscribing to the mini-course! You’ll be getting your first lesson tomorrow!).
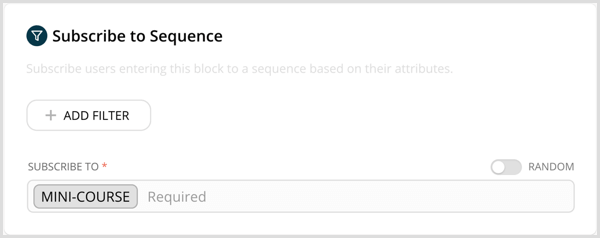
Under Add a Card, click the To Sequence icon.
Then type in your sequence name (Mini-Course) to enroll users in the sequence!
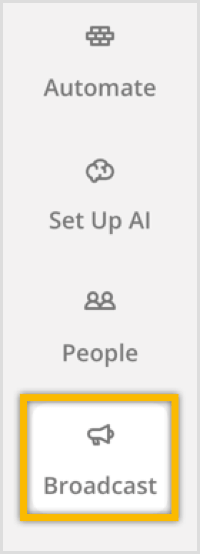
To get subscribers enrolled in this new sequence, you want to send out a broadcast. Click the Broadcast icon on the left menu.
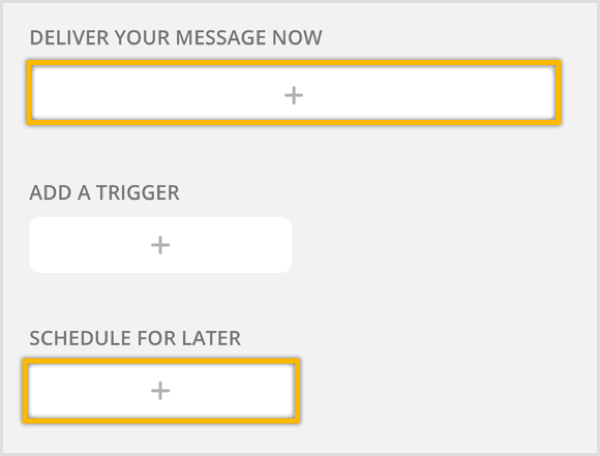
You can either deliver your message now or schedule your broadcast to be delivered at a later date. Choose one by clicking on the + icon.
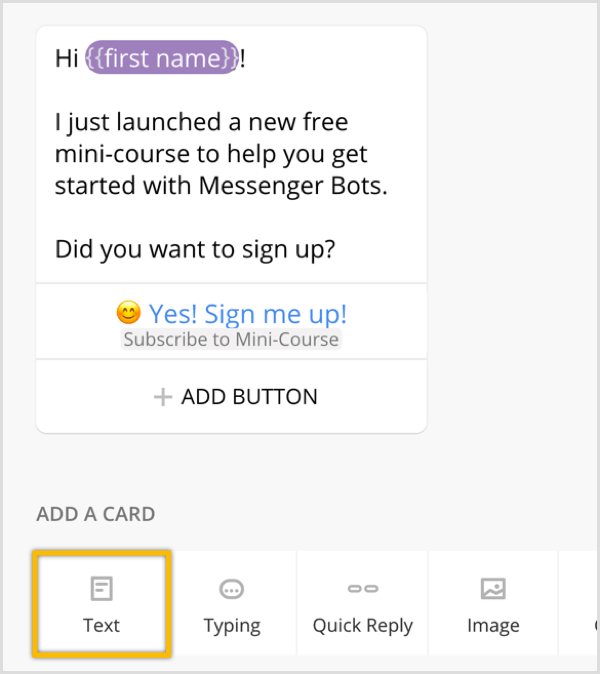
Next, add a text card with a message to let users learn about your mini-course and end it by asking if they want to sign up.
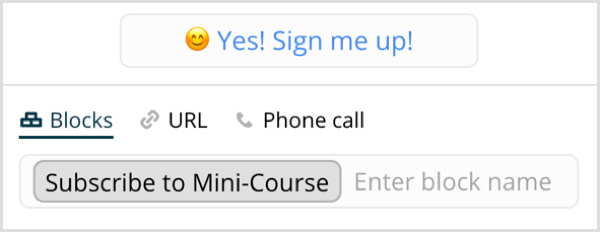
Add a button with an emoji and text that says, “Yes! Sign me up”, and link it to the Subscribe to Mini-Course block.
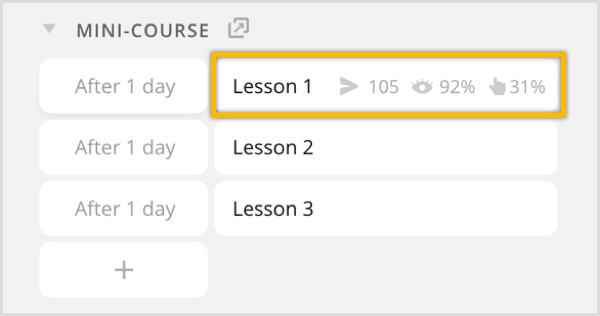
Once users start to subscribe to your sequence, you can track the performance. Hover over each message block to see the number of people who received, opened, and clicked on the message.
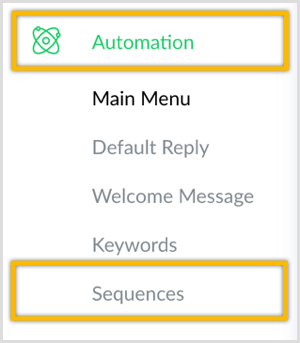
#2: Create a Messaging Sequence Using ManyChatTo create a similar sequence with ManyChat, log in and click Automation > Sequences in the left menu. Note: If you haven’t previously used this tool, check out this video for details on how to sign up and build a simple bot with ManyChat.
In the upper-right corner, click the + New Sequence button.
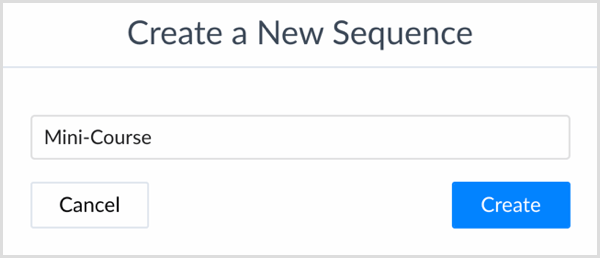
Enter a name for this sequence (Mini-Course) and click Create.
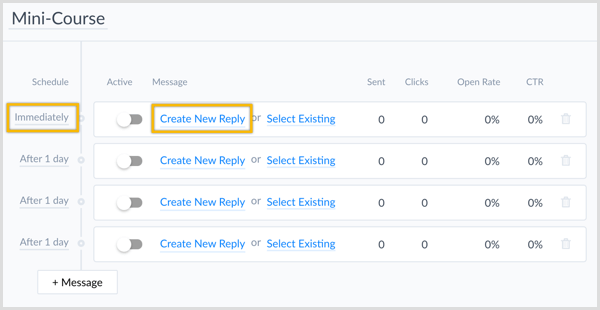
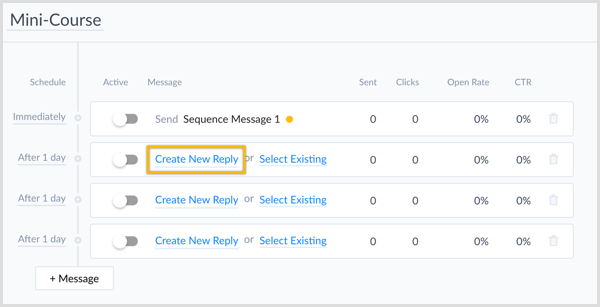
By default, ManyChat will automatically create one new flow for the new sequence. The first message will be sent out after 1 day. Click the + Message button to add three more messages. (You’ll need one for the confirmation and one for each of the three lessons.)
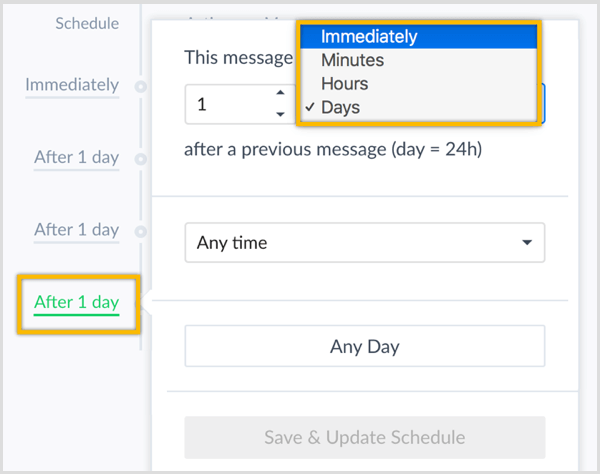
To change the delay between each message, just click the After 1 Day text in the Schedule column and you’ll see the option to change it to immediately, or after a certain amount of minutes, hours, or days. From this drop-down menu, click to select Immediately.
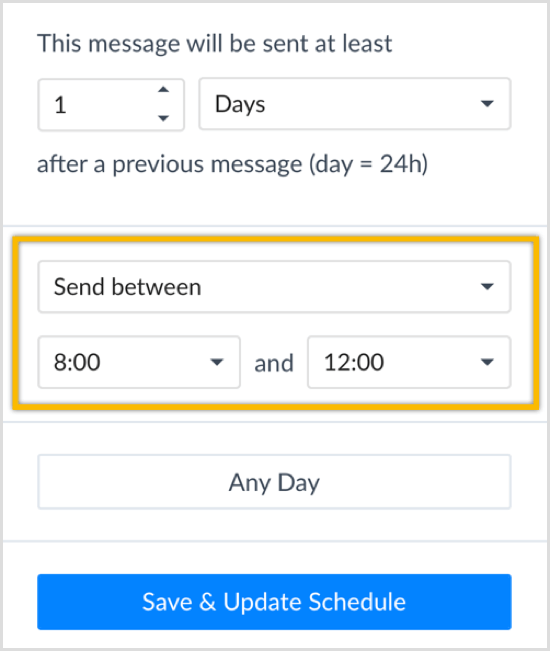
You also have the option to send the message within a certain timeframe. For example, you can set it so the message is sent only between 8 AM and noon.
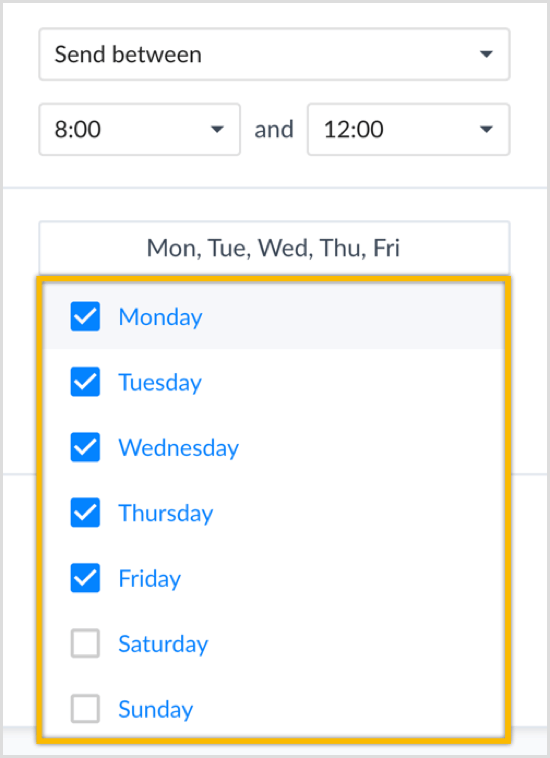
You also have the option to limit the day of the week. In the settings below, the subscriber will receive the message only on weekdays between 8 AM and noon:
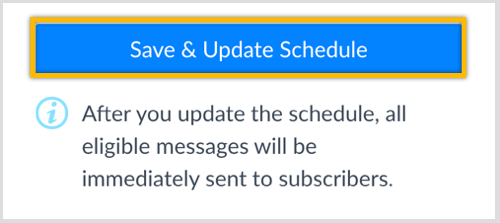
After you make your changes, click the blue Save & Update Schedule button.
The first message in the sequence is a confirmation message that’s sent immediately. Let’s start by adding content to this confirmation message. Click Create New Reply next to the first message.
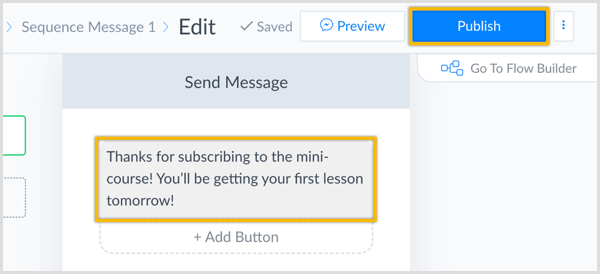
Now enter the message users will receive after subscribing (Thanks for subscribing to the mini-course! You’ll be getting your first lesson tomorrow!). When you’re done, click the blue Publish button in the top-right corner.
Now navigate back to your sequence and click Create New Reply next to the second message in the sequence.
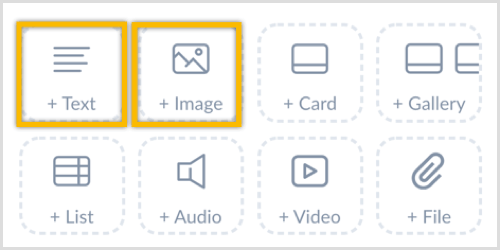
Then add a combination of images and text content blocks.
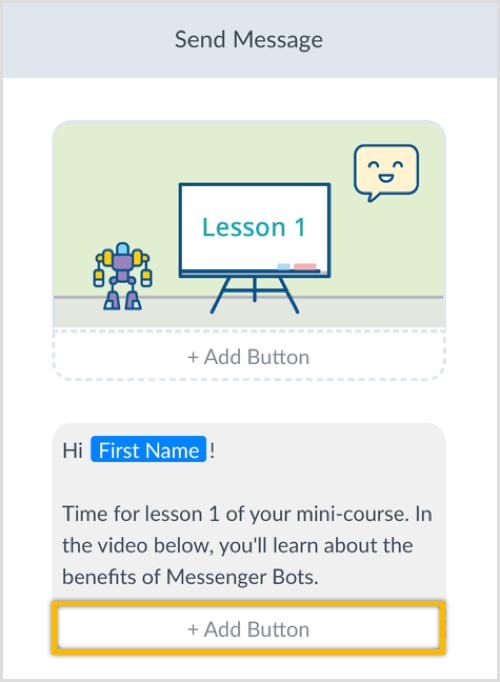
Your resulting message might look something like this:
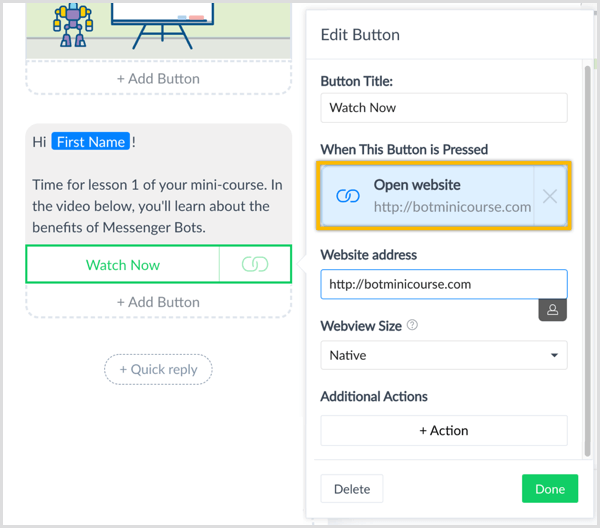
I suggest that you also add a button to open a website or YouTube channel for more details or to watch a video.
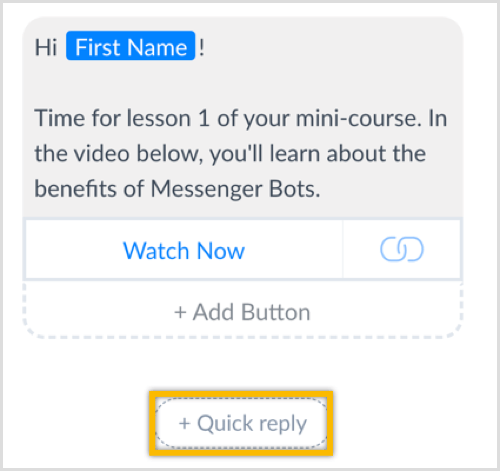
As a best practice, I strongly recommend that you add a quick reply to each message to allow subscribers to easily unsubscribe from the sequence. To add a quick reply, click the + Quick Reply button below the message for lesson 1.
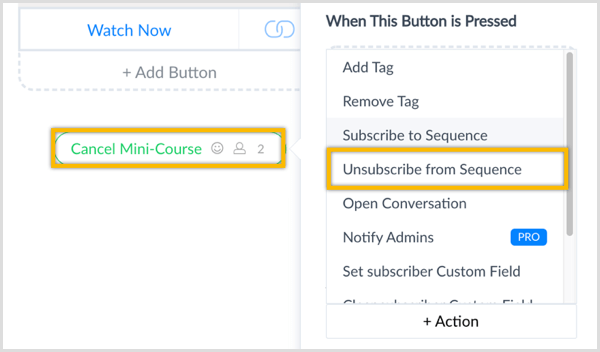
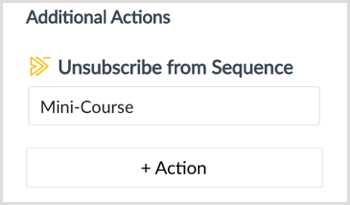
Enter the name for the button (Cancel Mini-Course) in the text box. Then click the + Action button below the Additional Actions section and select Unsubscribe From Sequence.
Type in the sequence name (Mini-Course).
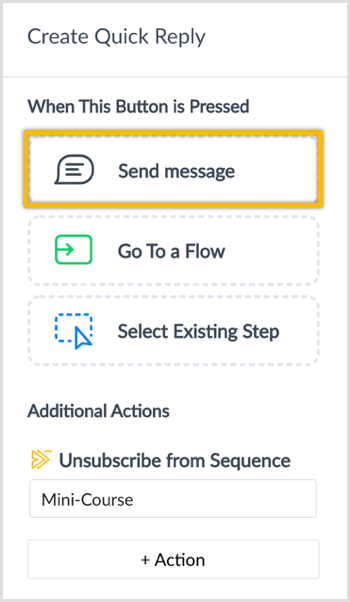
From the action step, click to send another message.
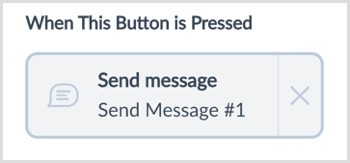
In the When This Button Is Pressed section, click Send Message to open the message.
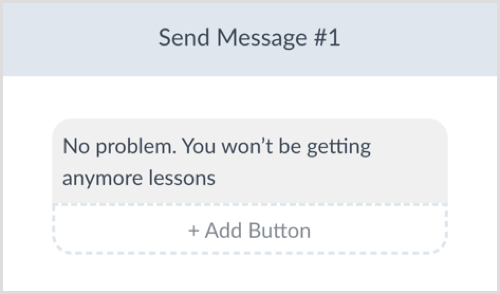
Enter your message (No problem. You won’t be getting any more lessons.). When you’re done, click the blue Publish button up in the top-right corner.
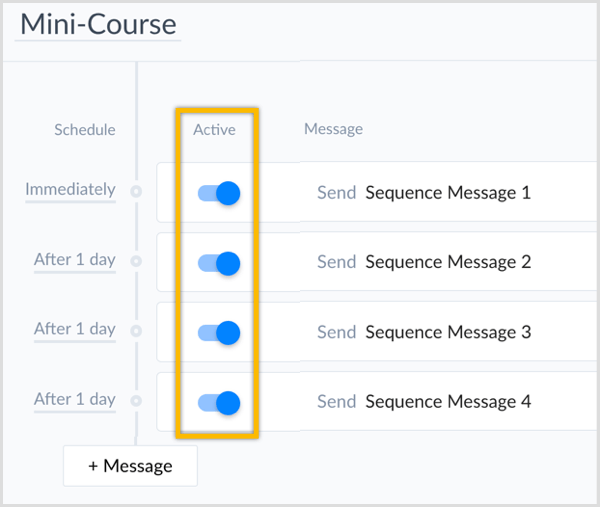
Now repeat these steps for the sequence messages for lessons 2 and 3. When you’re finished creating the sequence, don’t forget to toggle the messages in the sequence to Active.
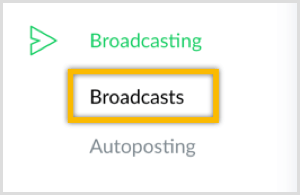
To get subscribers enrolled in this new sequence, you can send out a broadcast. Click Broadcasting > Broadcasts in the left sidebar.
Then click the blue New Broadcast button in the top-right corner.
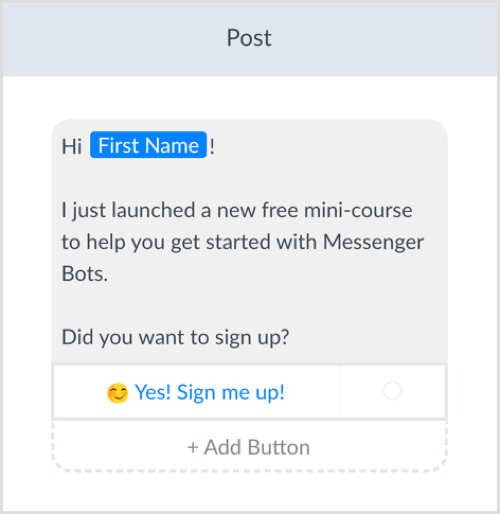
Now add a message to let users learn about your mini-course and end it with a question (“Did you want to sign up?).
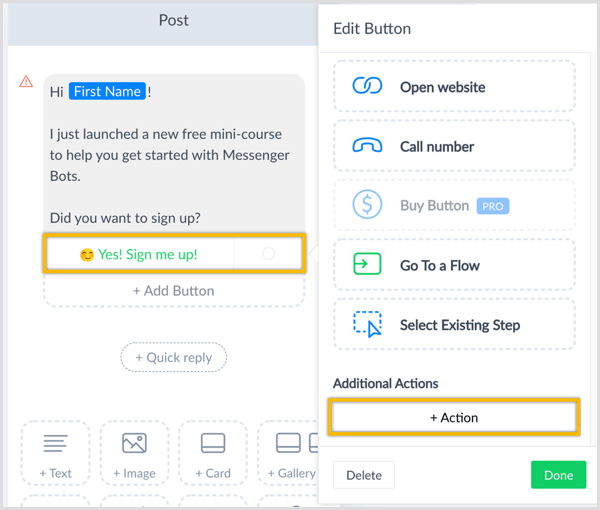
To give users the option to sign up, include a button with an emoji and text that says, “Yes! Sign me up!”. To link it to an action step, click the Action button.
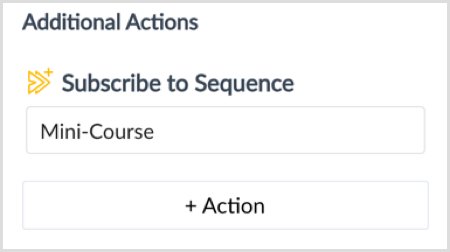
Choose Subscribe to Sequence from the drop-down menu and select Mini-Course as the action. Then click Done.
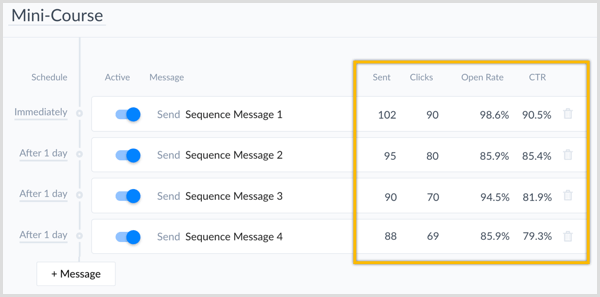
Once subscribers are enrolled in your sequence and mini-course, you can track the performance of your sequence by viewing the stats on the sequence page.
Conclusion Adding a sequence to your Messenger bot is a great way to deliver value so new subscribers learn more about you and your business. It also allows you to provide relevant valuable content to existing subscribers with minimal effort and maintenance. Before you jump into Chatfuel or ManyChat to build your sequence, keep these important tips in mind:
What do you think? How might you use sequences with your Messenger bot? Please share your thoughts below.  Social Media via https://ift.tt/1LtH18p June 6, 2018 at 05:07AM
0 Comments
Leave a Reply. |
�
Amazing WeightLossCategories
All
Archives
November 2020
|

















 RSS Feed
