|
https://ift.tt/2G2ad80
How to Add Facebook Customer Chat to Your Website https://ift.tt/2G1CYlz
Did you know that Facebook Messenger makes it easy to embed a live customer chat widget on your site? The Messenger Customer Chat plugin allows you to have a live conversation with site visitors. In this article, you’ll learn how to add a Facebook Messenger customer chat widget to your site. 
How to Add Facebook Customer Chat to Your Website by Dana Tran on Social Media Examiner.
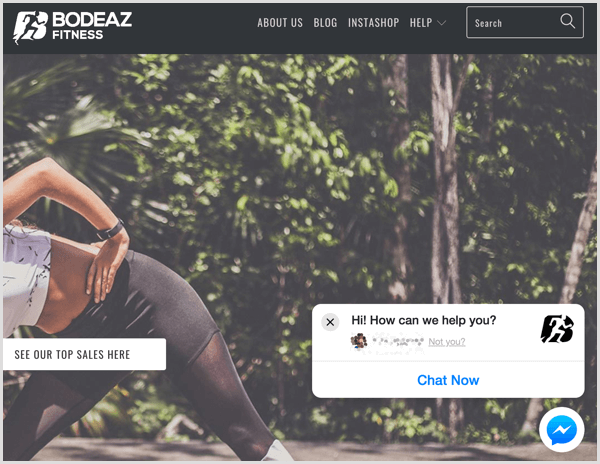
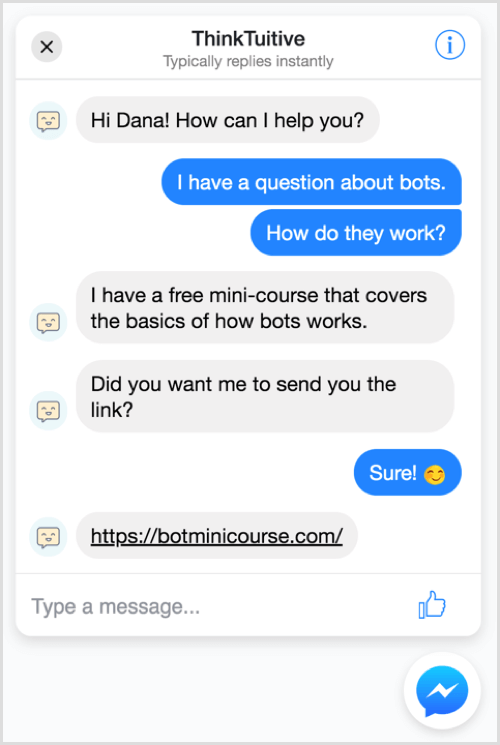
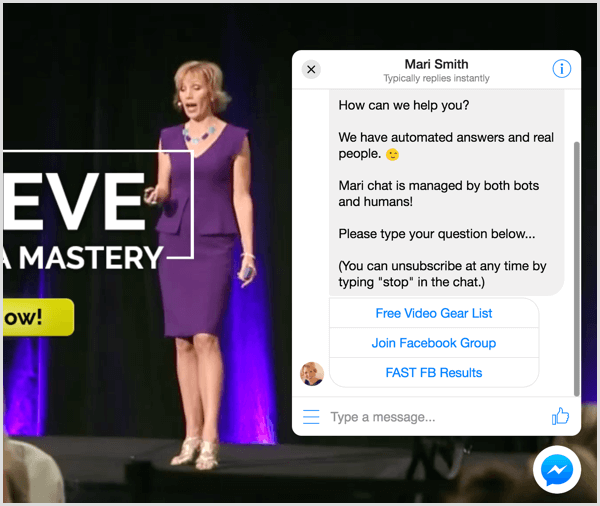
Why Use Messenger’s Customer Chat on Your Website?A customer live chat is a small floating icon that usually appears in the bottom-right corner of a website. Like traditional live chat software, you can install a Messenger customer chat plugin on your website. This plugin makes it easy for any website visitors with a Messenger account to have a live conversation with a human, leave a message, and interact with your Messenger bot.
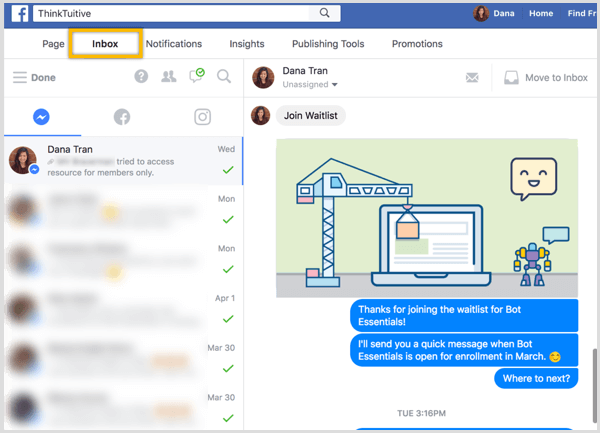
Facebook doesn’t charge you anything to install this customer chat widget. You don’t even need to have a Messenger bot. The only requirement is a Facebook page. Before we talk about how to set up a Messenger live chat feature with the help of ManyChat and Chatfuel, let’s look at a few reasons why you should have a live chat on your site. Manage Conversations Via Your Page’s Inbox Any messages sent through the Messenger chat widget on your website will automatically appear in your Facebook page Inbox.
You can also read and reply to visitors’ messages on your mobile device through the free Facebook Page Manager app, which is available on the App Store and Google Play. Enhance Customer Service According to Facebook, 53% of people are more likely to shop with a business they can message directly. With your traditional live chat, you can only carry out the chat conversation on a specific site. With Messenger chat, though, you can start a conversation on desktop and then continue it on your mobile device with Messenger at a later date or time. Provide Instant Automated Answers The Messenger Chat widget allows visitors to ask questions directly on your website and you can carry on conversations with potential leads in real time.
If you don’t have a support team working around the clock to reply to customer questions, build a Messenger bot to power your Messenger chat widget and answer basic FAQs. To help convert visitors into leads, you can give people the option to subscribe to your Messenger or email newsletter, deliver lead magnets, or provide links to additional useful content while they wait for a human response.
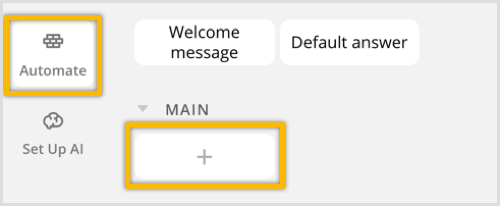
Now let’s look at how to set up a Messenger customer chat feature with Chatfuel and ManyChat. #1: Set Up Messenger Chat on Your Website Using ChatfuelEven though it’s not required, it’s more effective to have a Messenger bot send users a greeting when they start a live chat through the Messenger customer chat plugin. So let’s start by creating this greeting message in Chatfuel. If you haven’t previously used this tool, check out this video for details on how to sign up and build a simple bot with Chatfuel. After you log in, click the Automate tab. Then click on the + sign to create a new block.
To keep things organized, click the title of the block and rename it “Live Chat.” Under Add a Card, click the + sign.
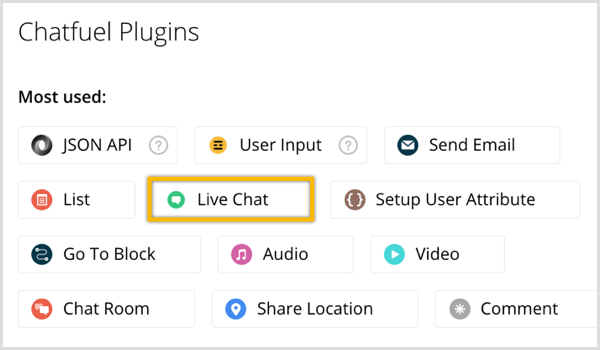
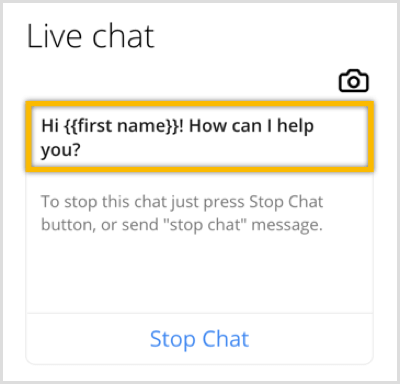
In the pop-up window, click Live Chat to add the live chat plugin.
This plugin will temporarily disable your bot’s Artificial Intelligence feature when you’re having a live conversation with a user. Whenever there’s a new chat session, you’ll also get a push notification alert from your Messenger bot. Now modify the default start message (“You started chat session with our operator”). Type in something like “Welcome {{first name}}! How can I help you?” Adding curly brackets after “first name” tells the bot to include the user’s first name in your welcome message. Facebook will automatically provide this information, so you don’t need to ask the user to complete a form or fill out this basic detail.
You can also review and modify the start message description and stop message. For this tutorial, we’ll just go with the defaults. Now click the Link icon at the top of the page, next to the name of the block.
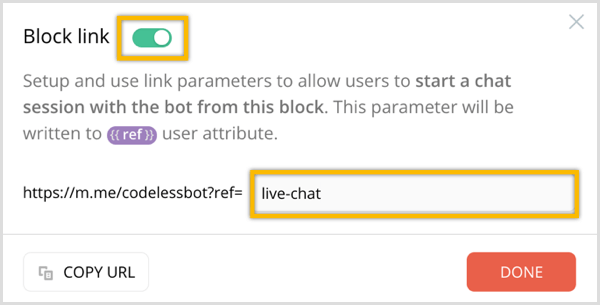
In the window that appears, toggle the Block Link option on. Then enter a ref link and be sure to remember what you typed in. Then click the orange Done button.
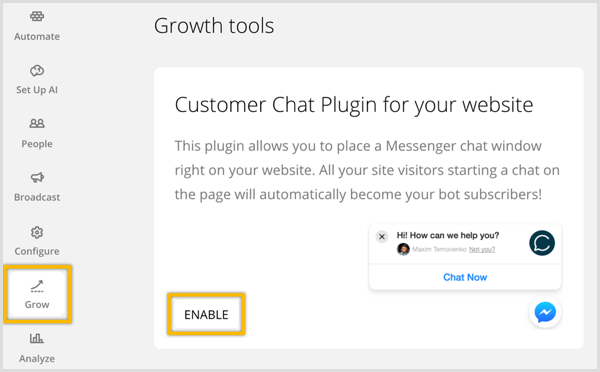
Now that you’ve created the greeting message, the next step is to generate the code for the Messenger chat plugin. Click the Grow Tab in the left sidebar. On the Growth Tools page, find Customer Chat Plugin for Your Website and click Enable below it.
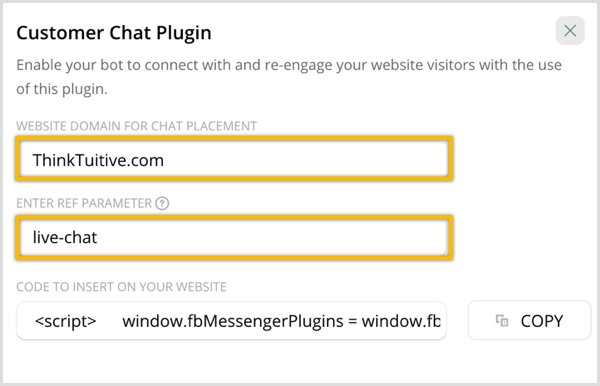
In the pop-up window, enter the URL for the website where you plan to install this Messenger chat plugin. Then enter the ref parameter you added above. When a user starts a live chat with your Messenger chat plugin, your bot will send users this message block containing the live chat plugin.
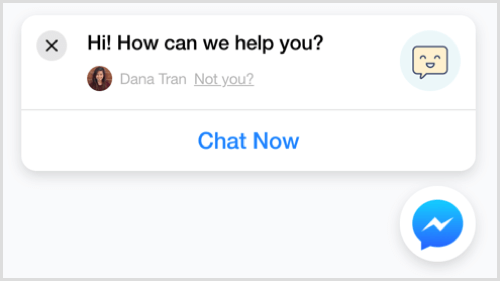
The code for this chat plugin is automatically generated for you, so click Copy to copy it to your clipboard. You’ll then paste this code into the Header section of your WordPress site; see section #3 below for details. Advanced Hack: Customize Your Messenger Chat Widget Did you know that you can add a few lines to this code to further enhance your Messenger chat widget? Here’s what the plugin you just created will look like:
By adding some code, you can customize the chat plugin to:
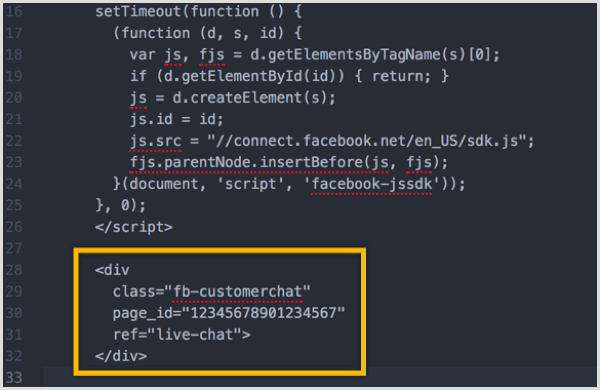
To make these changes, paste the code generated from Chatfuel into a notepad or text editor. Look for the snippet of code in yellow below.
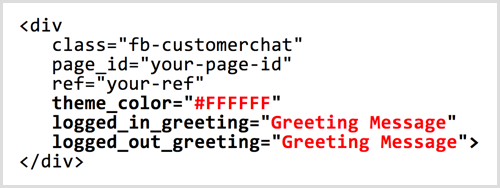
Within this snippet, add the three bolded lines below:
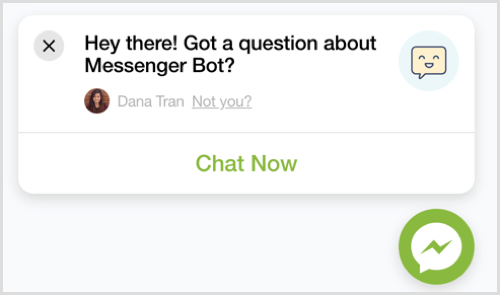
Replace #FFFFFF with the hex code of the color you want to use for the theme. (You can find hex color codes with a tool like ColorHexa.) Replace “Greeting Message” to modify the two greetings. For example, suppose you want to change the default Facebook blue color theme to green and change the default greeting message from “Hi! How can we help you?” to a call to action for your business. Here’s the code you might add to your chat:
The chat widget would now look like this:
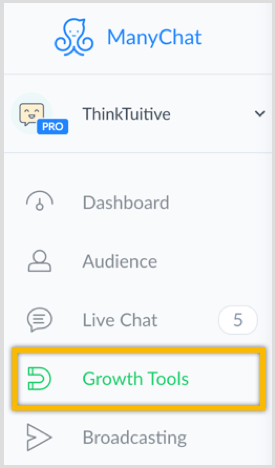
#2: Set Up Messenger Chat on Your Website Using ManyChatTo set up a Messenger live chat feature with ManyChat, log in and click the Growth Tools tab in the left sidebar. If you haven’t previously used this tool, check out this video for details on how to sign up and build a simple bot with ManyChat.
Next, click the New Growth Tool button at the top of the page.
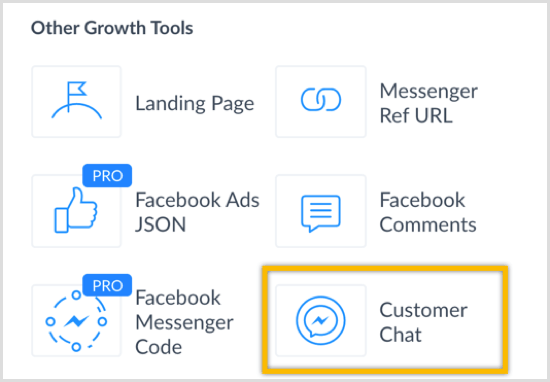
In the window that slides out, click Customer Chat.
To keep things organized, rename this growth tool to “Live Chat” and then click the blue Save button.
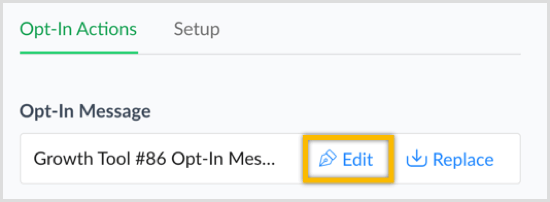
Next, click Edit to edit the opt-in message. This is the message that users will receive when they click the chat widget to start a new chat conversation.
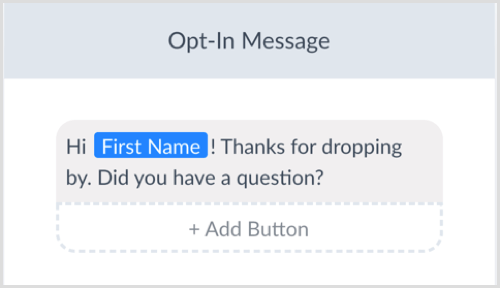
Change the opt-in message text to something like “Hi! Thanks for dropping by. Did you have a question?”
Click Publish at the top of the page and then click Live Chat to go back to growth tool.
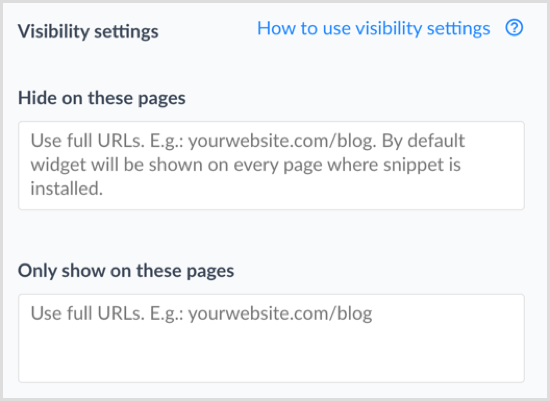
Now click the blue Next button and decide where you want the chat widget to display. Leave these fields empty if you want the chat widget to appear on every page on your site.
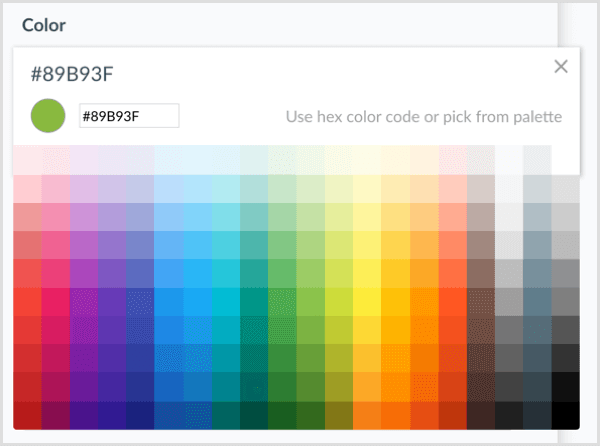
If you want to change the color of the widget, enter a hex code or choose a color from the palette. Notice how the chat widget and the color of the user’s message bubble change in the preview on the right.
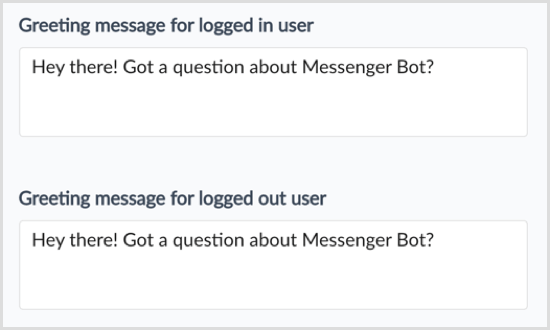
ManyChat also lets you modify the greeting message for users who are logged into Facebook and for those who are logged out of Facebook.
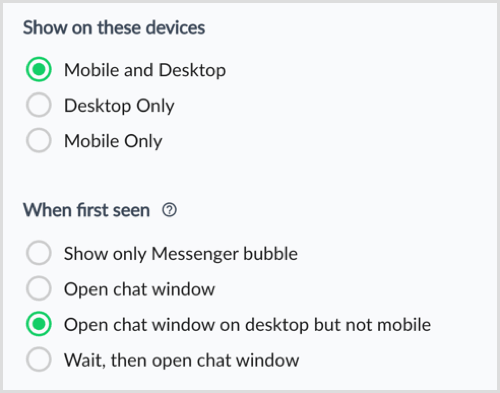
Next, choose whether the chat widget should be displayed on mobile and/or desktop. Also, select how the customer chat widget should behave when a person sees it for the first time on your website.
Now that you’re done configuring the changes, toggle your widget from Draft to Active at the top-right corner of the page.
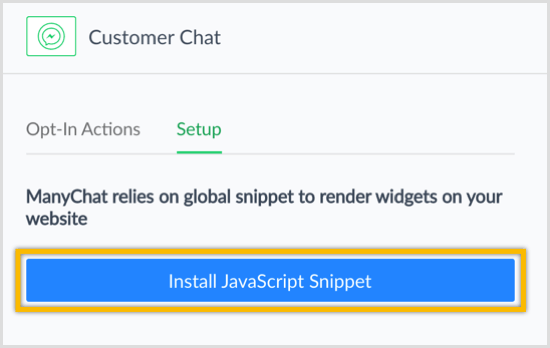
To install the Messenger chat widget on your website, click the blue Install JavaScript Snippet button.
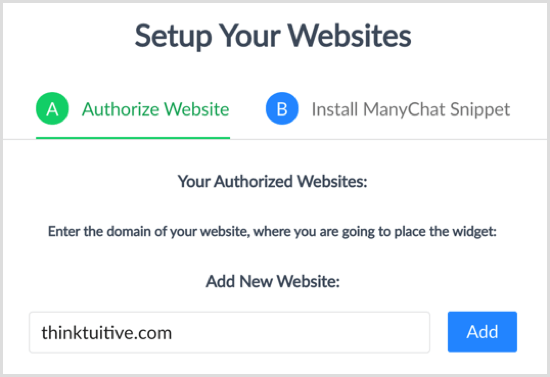
Enter the website URL where you’ll be installing this chat plugin and click Add. Then click Next.
ManyChat will automatically generate the code you need to paste into your website. Click Copy Code to Clipboard.
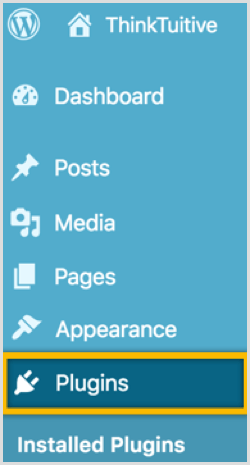
#3: Install the Code on Your WordPress SiteAfter you set up a Messenger chat feature using Chatfuel or ManyChat, the final step is to install the code on your website. If you use WordPress, navigate to your dashboard and click Plugins in the left-hand menu.
Then click the Add New button at the top of the page.
In the search box, search for the free Insert Headers and Footers plugin.
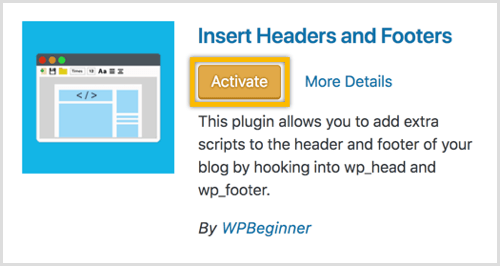
Click the button to install the plugin and then click it again to activate the plugin.
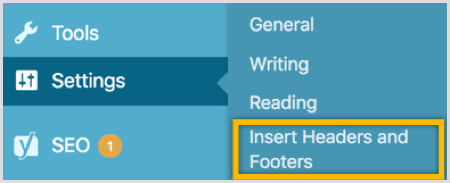
From the left sidebar, click Settings and choose Insert Headers and Footers.
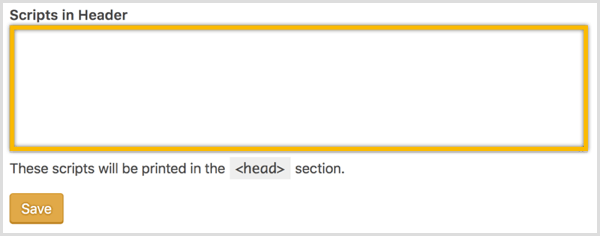
Finally, paste the Messenger chat code into your script header and click Save.
If you refresh the page, you should now see the Messenger chat plugin appear on your site. Tip: If you use Leadpages, follow these steps to embed the widget:
Other Helpful Resources Messenger Inbox To reply to users who have messaged your business, you can either use the Inbox link on your Facebook page or download the official Facebook Pages Manager app on iOS or Android.
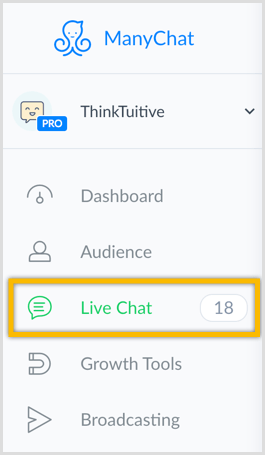
If you’re using ManyChat, you can also reply to users from the Live Chat tab. ManyChat doesn’t have an app but their live chat page looks great on a mobile device.
Customer Chat Plugin Documentation To learn more about customizing the customer chat plugin (if you’re a little more tech-savvy), check out the official Facebook documentation for details. Conclusion By offering your website visitors a convenient way to communicate with your business through the Messenger live chat plugin, you’ll be able to:
You’ll also be doing this on Messenger, a free platform that’s currently used by over 1.3 billion people, with over 2 billion messages sent between people and businesses each month. What do you think? Do you have a Messenger bot? Are you thinking about installing the Messenger live chat plugin on your website? Please share your thoughts in the comments below.  Social Media via https://ift.tt/1LtH18p May 10, 2018 at 05:07AM
0 Comments
Leave a Reply. |
�
Amazing WeightLossCategories
All
Archives
November 2020
|













 RSS Feed
