
|
http://bit.ly/2CCI5tE
How to Photograph Mysterious Floating Scrabble Letters http://bit.ly/2SlbEFH
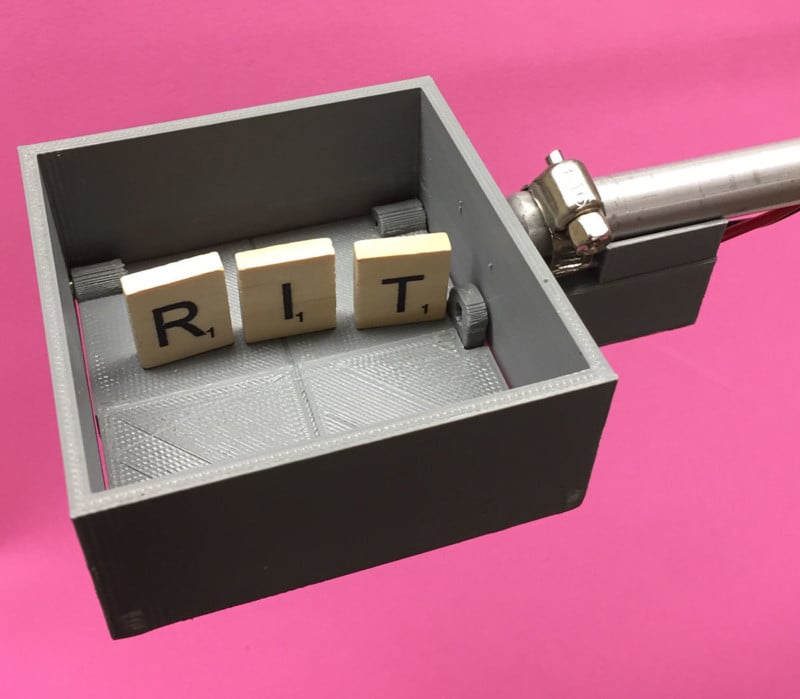
This past month, a student showed me an Instagram post with floating scrabble letters and asked me how it was done. After a few moments of reflection, I decided there was a number of ways to photograph floating letters and it would be a great idea for a student lab. To explore different techniques would be a great lab. The students evaluated the techniques to see which was best for creating floating letters. The Scrabble letters are obtained from an online retailer that sold a large bag of letters for a reasonable price. After several other experiments were tested, the best results were obtained by the “trapdoor” technique. This experiment was the students favorite and the technique I will explain here. In the trap-door technique, the scrabble letters are arranged in a specially built box that has two doors on the bottom that swing open when a solenoid is energized. The trap door is an easy device to manufacture and the one I use was 3D printed, by eBay seller talos_crete. He sells the 3D printed drop box or trap door for around 50 dollars. The current arrangement only allows four letters to be dropped at a time. For larger groups of letters, a larger apparatus would be better. The process is controlled by programming an Arduino processor to use a push button to start a clock and energize the solenoid which in turn opens the trap-door. After the letters fall the desired distance the high-speed flash is triggered to stop the motion. On this apparatus, the camera is set to bulb mode to catch the action, but future systems will be controlling a camera to take a picture at the correct time. This improvement will allow the system to operate in a room with the lights on. The process is so stable that one of the students Ashley Crichton made a GIF: The trap door ready to drop scrabble letters:
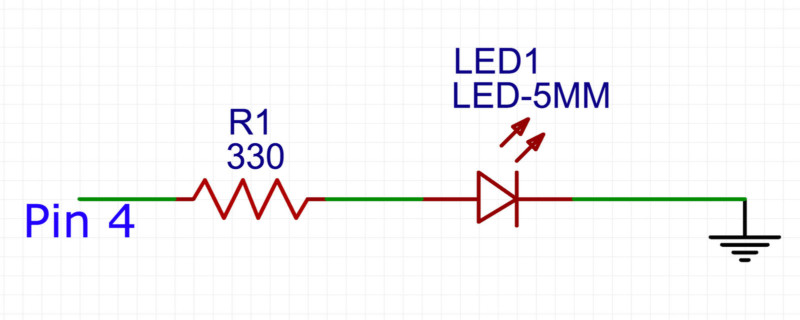
The circuit:
The switch resides on an electrical breadboard for this demonstration. When the switch is pressed, the Arduino pin 7 goes to a +5volt (high) value and this triggers the program to start.
I like to stress the power of a glowing LED to indicate the experiment is. This project is no exception. When the program starts up, the LED is turned on to show that something is working.
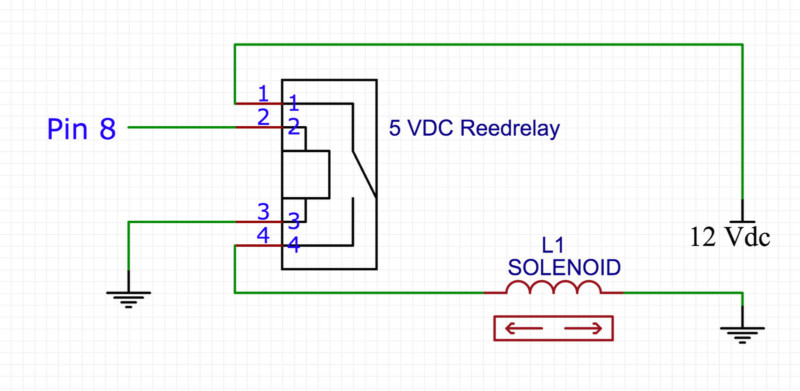
The next step that the program does is open a reed relay. This is basically a switch that allows the Arduino to control more voltage and current than can go through the microprocessor. Here the 5v DC reed relay opens a switch that allows the 12 VDC that the solenoid needs to open the trap-door. The reed relay also has the advantage that it isolates the 12VDC supply from the Arduino circuitry. The reed switch is not super-fast, but it is sufficient for this application.
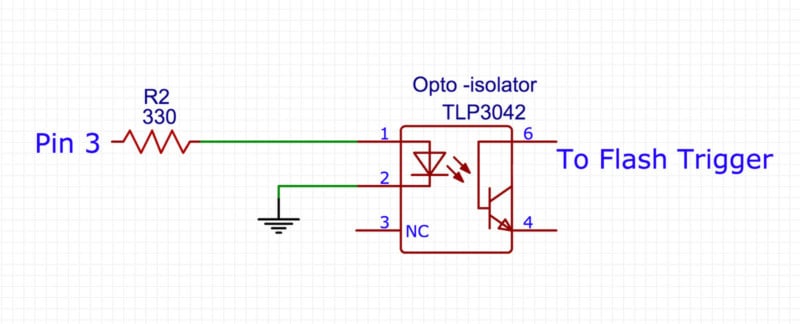
To trigger the flash, I used an optical isolator that keeps the circuits from the flash trigger separate from the circuits for the Arduino. I could use a reed relay for this application, however, the opto-isolator is much faster. This also a nice way for students to be introduced to an optical isolator. 
In conclusion, the students decided that the trapdoor technique of dropping letters was the easiest and yielded the best results. The elimination of trial and error from the process allowed the students to get the letters in the exact position they desired every time. 
During the day, the students were experimenting, Chris Marquardt from the podcast Tips From The Top Floor made the following video of the process: You can find the code here. About the author: Ted Kinsman is an assistant professor of photographic technology at the Rochester Institute of Technology. He teaches advanced photographic technology, light microscopy, and macro photography courses. Kinsman specializes in applying physics to photography. You can find more about him and his work in his faculty profile and on his website. Photography News via PetaPixel https://petapixel.com December 28, 2018 at 11:46AM
0 Comments
http://bit.ly/2CDMtsu
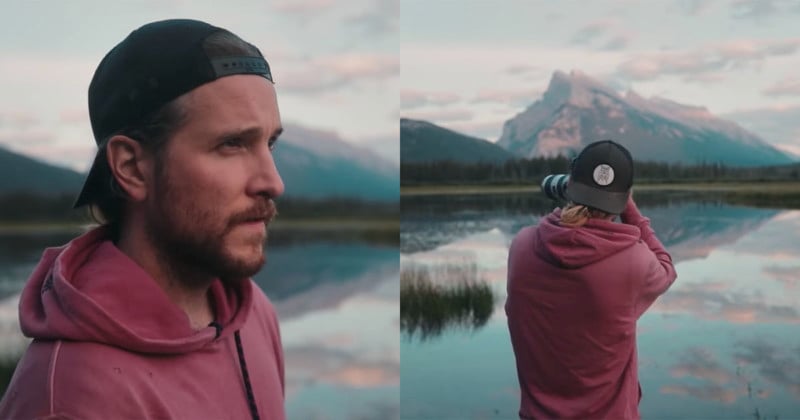
The Bucket Shot: Peter McKinnon’s Journey to Shooting His Dream Photo http://bit.ly/2AiQu3Y Growing up as a skateboarder and BMX biker, Peter McKinnon never thought he would one day become a creative. But after he received a camera, he was bitten by the photography bug and got hooked. This 23-minute short film, titled “The Bucket Shot,” tells the story of McKinnon’s life journey to shooting the photo of his dreams. The Toronto-based McKinnon’s eyes were opened to the joy of photography after he received a point-and-shoot camera as a gift for being in his sister’s wedding party. And after seeing his friend’s DSLR in action, McKinnon saved up and bought his own. He then dove headfirst into photography, shooting everything from weddings and portraits to stock photos. “It just took a hold of me completely, consumed my life,” McKinnon says. “From that point, I identified as a photographer.”
But the genre that stoked McKinnon’s passion the most was landscape photography. “There’s just nothing like waking up early before the rest of the world, heading out when it’s still dark, and seeing nothing, but you know that landscape is right there waiting for you,” McKinnon says. “It’s only a matter of time before the veil is lifted and the light starts to make it come alive. You’re the only one there with your camera, and you’re capturing every moment of that. “That’s a feeling that only photographers know well. It’s incredible.” Over 9 years of his journey as an artist, one shot has been swirling around in McKinnon’s mind: he wanted to visit Moraine Lake in Canada’s Banff National Park during winter and capture the snowy lake with the water still liquid and blue. So when the opportunity finally presented itself, McKinnon bought a plane ticket and flew across Canada in hopes of capturing his dream bucket shot. Getting there was just the first step: as landscape photographers know well, having things like lighting and weather come together just right is often a game of luck and perseverance. McKinnon has plenty of perseverance, and on that day, luck was in his favor. “I got lucky,” McKinnon says. “It was a quick break in the fog. I stood there. This was the exact moment everything came together. Everything came together in one moment. “I snapped the frame, and I nailed it. It was perfect. […] It was the bucket shot.”
“Photography means something to me,” McKinnon says. “What does it mean to you?” Photography News via PetaPixel https://petapixel.com December 28, 2018 at 11:28AM
http://bit.ly/2VfR3V2
4 Good Reasons + 1 Barely Adequate Justification to Shoot With a Rangefinder http://bit.ly/2AjLuMo
The SLR has been the dominant camera type in photography for the last 70 years. SLRs are more intuitive, easy to focus, and versatile when it comes to mounting lenses of any length. So why does the rangefinder, as a design, persist into the modern era? There is not a single reason why anyone should be using these archaic and fiddly cameras when more advanced and efficient machines exist. There are actually 5 reasons: 
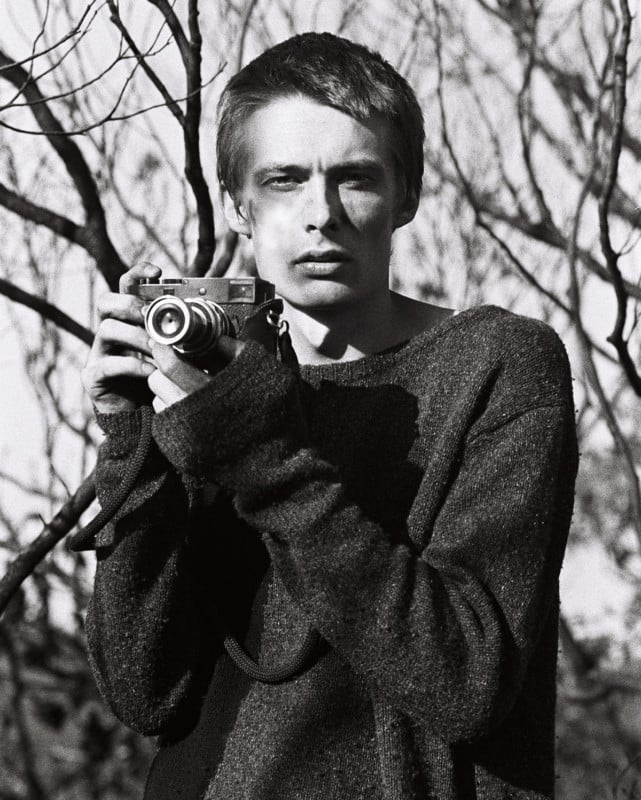
1. They Are Harder to Use, and You Look Cool Shooting ThemRangefinders just look better – they are the most ‘camera’ looking camera that there is. Shooting with them makes you feel like a photographer – there is a sense of sophistication and yes, snobbery, to using a piece of equipment that the average person won’t know how to use. Any monkey can click a Canon 5D into intelligent scene mode and fill an SD card with ‘usable’ pictures, but it takes a certain aptitude to accurately focus and manually expose a Leica loaded with Tri-X to take a grainy photo of a graffitied wall. And for this reason, people will react differently to having a Summicron shoved in their face, compared to a plastic 18-55mm Nikon kit lens – not that either piece of equipment takes better or worse photographs. Authoritative gear just makes you look like a good photographer, whether you are one or not. 
2. Zone Focus!For me, the great irony with rangefinders is that I rarely use the rangefinder. I much prefer to zone focus, looking at my lenses distance scale. At first, especially when shooting film, this was nerve-wracking and I took a lot of badly focused images. The trick I would learn is to start with large apertures. I know when I click my 35mm into f/8 all I need to do is guess the distance away from my subject, focus approximately and so long as I get it in the ballpark, I’m getting sharp pictures. As you get better, you can narrow your depth of field. Zone focus is the best way to get candid photos. I have heard some argue that rangefinders, by their design are more ‘discreet’ than an SLR, but that depends on how you use them. If you raise any camera to your face, people know you’re taking a photo of them. It’s the zone focusing system that allows you to shoot from the hip, or pre-focus so you can shoot and run without awkwardly staring down a lens at someone while you line up your images.
3. No Mirror ShakeA rangefinder is more forgiving than an SLR when it comes to shooting low shutter speeds handheld because the lack of a mirror will reduce the amount of shake during the exposure. I find typically that I am able to shoot as low as 1/15 with my ZM and 35mm lens without shake, provided I’m both warm and sober. But with the same focal length on my Nikon, I will only go as low as 50th of a second to guarantee sharpness. That’s almost two extra stops of light that I can get out of a scene when I shoot with a rangefinder! 
4. They Have The Best LensesThe snobbiest reason to use a rangefinder: rangefinder lenses, particularly Leica, Zeiss or Mamiya lenses are generally considered as the best in the world. They are the sharpest, have the least distortion and the best color rendition around and are often the most compact – their legendary status is well earned. Rangefinder ultra-wide lenses, in particular, have far superior optical quality and much less distortion than their SLR equivalents. My favorite crazy lens is the 18mm Distagon, which huge depth of field makes missing focus virtually impossible but pushes to creatively frame your subject. 
5. You Learn to Use Your Eyes, and Not a Lens, to Frame PicturesThe main disadvantage to shooting with a rangefinder is also one of its greatest strengths. Framing with an SLR is easier and more accurate than a rangefinder because you see what the lens will capture. Rangefinder frame lines are only an approximation, not an exact cut of your final frame. This forces you to think differently about the way you frame photos. When you look through a lens, you lose sight of what’s outside of the image that you’re taking. You learn to think of pictures through a lens. A rangefinder will teach you that taking photos happens through your eyes. After you become familiar with it, you will start to ‘see’ the frame lines with your mind’s eye, and be able to pre-visualize your pictures before you even have your camera in your hand. 
To ConcludeAnd if that does sound like pretentious wank to the SLR or digital mirrorless user, it might well be. Something I say to reassure myself that all that money spent on this equipment was to make myself a better photographer. The thing is though, I enjoy shooting with rangefinders far more than I do with other cameras, whether that be from the extra challenge or minor advantages they possess, the unique ‘perspective’ they lend to shooting, or simply because it makes me feel superior. Whatever the case, because I enjoy it, I shoot more and that’s what makes you get better at anything. About the author: James Cater is a digital and analog photographer, film lab operator, and model. The opinions expressed in this article are solely those of the author. You can find more of Cater’s work on his website and Instagram. This article was also published here. Image credits: Header photo of me and my Leica M-D shot by Matt Robson on TRI-X 400. Photography News via PetaPixel https://petapixel.com December 28, 2018 at 10:33AM
http://bit.ly/2QVrRF3
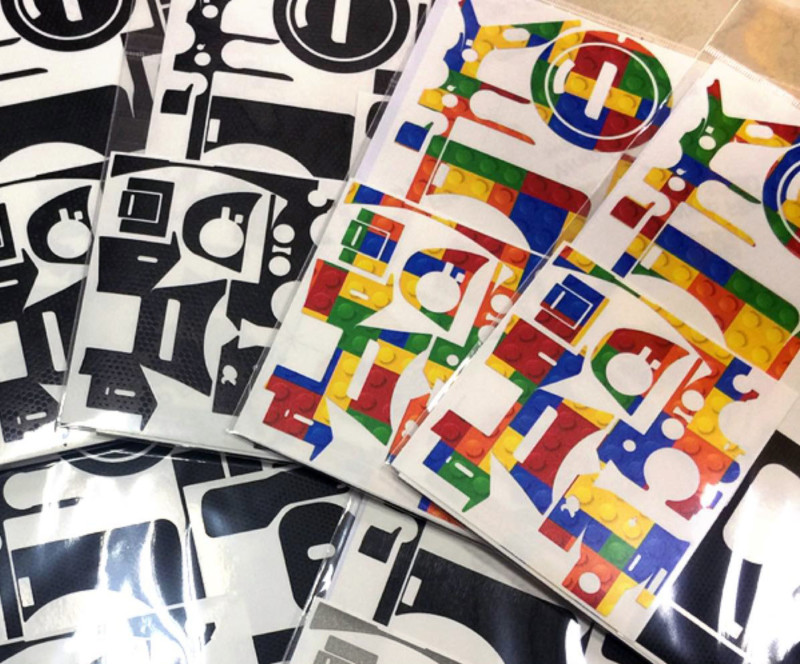
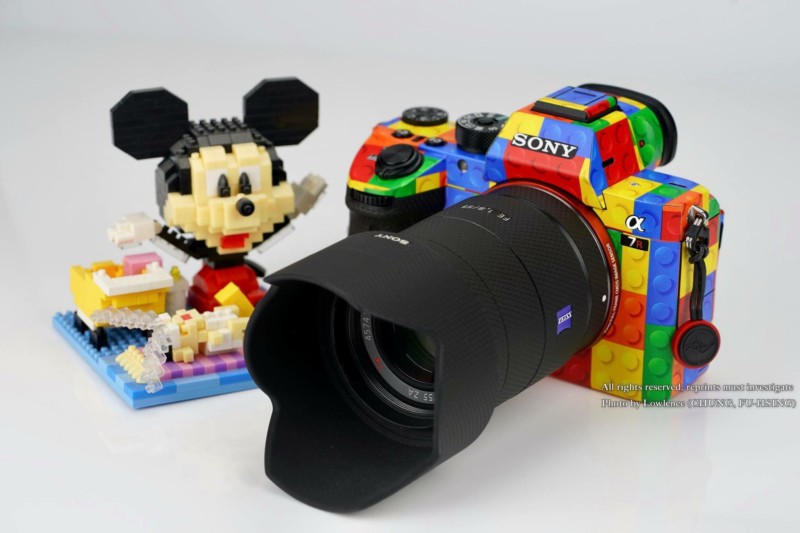
You Can Now Skin Your Sony Mirrorless Camera to Look Like LEGO http://bit.ly/2VgK3XX
Have you ever had the desire to make your Sony mirrorless camera look like it was built out of LEGO blocks? No? Er… Well, in any case, now you can. The Taiwanese company LIFE+GUARD has created a protective skin for the Sony a7 III and a7R III that features a pattern consisting of colorful LEGO-style blocks.
The result is a strange-looking camera that could come in handy if you work in certain genres (e.g. child portraiture).
The skin costs a cool $50 and can be purchased by contacting the company directly (an online store will be launched to sell the skin in early 2019). (via LIFE+GUARD via sonyalpharumors) Image credits: Photographs courtesy LIFE+GUARD Photography News via PetaPixel https://petapixel.com December 28, 2018 at 10:05AM
http://bit.ly/2QaQVCN
 Here is another in a long line of diffractive optics patents we’ve seen from Canon over the last couple of years. Since the Canon EXPO in 2015, we’ve all been wondering where the EF 600mm f/4 DO IS lens is, a lens we don’t think is ever coming at this point. A lot has changed over the last 3 years, and we expect any new DO super telephoto lens to be for Canon’s new RF mount. This latest USPTO patent showcases both a 500mm and 600mm optical formula. As Canon News points out, this patent shows Canon moving the lens elements closer to the camera body to improve balance. This is the same sort of design we saw in the brand new EF 400mm f/2.8L IS III and EF 600mm f/4L IS III lenses. Example 1:
Example 2:
Photography via Canon Rumors http://bit.ly/2CsmGDw December 28, 2018 at 09:34AM
http://bit.ly/2ETwHMC
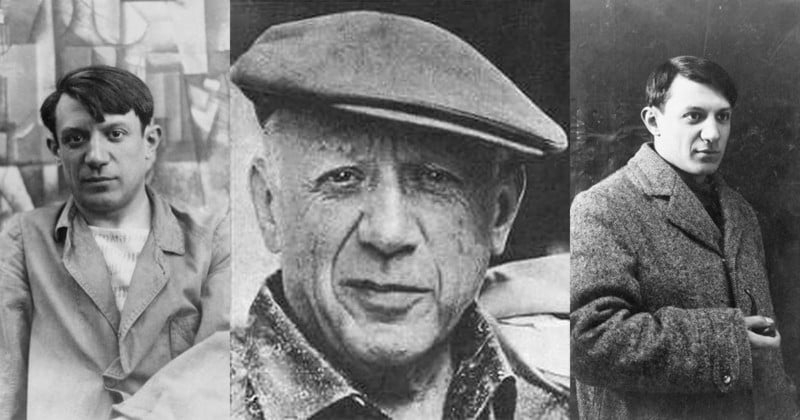
7 Things Pablo Picasso Can Teach Us About Photography http://bit.ly/2EQt8G0
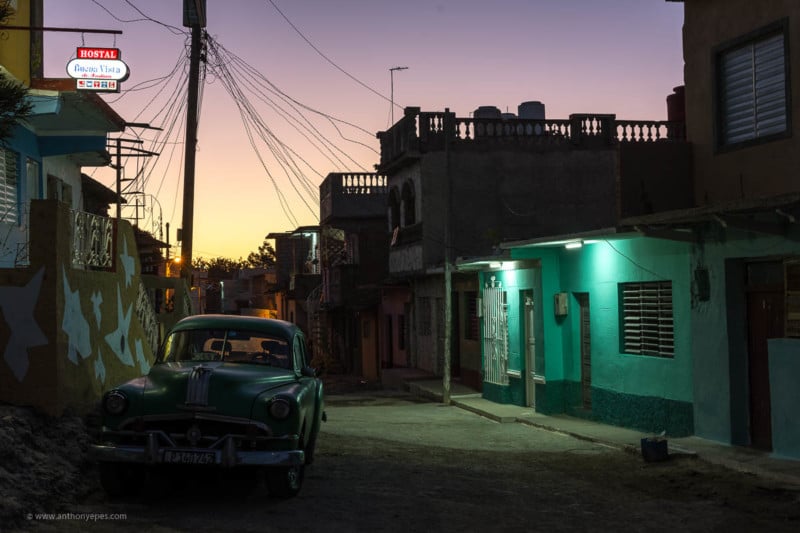
As I am always looking to improve my photography by learning, part of the process is seeking inspiration from others who create. I don’t, however, confine myself to just learning from other photographers. I cast my net for ideas wide, and look to artists, writers, musicians — whoever it is that will inspire me with new ways of seeing and fresh ideas. I’ve been spending a lot of time in Spain lately, close to Pablo Picasso’s birthplace. After visiting museums to see his work, and reading more about his creations, I found myself pondering over some of the ideas he talked about in relation to creating art.
Some of his ideas are fantastically inspiring and I’d like to share them with you today – and show you how they can help develop your photography. Let’s get started because, as Picasso said: “Inspiration does exist, but it must find you working.”
#1. “The artist is a receptacle for emotions that come from all over the place: from the sky, from the earth, from a scrap of paper, from a passing shape, from a spider’s web.” –Pablo PicassoWherever you are, you are absorbing the energy and emotions from everything around you. If you are in the right mental state, of being open and receptive, it can help generate wonderful ideas. Being peaceful and quiet — really looking at things, not necessarily in a super-focused way, but just allowing your attention to drift — is very helpful for your creativity. In fact, I encourage everyone to do as much of this type of ‘open awareness’ as it generates ideas for your creativity.
I read on the SIYLI website about open awareness in relation to meditation (which I think also applies to photography). Open Awareness “is your ability to maintain your presence of mind while allowing different stimuli to pass through your awareness – and it’s incredibly useful…When you cultivate open awareness, you open the doors to tremendous insight.” This helps pull us away from our usual barrage of thoughts (and things to do) and allows us to connect to the world around us, and draw ideas from it. I also like this from Picasso: “A piece of space-dust falls on your head once every day… With every breath, we inhale a bit of the story of our universe, our planet’s past and future, the smells and stories of the world around us, even the seeds of life.” So go find the stories!
#2. “If only we could pull out our brain and use only our eyes.” –Pablo PicassoThe mind is a busy place. It always seems to have a lot to sort out, think about and organize. But the busy mind is the worst state to be in when you are taking photos. Learning to see is about learning to ignore that busy, analytical mind and become present, learning to observe the world around you. It’s getting in touch with the present moment. I would also add: use your heart, your guts, to guide you. This is where our instinct lives. It’s where we get our ideas about photography without consciously knowing. Intuition is that knowingness, in a way where you are led by ideas and interests, and not by your logical, analytical mind. It also connects with what Picasso said: “My hand tells me what I’m thinking.” Your eyes, your instinct, can lead you in your photography. (Your busy mind will mostly lead you astray.)
#3. “If I paint a wild horse, you might not see the horse… but surely you will see the wildness!” –Pablo PicassoWe often think, especially as photographers, that we are photographing what we see. Of course, we must ‘see’. I talk about it endlessly because the ability to see and notice things in your environment is the number one thing most people are missing in their photography. But we are also photographing something that has generated a feeling in us. Something that has probed and provoked our interest. We see, we feel, and then we create. And what you end up creating can be anything! It can look like anything, feel like anything — the photograph, your art, is yours to make your very own.
#4. “To know what you’re going to draw, you have to begin drawing.” –Pablo PicassoThis is the same for any creative medium. If you don’t know where to start, don’t worry. Just begin, and that’s often when ideas start to flow. If I am busy with work and family life, it can sometimes take me a while to really get into the creative flow when I am out shooting. Instead of waiting, though, for inspiration, as Picasso said at the beginning of this article, I just get going, and wait for the ideas to find me when I am in the perfect place to do something about them with my camera in hand!
#5. “The more technique you have the less you have to worry about it. The more technique there is the less there is.” –Pablo PicassoThis quote sums up so much for me about why learning technique makes things easier when we are out creating. When you know your kit, you aren’t interrupted when you are in the creative flow. Instead of battling with your camera, you can get totally absorbed in that beautiful location, that interesting subject, or that absorbing light and create some incredible images. You become so at ease with your tools that your creativity just takes over. Even if you don’t feel like you’re particularly technical or confident with technique, I have seen hundreds of people in my workshops learn that with practice and focus, you can grasp anything. Besides…
#6. “I am always doing that which I can not do, in order that I may learn how to do it.” –Pablo PicassoAt the moment I like to think of not knowing how to do something as something to celebrate. It’s an opportunity to exercise my (always aging) mind; it’s an opportunity to learn and see something in a different way. Keep yourself young and your mind agile by learning new things. Plus, Picasso said: “He can who thinks he can, and he can’t who thinks he can’t. This is an inexorable, indisputable law.” I totally, totally agree. I didn’t think I could be a world-traveling photographer, teaching photography online and selling my work internationally. That seemed impossible to me ten years ago. But now, here I am. If I can do what I thought impossible, then so can you.
#7. “In art intentions are not sufficient and, as we say in Spanish, love must be proved by deeds and not by reasons. What one does is what counts and not what one had the intention of doing.” –Pablo PicassoThere is never a better time to do something than now. Picasso said so, so get started, OK? Enjoy this exploration into Picasso’s ideas, and I hope that it’s a little nudge to do something cool with your photography in the week ahead. About the author: Anthony Epes is a photographer whose work has been featured internationally; including on BBC, French Photo Magazine, Atlas Obscura and CNN. The opinions expressed in this article are solely those of the author. Epes is also a teacher – writing in-depth free articles on his website. Receive his free ebook on the two essential skills that will instantly improve your photos, and sign up to his weekly newsletter providing inspiration, ideas and pro-photo techniques. This article was also published on Cities at Dawn. Photography News via PetaPixel https://petapixel.com December 28, 2018 at 09:31AM
http://bit.ly/2GLzJ7a
7 Expert Editing Tricks for Portraits http://bit.ly/2SnVag4 As a portrait photographer in the digital era, you are expected to be very knowledgeable about Photoshop and Lightroom. This means that besides using basic edits you need to learn how to take your portraiture to a whole new level with more advanced editing tricks. There are many editing tools and procedures that take time to understand and use creatively, but they are definitely worth the effort because they can wow your clients. The following list of 7 advanced techniques will help you get the most out of your portraits! 1. Use the healing brush properlyThe healing brush can be more useful and more precise tool than the spot healing brush because it allows you to pick your own source points. It’s a great tool for fixing various skin issues – for instance, you can use the healing brush to remove pimples or other inconsistencies on the skin, such as wrinkles or redness. You can use this brush to get rid of various distractions on backgrounds too, which is truly useful in portrait photography. 
Photo by Allef Viniciusa on Unsplash 2. Know how to dodge and burnThere are many ways to use dodge and burn, but if you want to use them properly, you have to find the least destructive way to play with these tools. You should always create new layers for this kind of edits and name them properly so that you can easily find them later on, in your final round of editing. Dodge and burn are quite powerful and versatile tools – they can be set to affect the shadows, midtones, or highlights. You can also create a sense of depth by having an interesting transition from dark to light in some of your images where you played with these tools. 
Photo by Sorin Sirbu on Unsplash 3. Play with layer masksLayer masks are another important tool that every advanced portraitist should use. When you are toning or editing the portrait you often don't want the effects to be global. You can tone and edit only the selected parts of the image if you know how to use layer masks. In portraiture, it can be very useful to use layer masks with the hue/saturation adjustment layer. Body parts such as hands, ears and legs often have different colors and layer masks will allow you to balance these colors so that you can get the flawless skin color in your final image. 
Photo by Nick Karvounis on Unsplash 4. Try out different blending modesLayer blending modes are commonly overlooked in Photoshop, which makes them a true hidden gem. When we pick a blending mode, we’re asking Photoshop to blend our selected layer with the layer below based on the selected mode. This means that the pixels from the top layer are going to alter the color and luminosity of those on underlying layers. There are 26 different blending modes – you should try them out and get creative! 
Photo by Lydz Leow on Unsplash 5. Use the selective color tool to fix awkward color castsYou can use the selective color adjustment tool to edit specific tones and fix various color casts in your portraits. This amazing tool can help you achieve anything from darkening lip colors to fixing uneven skin tones. This tool also allows you to add blue hues to your shadows, gold tones to your highlights, and introduce similar small changes that can make your portraits pop. The dialog for selective color can be found in adjustment panels within Photoshop and it’s best to use it with a layer mask.
Photo by Sorin Sirbu on Unsplash 6. Play with gradientsThe gradient tool should be use sparingly because it tends to look quite overwhelming and it can change the entire atmosphere of the portrait. However, you shoud give it a try because it can add a spark of vibrant colors to your portraits, especially those that lack visual interest. When used right, gradients can look quite refreshing and memorable. You should always change the layer opacity (of gradients) to around 20% – 30% for a subtle yet magical effect. 
Photo by Kevin Laminton Unsplash 7. Use presets to speed up your editingUsing a quality preset can save you a lot of time. When installed, presets add an array of different colors, tones, and other adjustments you may need. You can adjust any preset according to your needs, which makes them very versatile and user friendly. Lightroom presets give you a great starting point and allow you to do one-click edits. They are also really helpful when it comes to repetitive tasks, such as editing a group of photos that are in the same time frame or have similar exposures. 
Photo by Christopher Campbell on Unsplash
These seven photo editing tips will surely help your improve your portrait editing routine. Of course, there are many, many more tips and tricks when it comes to editing portraits, so feel free to check out the following links: Further Resources:The post 7 Expert Editing Tricks for Portraits appeared first on Light Stalking. Photography News via Light Stalking http://bit.ly/2kwTW5i December 28, 2018 at 08:01AM
http://bit.ly/2RkSORM
Gear of the Year 2018 - Allison's choice: Google Photos http://bit.ly/2ESJjTm At some point in elementary school my sister was required to study San Francisco, which – if you've only ever lived in the Midwest – is a far-off, exotic city. She took an interest in the place, and over the dinner table she'd rattle off facts about the city, like how many hills there are (seven) and how many mosquitos there are (none). In contrast to our part of the country, an extremely flat, mosquito-riddled hellscape, San Fransisco seemed like almost a mythical place. Jumping ahead a few years, my sister was on the verge of turning thirty, and we decided to celebrate with a trip to the destination of her choice. Naturally, San Francisco was at the top of the list. At last, she'd finally get to experience the seven mosquito-free hills for herself. In four days we covered most of the standard stuff – the bridge, the prison, the endless souvenir gift shop that is the Fisherman's Wharf. We drank Irish coffees at the cafe that claims to have invented them (but probably didn't), ate avocado toast at the place that claims to have invented it (and probably did), and took a lot of selfies in front of iconic things.
During the course of the trip, we documented our adventure the way most older millennials do: on our phones. When we returned to our respective homes, she requested that I add my photos to a shared Google Photos album so she could show our mother over dinner. I already backup my iPhone photos to the Google Photos app, so that was easy enough to do. I also wanted to show the Alcatraz photos to my boyfriend (disused prisons are his thing) but flipping through them on my phone clearly wasn't going to do them justice. Then I remembered the Chromecast plugged into the back of our TV, and within a few minutes I had a good old fashioned "How I Spent my Summer Vacation at a Former Federal Penitentiary" slideshow going. To commemorate the whole trip, it occurred to me that a photo book might make a nice birthday present for my kid sister. And at this point, the whole thing starts to sound like a commercial for Google Photos: I selected images, added a title and text, paid for and shipped the whole thing from my phone while commuting to work on the bus. I didn't even need to get out my wallet, because Google remembers my credit card number. Here's the thing: having the device I use to capture the images integrated into an ecosystem designed for sharing actually is really useful. My photos from that trip didn't die on a hard drive – they came to life. And sure, my iPhone SE takes some pretty lousy photos in low light. But you know what? They're fine. Nobody I showed them to complained about detail retention. And I wasn't looking to blow them up and put them on my wall, I just wanted to remember a trip that was about hanging out with my sister. There's still room for improvement – the Assistant feature continues to be a mixed bag of sometimes nice, sometimes ridiculous AI-generated albums, videos and "stylized" photos. At least it does a good job of auto-suggesting items to archive, like screengrabs and pictures of packaged dinner re-heating instructions. But really, it's fine because it's not a core feature – anything useful the Assistant does is basically a bonus.
I think what impresses me most is that I didn't at any point decide "Alright, I'm going to go all in on the Google ecosystem." It just happened organically. I didn't think I was the kind of person who would want to play a summer vacation slideshow on her TV – until I was. When the technology is seamless and available at your fingertips, it turns out you're more likely to use it. And if that means more people doing more to share their photos, then that's enough for me to call Google Photos my gear of the year. Photography News via Dpreview http://bit.ly/i0r8o5 December 28, 2018 at 08:00AM
http://bit.ly/2ThH28e
2018 was definitely the “year of the lens” for Canon as well as the third party manufacturers. Canon announced nine lenses, their most since 2012, including 7 L lenses, which is the most Canon has ever announced in one calendar year. Canon camera announcements were a different story. There has been no “professional” camera announcement from Canon since the EOS 5D Mark IV in 2016. The EOS 6D Mark II was the only full frame camera announced in 2017, a year which brought us oddities like the EOS 77D and the PowerShot G1 X Mark III. 2018 only saw 2 ILC cameras that brought about any sort of excitement. The EOS M50, which has been a very successful APS-C mirrorless camera, as well as Canon’s first full-frame mirrorless camera, the EOS R. As you all know, the EOS R also brought us the brand new RF mount. Canon also announced two entry-level Rebel’s, the EOS T7 and the super cheap EOS Rebel 4000D for certain markets. The EOS 4000D sports a lens mount that isn’t metal! Two non-G series PowerShot cameras were also announced. Including the long-awaited superzoom the PowerShot SX70 HS, which unfortunately was just a warmed over version of the PowerShot SX60 HS. Canon also announced the compact PowerShot SX740 HS. We expect 2019 to be a much bigger year for camera bodies from Canon. We expect at least two RF mount camera bodies, possibly an EOS-1D X Mark II replacement as well as some upper tier APS-C camera bodies. The Contenders
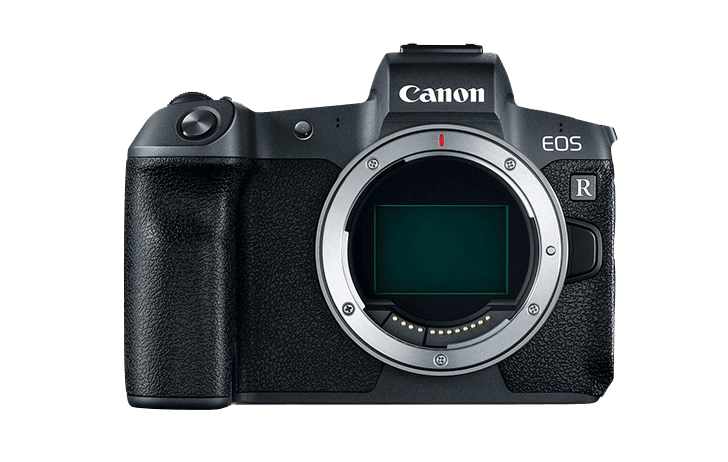
Canon’s first ever mirrorless camera, the EOS R, proves to be well worth the wait with its revolutionary features. Integrated into the camera is Canon’s brand-new RF lens mount, which allows the EOS R to support a new series of lenses and highly advanced optical technologies.
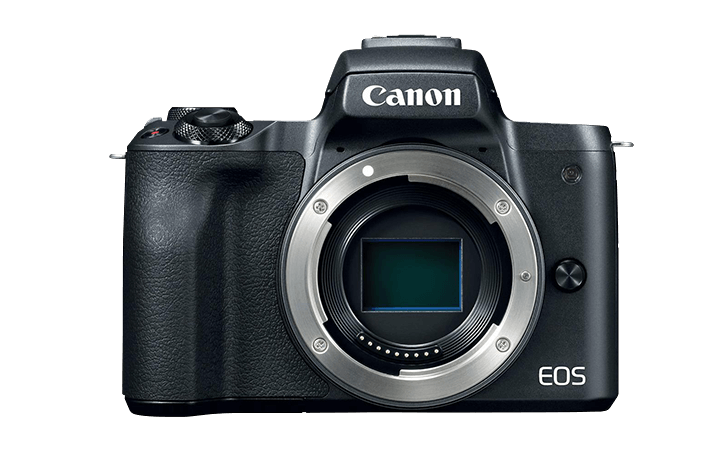
The EOS M50 is a compact interchangeable lens camera for aspiring photographers looking for an easy way to boost the quality of their photos and videos. With clear, high-resolution 4K UHD 24p video, you can capture the incredible details and cinematic moments of your life at home or wherever your adventures take you.
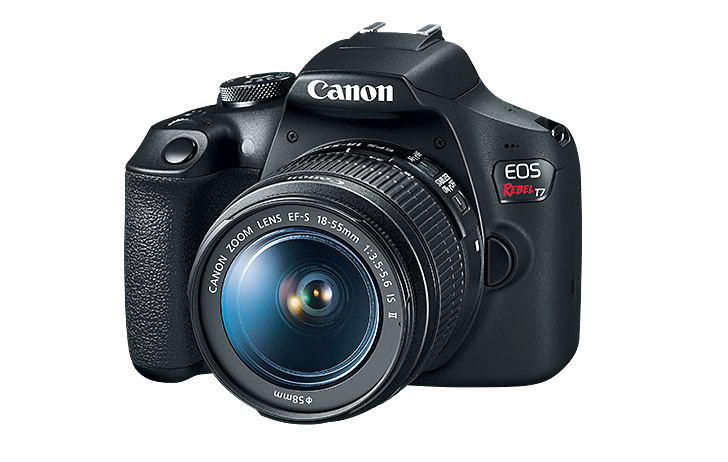
Canon EOS Rebel T7 Ideal for mobile device users wanting to take the next step with their photography, the EOS Rebel T7 camera combines fantastic features with easy-to-use operation for high-quality images you’ll be proud to share. Harness the power of the EOS Rebel T7’s large 24.1 Megapixel CMOS sensor to realize your potential for great shots
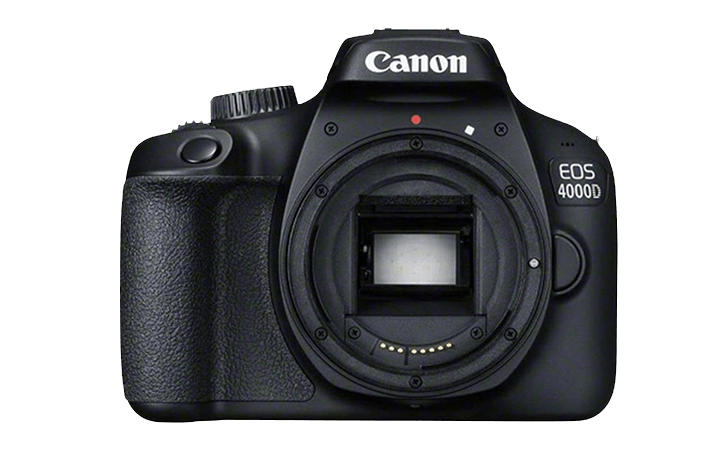
Canon EOS Rebel 4000D The Canon EOS 4000D Digital SLR camera combines tried and tested hardware with Canon’s great functionality and guidance software to provide a perfect camera for those wanting to make the move to DSLR.
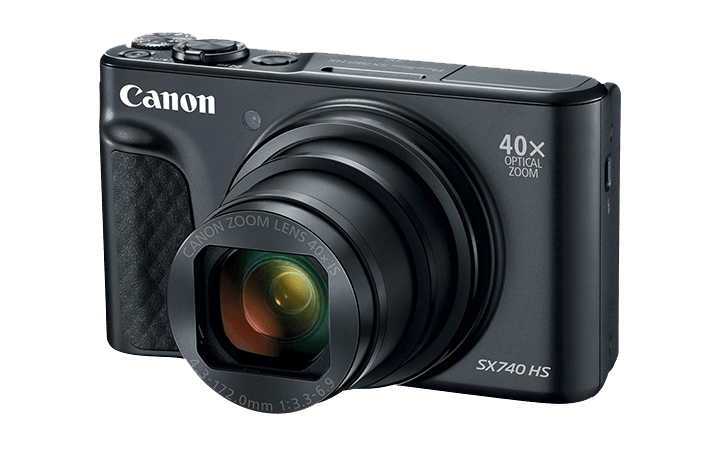
The Canon PowerShot SX740 HS Digital Camera combines superior, high-definition imagery with exceptional zoom capabilities in a small and compact body. This revolutionary point-and-shoot is Canon’s first Powershot camera to deliver 4K video (3840 x 2160 at 30fps)—all thanks to its 20.3MP CMOS sensor and state-of-the-art DIGIC 8 imaging processor.
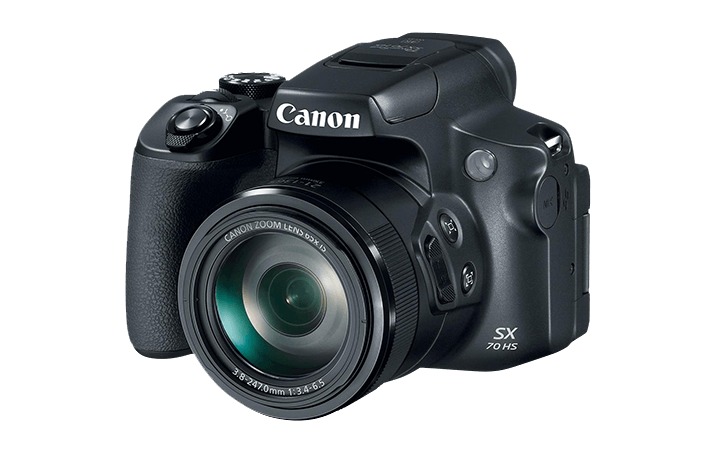
The Canon Powershot SX70 HS is a versatile point-and-shoot digital camera that is distinguished by its impressive optical zoom range. Its high-resolution imaging performance and 65x zoom lens enable both entry-level and seasoned photographers to capture a wide variety of scenes from a distance. Be sure to cast your vote in our other polls. Your favourite Canon lens of 2018, and your favourite third-party lens of 2018. Photography via Canon Rumors http://bit.ly/2CsmGDw December 28, 2018 at 07:28AM
http://bit.ly/2SpboWi
The post The dPS Top Landscape Photography Tips of 2018 appeared first on Digital Photography School. It was authored by Caz Nowaczyk.
This week on dPS we’re featuring some of the top articles in different categories that were published on the site over 2018. We’ve already shown you the Top All-Round Photography Tips, the Top Photography Gear Tips, and the Top Post-Processing Photography Tips of 2018. This one is all about the best landscape photography tips of the year. Here are the top landscape photography tips articles of 2018:1. How to Choose the Right ISO for Landscape Photography2. Tips for Shooting Landscape Photography Towards the Sun3. 5 Tricks to Make Your Landscape Photos Stand Out4. 3 Techniques and Tips for Photographing the Moon in the Landscape
5. 7 Tips to Help You Capture the Perfect Landscape Photo6. How to Make Storytelling Landscape Photos – 4 Steps7. Tips for Shooting Landscapes With a Telephoto Lens8. Using Layers and Foreground Interest for Better Landscape Photography
9. Understanding Aperture and Landscape Photography – Why F16 Isn’t the Only Choice
10. Getting Started with Landscape Photography – 4 Easy Tips for Beginners
11. How to Add a Sense of Scale to Your Landscape Photos12. 5 Landscape Photography Mistakes That Keep Your Images From Standing Out
13. Beginner’s Guide to Natural Light in Landscape Photography14. How to Work with Different Shutter Speeds for Landscape Photography
15. 7 Landscape Photography Tips You’ll Wish You Knew EarlierNext up, we’ll show you the dPS Top Portrait Photography Tips of 2018. The post The dPS Top Landscape Photography Tips of 2018 appeared first on Digital Photography School. It was authored by Caz Nowaczyk. Photography via Digital Photography School http://bit.ly/29wB9CX December 28, 2018 at 07:09AM |
Categories
All
Archives
November 2020
|


 RSS Feed
