
|
http://bit.ly/2KjAdl9
Kickstarter campaign seeks funding for Alter RFS, a hinged lens filter adapter http://bit.ly/2Xhh9YD Alter has launched a Kickstarter funding campaign for Alter RFS, a Rapid Filter System that attaches lens filters to a camera via a hinged adapter. The Alter RFS friction hinge supports 270 degrees of rotation, enabling photographers to lower a filter over the lens when needed, then quickly lift it out of the way again.
Alter RFS, which is made out of milled anodized aerospace aluminum, features a magnet for sealing the filter over the lens and a light shield for preventing light leaks. The adapter supports existing lens filters with universal threads and can be rotated to move the hinge to the ideal position for the user's needs (from the top to the side of the lens, for example).
The friction hinge prevents the filter from falling back down over the lens even during rough camera movements. Alter plans to offer the Rapid Filter System in filter sizes 40.5mm to 105mm, as well as an RFS+ adapter model that includes a built-in step-up. Alter is offering Kickstarter backers various discounts for pledging funds to the campaign, with those discounts starting at $67 USD for a single Alter RFS up to $59 USD each for three units and $55 USD for any additional units beyond that. The company anticipates a retail price of $79 USD, assuming the campaign is successful and the product is brought to market. Shipments to backers are estimated to start in September. Disclaimer: Remember to do your research with any crowdfunding project. DPReview does its best to share only the projects that look legitimate and come from reliable creators, but as with any crowdfunded campaign, there's always the risk of the product or service never coming to fruition. Photography News via Dpreview http://bit.ly/i0r8o5 May 31, 2019 at 01:43PM
0 Comments
http://bit.ly/2HOA1bZ
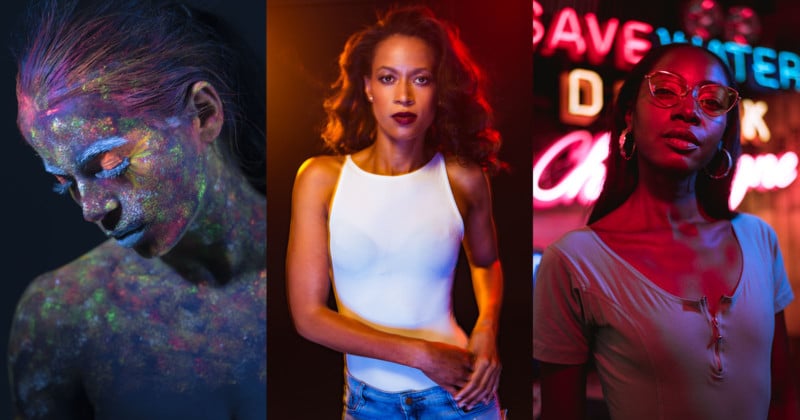
3 Ways to Boost Your Portraits Using Color http://bit.ly/2JRDGYS
We photographers obsess about finding the right light. We understand how to use hard light, when to use soft light, and get excited by directional light. Portrait photographers learn how to control light using flashes and modifiers, and become experts in getting the most from natural light. Light is an electromagnetic wave, and the frequency of that wave determines whether the light is visible or invisible to humans, and what color it is. Once you’ve mastered working with the quality and direction of light, maybe you should try experimenting with this other dimension and play with the color of light. It could really take your portraits in a new direction, and you might start to see things very differently. Here are three very different ways you could try to make an impact on portrait photos using the color of light: 1. Use UV Light
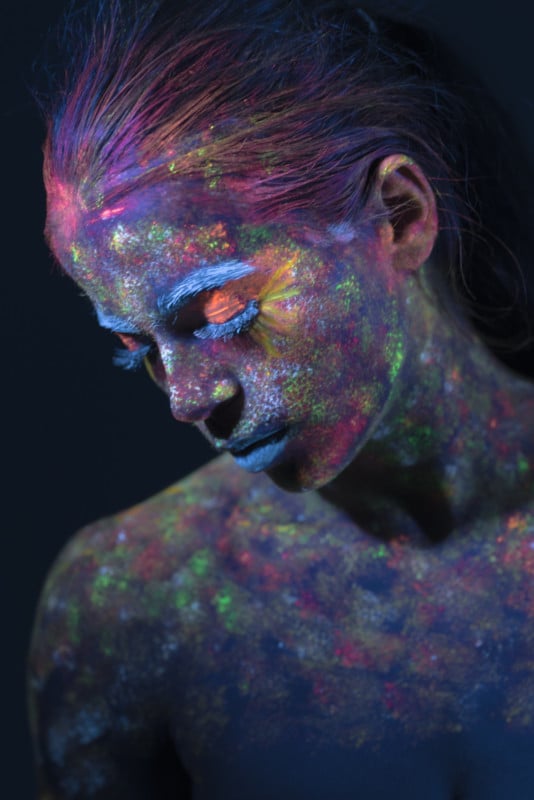
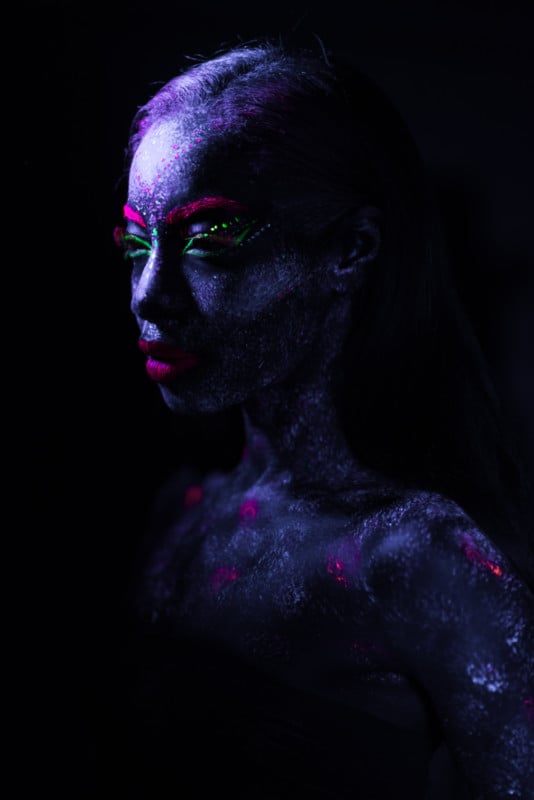
The color of the things we see is due to light waves of different frequencies in the visible spectrum hitting our retina. Electromagnetic waves outside of the visible spectrum are also present, it’s just that we can’t see them, but that doesn’t mean we can’t use them. UV light is just outside the visible spectrum. Usually it’s invisible, but it can be seen when there is little visible light and the UV light hits certain compounds, such as those found in neon makeup or body paint. When it does, it creates a glowing, colorful light that can look spectacular.
Try shooting a model wearing neon make up under UV light, it will give totally different results to those achieved using visible light. Technique: LED UV lights are fairly cheap and similar in size and weight to LED constant lights. Start out with just one. They emit most of their light in the UV spectrum, and very little in the visible spectrum. You’ll need to use the UV light in a totally dark room to see its effect. Next, get some neon body paint or makeup and a willing model. Apply makeup to your model, turn the ‘normal’ lights off, turn the UV lights on, and shoot! 2. Gels
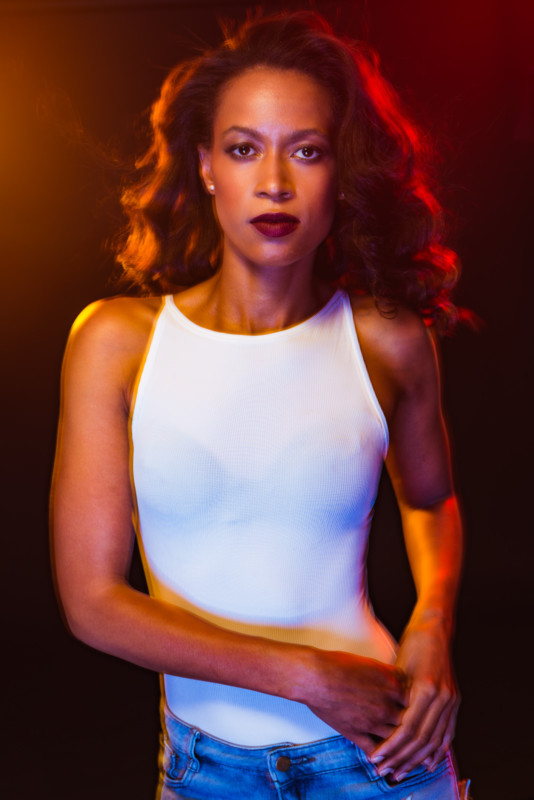
Gels are colored sheets of flexible plastic that can be attached to lights in order to give a color tone. Gels can be used to subtly tone a portrait or to add a kick of creative colorful impact. An effective way to improve the colors in a portrait is to make your flash match the color temperature of the ambient light, here’s an example: When shooting in warm light (such as at sunset), light from a flash can look white and cold in comparison to the golden sunlight. At times like this, you could use a warming (slightly orange) gel to match the color temperature of your flash to the ambient light.
A creative way to use gels is to employ them to add color to portraits for creative effect. You need to do some planning and it’s probably better to start out with complementary colors. Interesting effects can be achieved by adding color to different lights. A simple option is to add color to the background by adding a gel to a light pointed at the background. This will tone the background with the color of your gel. A step up from this is to add color to your fill light which changes the color of the shadows. Experiment with the power of the gelled fill light to get the right look. You can also gel your main light and hair light. This technique works with both flash and constant lights. There is so much room for experimentation once you start using gels. It can be quite challenging to get right, but once you master it, you will never look back. 3. Shoot Under Neon
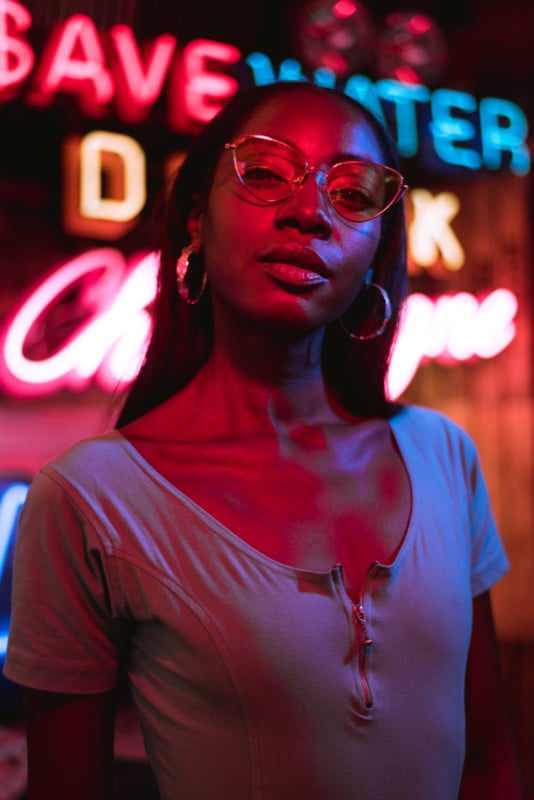
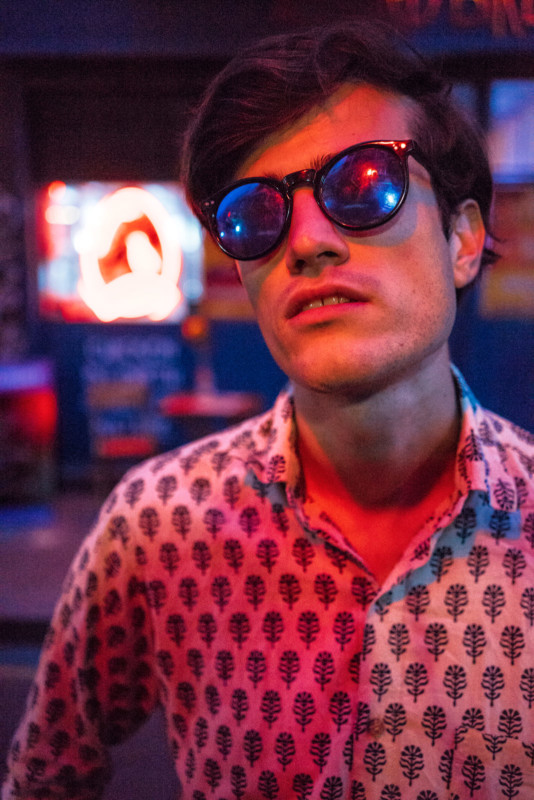
Why limit yourself to shooting portraits under lights that are the same color as daylight? In most towns, you will find shops, signs and all manner of things that are lit with colorful neon lights. These all make fantastic light sources for portrait photography. The light from the neon sign can be used as the main light on your subject, or you can use it as an accent or fill light. You could just have the neon behind your subject to give you a dreamy, colorful, out of focus background.
You’ll need to shoot when there is not much daylight to make the neon lights show up, and pick a person who fits in with this type of light. Try asking them to wear glasses because they will show the lights as reflections. Neon lights are also usually close to windows, so you could try getting window reflections in your shot too. Seek out some neon to give your portraits a colorful boost. About the author: Andrew Mason is a portrait photographer based in London, UK. The opinions expressed in this article are solely those of the author. You can find more of Mason’s work on his website. Photography News via PetaPixel https://petapixel.com May 31, 2019 at 01:10PM
http://img.youtube.com/vi/tJxHPeqgrJc/0.jpg
Heavy Metal Singer Kicks Phone Out of Fan’s Hands During Show http://bit.ly/2I8kYZC Singer Rob Halford of the famous English heavy metal band Judas Priest is making headlines after he was caught on camera kicking a phone out of a fan’s hands in the middle of a song. Planet Rock reports that Halford was performing at the Rosemont Theatre in Illinois on Saturday, May 25th, and that many fans in the sell-out crowd were shooting photos and videos with their phones. But one particular concert-goer at the very front of the crowd was reportedly shining or flashing his phone’s LED light while shooting the performance, and the distraction got on Halford’s nerves. The singer, without warning, ran to the front of the stage and gave the fan’s phone a strong kick “with great gusto,” sending the phone high into the air before it landed several rows back. Halford has since released a statement defending his actions. “The facts are we love our fans and you can film us all you like and watch our show on your phone rather than in the flesh,” the singer tells Loudwire. “However, if you physically interfere with The Metal God’s performance you now know what will happen.” Many famous music artists have taken a stand against the widespread practice of shooting photos and videos throughout concerts rather than “fully enjoying the show” — rock star Jack White banned fan photos at his shows last year, announcing that attendees would need to have their phones put into locking smartphone pouches to ensure a “100% human experience.” But performers generally don’t go so far as to kick phones and cameras out of their fans’ hands. Photography News via PetaPixel https://petapixel.com May 31, 2019 at 12:17PM
http://img.youtube.com/vi/2C0WWPMkYRc/0.jpg
LIT wireless xenon flash Kickstarter campaign cancelled after project reevaluation http://bit.ly/2wwTVlu The Kickstarter funding campaign for the LIT wireless xenon flash has been canceled. The team behind the device detailed their decision to end the funding in a post published on the Kickstarter update page, where they state, 'After doing some additional calculations during the campaign, we realized we won’t be able to make it a reality with just our initially set funding goal and newly uncovered product ambitions.' As DPReview reported last month, the LIT wireless xenon 40W flash was intended for use with a smartphone, and would have—if everything had gone according to plan—included a built-in rechargeable battery capable of powering 200 full-power flashes. The device was also expected to feature HSS and support for smartphone shutter speeds as fast as 1/10,000s.
Though the Kickstarter campaign exceeded the $40,000 funding goal, the LIT team explains in the update post, 'Based on the current funding rate, we might be able to push the product development and production through, but it would take considerably more funds to make it in a way that would meet our high standards.' The LIT xenon flash Kickstarter project was canceled at just over $65,000 in pledged funding from 367 backers. The LIT team said in its post: We don’t compromise and that’s why we’ve decided to cancel our campaign and maybe revisit Kickstarter at some later time with a new campaign. It feels so wrong doing the right thing. Saying goodbye is the hardest solution to any problem. But sometimes it’s the only choice we have. It’s not forever, is not the end. It simply means we'll miss you until we meet again. We still believe that the future of image making is in your pocket. It is in our nature to work hard. To listen. To think. To question everything. To fail, stand up and change. LIT will not collect the Kickstarter funds. Photography News via Dpreview http://bit.ly/i0r8o5 May 31, 2019 at 12:10PM
http://bit.ly/30Xyo3k
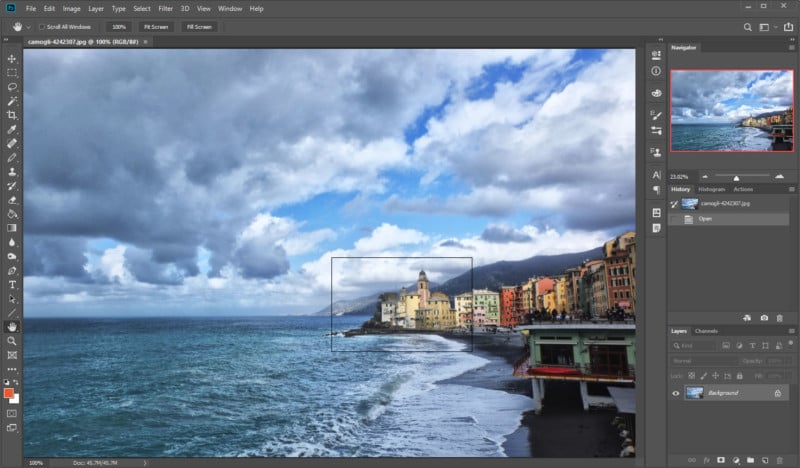
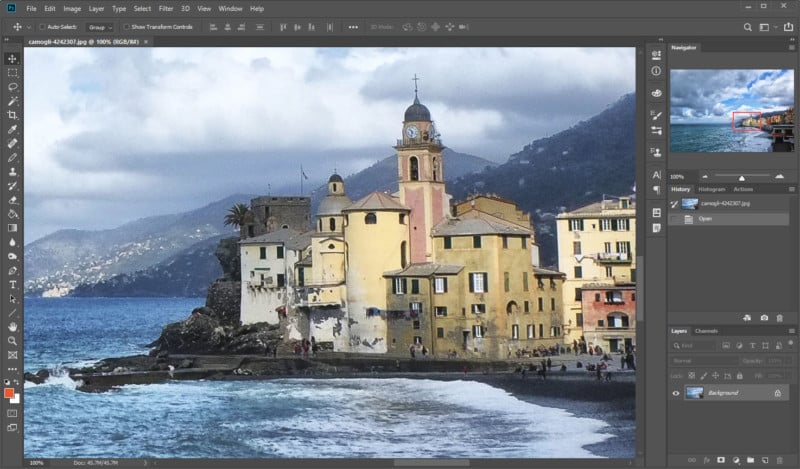
Here’s a Lesser-Known Photoshop Trick for Zooming Around Inside Photos http://bit.ly/2KhB3in If you’re zoomed into a photo in Photoshop, popular ways to move around include holding the spacebar (and then clicking and dragging) or clicking inside the Navigator panel. But there’s a lesser-known trick that’s just as handy, and the Photoshop Training Channel explains how it works in this 2-minute video. Basically, you can easily reposition your view within the photo at the same zoom level without having to move your mouse to the Navigator window. Simply hold the ‘H‘ key and then click and hold your left mouse button. This will cause you to temporarily zoom out and see the zoomed area as a small black box — the same box you see in the Navigator panel. You can then move the box around, and releasing the mouse button zooms into the new area.
It’s an ultra simple technique but one that’s useful to have in your mental bag of tricks. Watch the short video above to see how it works in action. (via Photoshop Training Channel via Fstoppers) Photography News via PetaPixel https://petapixel.com May 31, 2019 at 11:31AM
http://img.youtube.com/vi/vqAJgm3YDkE/0.jpg
Sony releases promotional videos to highlight Xperia 1 pro-oriented video features http://bit.ly/2KfNlrp
The Sony Xperia 1 was announced back in February but has become available to buy in the shops only this week. It's Sony's first triple-camera phone and comes with a range of enticing imaging features, including a 21:9 OLED display with 4K resolution, 4K HDR video as well as ultra-wide and tele-cameras. In order to highlight the camera's video capabilities Sony has now released several promotional videos, explaining some of the more advanced new features. Cinema Pro is a set of features aimed at mobile videographers. Users can choose from a range of color presets and footage can be recorded at a cine-compatible 24 frames per second and 21:9 aspect ratio. You can also shoot with any of three lenses and select manual shutter speeds. Optical Steady Shot is another highlighted video feature. It combines electronic and optical image stabilization for smooth and shake-free footage. The results in the sample clip below look pretty impressive but we have seen similar results on other high-end devices. That said, Sony claims the Xperia 1 comes closest to 'cinema-grade' results. Photography News via Dpreview http://bit.ly/i0r8o5 May 31, 2019 at 11:06AM
http://bit.ly/2Kp4AXF
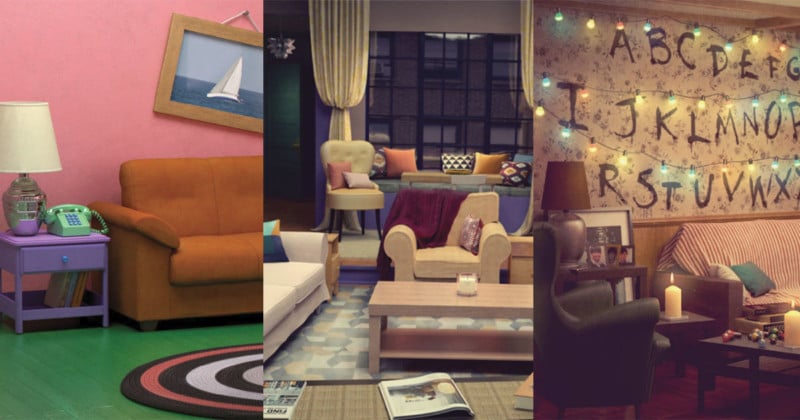
IKEA Recreates Rooms in ‘Simpsons’, ‘Friends’, ‘Stranger Things’ With Its Furniture http://bit.ly/2MllA3l
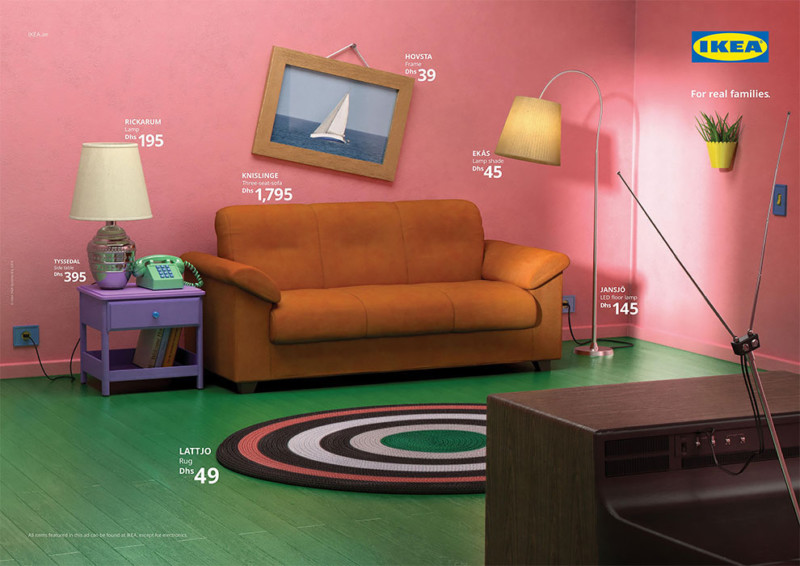
IKEA United Emirates has launched a clever new marketing campaign called the “Real Life Series.” Each picture is a famous room from a popular TV show recreated entirely using IKEA furniture and products. “We brought to life the iconic living rooms of the most beloved families of all times, through tons of furniture combinations in lots of different styles and sizes – and at affordable prices,” IKEA says. “We’ve grouped all the products for each room for you, so it’s easy to recreate what you see here in your own home. Take a look and make your living room iconic with IKEA.” The Simpsons: The “Room for Families”
“A living room is not just a place for families to get together and watch TV, it’s a place to share happy moments and have fun,” IKEA says. “And fun is what this room is all about. Combine new colorful and playful patterns and brighten-up your living room with your functional and favorite IKEA furniture pieces.” Friends: The “Room for Mates”
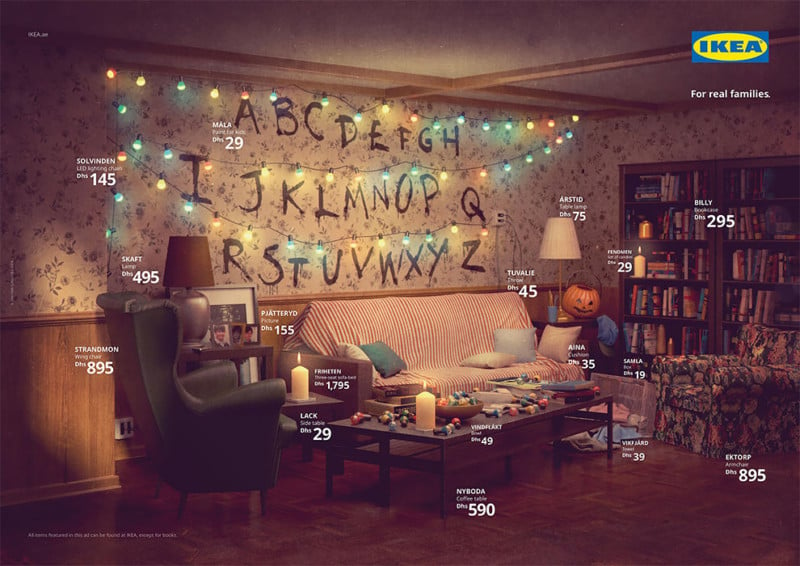
“Whether you share the same surname or just each other’s companies on a regular basis,” IKEA says. “Family for IKEA goes beyond the traditional definition. And we also have rooms far from traditional to match that. Mix and match styles, throw some color in and build a comfy, flexible, friend-magnet living room to enjoy with your favorite people in the world.” Stranger Things: The “Room for Everyone”
“Every living room tells a story of the family who lives there,” IKEA says. “And this one is not afraid to tell it out loud. So let your furniture do the talking. You can express your family’s romantic with a colorful string of lights or brag about your great book collection, perfectly organized on our display cases. Whatever your family loves, you’ll find a way to show it at IKEA.” “The production was an arduous, months-long process during which the Ikea and agency teams worked together, sifting through thousands of items from the Ikea catalog and site that would work as stand-ins,” AdAge reports. Want to shoot photos of these IKEA-flavored rooms? IKEA is planning to hold a live event in the Middle East so that people can roam around in these rooms for themselves. Dates and details of this event have yet to be announced. And if you’d like to build one of these rooms for yourself, you can find links to the products in these pictures on the IKEA Real Life Series page. (via IKEA via Laughing Squid) Photography News via PetaPixel https://petapixel.com May 31, 2019 at 11:05AM
http://bit.ly/2I931dr
North Face Snuck Product Placement Photos Into Wikipedia Articles http://bit.ly/2W5WVQ2 The outdoor apparel company The North Face is getting slammed today after it boasted of sneaking product placement photos into Wikipedia articles in order to show up as top results in Google Images search results. The Drum reports that North Face teamed up with the ad agency Leo Burnett Tailor Made for the eyebrow-raising marketing campaign, seen in the 2-minute ad above. “How can a brand be the first on Google without paying anything for it?” the ad asks. Its answer: Wikipedia photos, since those images often show up as top results for search terms 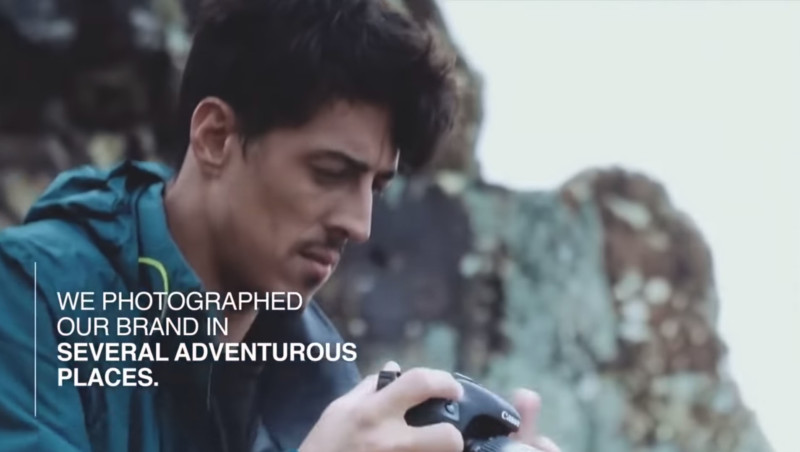
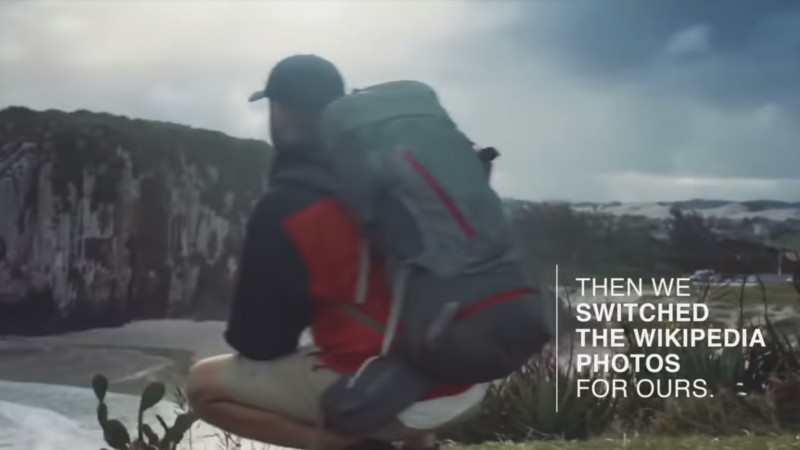
Photographers were sent out into some of the world’s most beautiful and famous outdoor landmarks to shoot original photos of those locations. 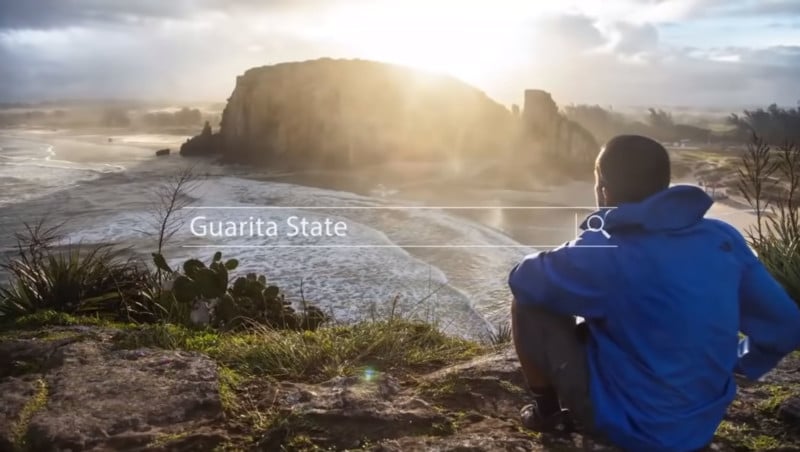
Prominent photos in the Wikipedia articles were then swapped out for the new ones containing people wearing and using The North Face-branded products. 
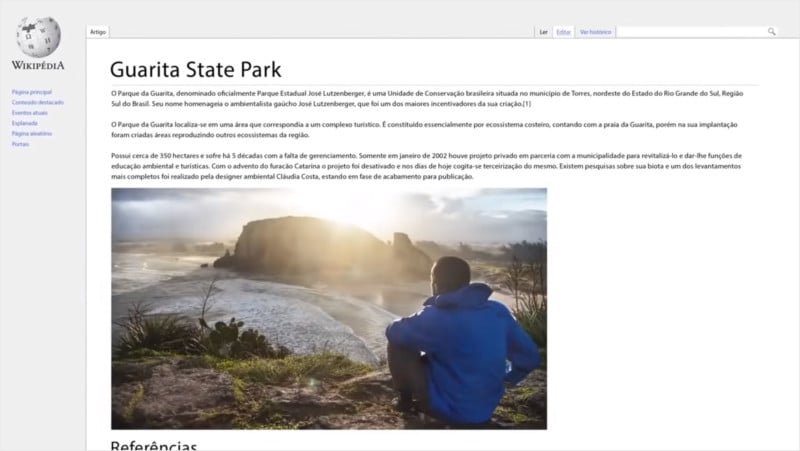
The “biggest obstacle” was to do the stealthy replacements “without attracting the attention of Wikipedia moderators,” the agency tells AdAge. It seems the effort was a success — the ad photos started showing up at the top of Google Images for many famous spots. 
“We hacked the results to reach one of the most difficult places: The top of the world’s largest search engine,” The North Face says in the ad. “Paying absolutely nothing just by collaborating with Wikipedia. “Now, every time someone searches for a new adventure, they will find The North Face there.” But as you might expect, the underhanded effort left a sour taste in many mouths, including Wikipedia’s. The free encyclopedia took to Twitter yesterday to slam The North Face and its ad campaign, which many are labeling “unethical”:
“[W]hat they did was akin to defacing public property,” Wikipedia states. “When companies like The North Face take advantage of the trust you have in Wikipedia just to sell you clothes, you should be angry. Their actions have gone directly against the spirit, purpose, and policies of Wikipedia to provide neutral, fact-based knowledge to the world.” The North Face soon issued a public apology and ended the marketing effort.
“Leo Burnett Tailor Made found a unique way to contribute photography of adventure destinations to their respective Wikipedia articles while achieving the goal of elevating those images in search rankings,” says the ad agency. “We’re always looking for creative ways to meet consumers where they are. “We’ve since learned that this effort worked counter to Wikipedia’s community guidelines. Understanding the issue, we ended the campaign.” Photography News via PetaPixel https://petapixel.com May 31, 2019 at 10:11AM
http://bit.ly/2Z3Bgdh
5 Ways To Tell If A Shot Will Make A Great Black and White http://bit.ly/2IczjUK There’s something about a black and white image, isn’t there? A good black and white stirs something inside us. It may create an emotion, make us question or simply step back in awe. The problem is, shooting great black and white shots can be tricky. Perhaps the trickiest part is knowing whether a shot will convert well to black and white.
Print it out and keep it for when you really need it - when you're out shooting! I am sure that, like me, many of you have converted shots that you might think would be great in black and white, only to be entirely disappointed with the end result. The thing is, whether you are converting an existing shot, or shooting a new one, black and white has some very specific requirement to work well. Today, we are going to look at a few of them. 1. Scenes With Good Tonal ContrastOne of the primary factors that makes up a good black and white image is good tonal contrast. By that, we mean a range of tones from solid black through to pure white with several distinct mid-tones in the middle. The best black and white images work when different tones are on different layers through the image. For example, the pure black may be just in the background, while the subject is composed of a series of lighter tones. Those lighter tones separate the subject from the background, giving depth, while the variation in the lighter tones provides us with texture. Combing that depth and texture well can give us an almost three-dimensional look to our black and white photos. 2. Scenes With Contrasting Primary ColoursIt might seem odd to suggest colour is essential in black and white, but it is, in fact, vital. Just as tonal contrast can give us depth, so can colour contrast. It also can help separate compositional elements within a scene. The primary colours are the best to work within black and white, usually in pairs. Green and Red, Green and Blue and Red and Blue are all combinations that can give a striking colour contrast to a black and white image. Another reason for looking for these primaries is how we work in post-production. Our editing software will work predominately with primary colours. That means that we can change the saturation and lightness of those individual colour channels even in black and white. Decreasing the lightness of the blue channel, for example, will darken our skies. If we have fluffy white clouds in that sky, they will become more prominent. Increasing the lightness of green will lighten any foliage in a landscape, helping it stand out from other elements in the scene. Colour contrast is as important to black and white as tonal contrast. 3. Strong Directional LightLight is, of course, important in all photos, but black and white images can benefit from strong directional light. This could be sunshine, flash or continuous light or reflected. By having an omnidirectional light source, we can cast shadows over our subject and background. This, in turn, creates a feeling of depth, similar to the use of good tonal contrast. There needs to be some subtlety to the light. Too hard or harsh and those shadows will go black, revealing no details. A good directional light will cast strong shadows that can still exhibit texture and detail in a good exposure. Strong directional outdoor light is a particular weapon in architecture and cityscapes. The geometry of modern life can create amazing shadows and textures. 
Strong directional light creates shadow and mood. Photo by Daniel Horvath 4. TexturesTexture is another element that can make for a fantastic black and white image. Leading on from above, strong directional light passing at a deep angle over a textured surface can give us very compelling monochromatic images. Textures are all around us, from the rust on an abandoned car to the knurls and swirls of the bark of a tree. These textures can make an interesting abstract subject on their own or be used as a compositional element to highlight a different subject. Low, strong but not harsh light from one direction will be your friend here. 5. GeometryMathematicians will tell there is a beauty in geometry and they would be right. For photographers, there is a special kind of visual beauty to geometrical subjects, one that is especially so when shot in monochrome. Geometry is all around us but occurs more in human-made subjects than in nature. It can be as simple as the hard intersections of brutalist architecture to the subtle curves of a modern airport terminal. The shapes formed in geometry give rise to light and shade. When we combine that with low directional light, those shapes cast shadows on themselves and create the perfect feel for black and white architectural shots. Move close, and the architecture can become abstract. Geometry is one genre where even harsh light can work in black and white. So long as the lighter areas have texture and detail, the shadows can be pure black and the shot will still work. 
Geometry has a special place in black and white. Photo by Alex Genres That Suite Black And WhitePretty much any form of photography can look great in monochrome, but some are more suited. Street photography is an obvious choice. Photographers can use tonal contrast to highlight a subject against a darker or lighter tone. Architecture is another genre highly suited. The geometry of buildings, combined with directional light, can make very striking images. Portraiture, of course, light subjects well, separating them tonally from the background and you will get great shots. Older subjects are particularly suited to black and white; the lines and ageing of their face can bring a sense of depth to the image. Landscapes and seascapes work well, especially in stormy weather with contrasty light and foreboding clouds. Long exposure landscapes and cityscapes are both great subjects. Final Thoughts:So, what are the best elements to look for when shooting or editing a shot for black and white?
Black and white can be tough to get right. It’s not as simple as taking a shot and making in monochrome in Lightroom or Photoshop. If planning to shoot specifically for black and white, look out for some of the conditions we detailed above. If planning to edit existing images to black and white, the same applies. Either way, if your shot has some or all of these elements, there is a pretty good chance you will get a cracking monochrome image out of it. Further Learning:Make sure you take a look at Kent DuFault's Better Black And White Guide. This is a complete step by step guide to creating stunning black and white conversions – including teaching you everything you need to know about controlling tone and contrast to get the image you want.
Free Camera Craft Cheat Sheet Get your free camera craft cheat sheet so you always have the information you need when you're out shooting! Photography News via Light Stalking http://bit.ly/2kwTW5i May 31, 2019 at 10:01AM
http://bit.ly/2WfT4Vl
The post Tips to Take Better Photos in Direct Sunlight [video] appeared first on Digital Photography School. It was authored by Caz Nowaczyk. Sometimes, as photographers, we don’t always have the luxury of shooting in the lovely early morning/late afternoon light. We just have to shoot in the middle of the day where the harshest light of the direct sun exists. In this video by Peter McKinnon, he shares his tricks on how to take better photos in direct sunlight so you don’t end up with a bunch of photos that are super-contrasty and leave your model with harsh shadows around their eyes etc. ? Tips to Take Better Photos in Direct Sunlight1. Bounce the lightYou could use a reflector or bounce card. Consider using natural reflectors such as light-colored concrete. Concrete acts as a natural reflector for the sun. 2. Diffuse the lightHave someone hold a diffuser in the line of the light source coming from the sun. This will defuse the harshness of the direct sun and soften it on your subject’s face. Find areas of shade and if 3. Use the shadows to your advantageIf you don’t have a diffuser or a friend to hold one for you and you just have to shoot in the direct sunlight, take advantage of the shadows. Find great spots (like a staircase) that have interesting patterned shadows to create interesting effects on your subject. 4. Move your model aroundKeep in mind the direction your model is facing. Have them move around, and watch how the sunlight hits their face. Have them move until you get the most flattering/even light.
You may also find the following helpful:
The post Tips to Take Better Photos in Direct Sunlight [video] appeared first on Digital Photography School. It was authored by Caz Nowaczyk. Photography via Digital Photography School http://bit.ly/29wB9CX May 31, 2019 at 09:11AM |
Categories
All
Archives
November 2020
|


 RSS Feed
