
Deal: Save Up to 28% on Lexar CFast 2.0 2-Packs at Adorama
Adorama is having a sale on Lexar CFast 2.0 memory cards that come in packs of 2. You can save up to 28% on these 2 packs.
Lexar CFast 2.0 Memory Cards on sale (2 Pack):
|
https://ift.tt/2LSIe1T
 Deal: Save Up to 28% on Lexar CFast 2.0 2-Packs at AdoramaAdorama is having a sale on Lexar CFast 2.0 memory cards that come in packs of 2. You can save up to 28% on these 2 packs. Lexar CFast 2.0 Memory Cards on sale (2 Pack): Photography via Canon Rumors https://ift.tt/xgIh23 July 30, 2018 at 03:31AM
0 Comments
https://ift.tt/2LL0OZC
 Industry News: Nikon’s Full Frame Mirrorless to Be Announced August 23, 2018Over the last 24 hours, a lot of leaks have come out showing Nikon’s new full frame mirrorless system with the rumored new “Z mountâ€. Nikon Rumors has posted a ton of analysis from the teaser video and leaked images of the new system. For all of the leaked images and analysis, head over to Nikon Rumors. Photography via Canon Rumors https://ift.tt/xgIh23 July 30, 2018 at 03:31AM
https://ift.tt/2LRGcz3
“Sometimes you have to put reason aside and make something... https://ift.tt/2Os5qCq  “Sometimes you have to put reason aside and make something beautiful.” Oscar Niemeyer. Photography News via The Impossible Cool https://ift.tt/2a18MfQ July 29, 2018 at 02:33PM
https://ift.tt/2K4oT8V
Time-lapse photography is a different way to show the world around you. They are videos which are made up of a serious of still images and combined to look like a movie. The frame-by-frame gives a sped-up view of the world. People find them interesting to look at and if done well they are fascinating. 
One of the hundreds of photos taken at Point Lonsdale while trying to get a time-lapse there. There are a few ways of making time-lapse videos The obvious way is to do a video and speed it up, however, most are made from lots of individual still images. Using special programs, you can put them together and set the time for the video to run. In this article, I’ll share my experiences with you testing out some time-lapse gear and settings so you can learn along with me. Basic Time-lapseDoing time-lapse photography is relatively simple. All you really need to do is set your camera up on a tripod and get it to take a photo every few seconds. Put the images on your computer, batch process them if you like, then run some software that will allow you to make them into a time-lapse. Here is an example. ? That is a very simplified way of looking at it. Of course, there are many other factors, like what is moving in the scene, how quickly it is moving, etc. As you experiment more you will learn how to work out what time is best and how many images you need. On average, you will need 30 images for every second of video you want. So if you want a one minute video you will need 30 x 60 = 1800 images. Adding panning to your time-lapseOver the years I’ve played around with doing time-lapses, such as I just described. It didn’t seem hard and I thought that adding some new equipment would be fine, That it would just work. I was wrong. Recently I was loaned quite a few products from Syrp here in Australia to try out. It seemed like the ideal time to step up what I was doing with these. Perhaps get more serious about doing time-lapse photography. I was loaned enough gear to do panning, tilting, and sliding. In the kit were two Syrp Genie Minis, the tilt bracket, the Genie and the magic carpet rails. 
Photo by Syrp showing a kit with the magic carpet rails, Genie, and tilt bracket. Initially I decided to try just the Genie mini. Start with the easy one. 
One of the stills from the first attempted time-lapse. Syrp Genie Mini – first attemptMy first attempt was at the Tesselaar Kabloom Flower Festival. There were fields of flowers and lots of clouds, the conditions were perfect time-lapse photography. For a successful time-lapse it is best if there is something moving in the image. I moved around a bit to various places, but the very first series I shot had to be deleted. The exposure was okay, but none of the images were in focus. It was my first big lesson with doing them this way. I learned that you have to focus the image and then turn off autofocus, otherwise, the camera will attempt to refocus for each image. The Genie and Genie Minis are all controlled by an app on your phone. It is fairly simple to use, but the arcs for shooting can be confusing. Next, I worked out how panning worked and wide it should be. Several different arcs were attempted and when I got home and loaded the photos, the problems were clear to see. ? The first one was okay, but that was probably more luck than skill. I didn’t really know what I was doing and just let it go for ages, with the camera taking a photo every two seconds. There were around 450 images total. For the next few, I told the Genie Mini to run for 6 minutes, and for the camera to shoot an image every two seconds. This time it took 360 images. The area it was panning over was increased. When converted to the time-lapse it was jerky and the panning was too fast. Solutions, if you are going to do a wide pan, you need to take a lot more photos than you think you will need. 
Another one of the stills from the flower center. Next attemptI went down to a local area to try it out again, this time giving it more time. Unfortunately, I made a similar mistake. As I was setting up, I had it in my head to do an image every 5 seconds and to set the pan to last for 20 minutes. This only gave me around 240 images for the video. It wasn’t enough, and the same problem occurred. Next time if I only want to do 20 minutes I should take a photo every two seconds. That will yield 600 images, which should make it a better time-lapse. That is what will be attempted next time. A couple of other problems happened as well. While panning, the camera was not level for the whole scene. So, I need to work out how to make that happen. Practice will make it easier. ? All the tutorials I’ve been watching say to use manual mode for exposure. However, this really only works for constant light. If you are shooting a scene where it is variable, then you may need to use aperture priority. Working it outThere did come a point when I realized the smaller the arc the better. Not covering such a wide area was better. Making sure there was something interesting in the image as well, something moving. The number of images and how far apart they are shot is another aspect that can be hard to work out. Taking a photo every 2 or 5 seconds is good for some scenes, but not others. However, it is a good place to start and as you do more time-lapse photography you will begin to understand what settings you need. ? Most time-lapse series will result in a video of around 5-10 seconds. When you are compiling it, you need to think about how many images you will need. As a general rule most are done with 30 frames per second, or 30 images per second. In theory then, for a 5-second time-lapse you will need 150 images. However, if you are adding panning to that, then it will depend on how far you pan. If you are covering a really wide area you might need a lot more images. 
You have to make sure there is something interesting in the scene, and that there is movement. Adding TiltingOnce you think you have worked out how to pan you can try tilting the image up and down as well as panning. I only tried this a couple of times, as the biggest problem I had was my camera is very heavy and the tilt bracket struggled with it. You could see that it was too much weight for the system. I found that using the Genie Mini with it was a bit tricky and it would tilt the wrong way. The lens would hit the bracket if it went the wrong way. It was the most frustrating aspect. Again, you have to be careful what you use this for. There needs to be a reason to tilt up or down. Waterfalls are a good choice for tilting. Maybe looking up at a building. Think about why you would do this beforehand. Gliding along the Magic Carpet with the GenieThe magic carpet rails with the Genie on top will glide the camera along in a straight line. It can add a small amount of movement to your video to make it appear like the camera is moving. The Genie was very complicated to use and after doing so once, I really didn’t want to use it again. It wasn’t as easy and intuitive to use as the Genie mini. I had been shown how to use it, but when I went to do it myself, I had trouble working it out. In the end, I only used it once. ? It does add a nice effect to the final time-lapse, but I’m not sure it is worth the aggravation. Perhaps, if you really wanted to get into doing time-lapse photography seriously it would be worth spending the time learning how to get the best results. However, Syrp have now upgraded it to the Genie II. It is supposed to be easier to use and can do a lot more. Though at $1599 USD, the price will put it out of the range of many photographers, myself included. Syrp gearFor most of the time that I had the gear on loan, I used the Genie Mini the most. It was small enough that I could carry it around in my bag most of the time and it was easier to use. Using the phone to control it was never a problem. It is something that will take a lot of getting used to, but for anyone starting out doing time-lapse photography it would be enough. The Genie Mini is what I would recommend. It isn’t cheap, for what it is, but not that expensive that if you really wanted to do time-lapse. The Syrp Genie Mini sells for USD$249. In the end, by the time I had to give the gear back, I knew I wanted to do more time-lapse photography. So I have since purchased the Genie Mini. I like what I can do with it, it’s simpler to use and the price-point is doable for most people. ? Storage and processing the time-lapseEveryone recommends you take raw images for your time-lapse series, that way you can process them in Lightroom. The biggest problem is the size of the raw files. My D850 has raw files that are approximately 50MB each, so when you are taking a few hundred images, that requires a lot of space. Thankfully, the D850 has the ability to change the size of the raw files, so I can use smaller ones for time-lapse. If your camera has this feature, then I suggest you do so. Once the images are processed and the time-lapse is done, you can delete the raw files as you will be unlikely to use them again. 
Princes Pier is a popular place for photos, so it seemed like a good idea to try a time-lapse. This is one of the still images from the series. Using Lightroom to process the images is good as you can edit one image, then sync the rest of them. This will help give all your images the same look. You can then export them to make the time-lapse. I used Photoshop to build the time-lapse. However, there are many different programs available to try. Some will give you more control, however, Photoshop is quite basic. It’s a good place to start. If you have trouble getting Photoshop to work it could be the sequence of images you are using. They have to be consistent, or Photoshop won’t load the images properly. ? Getting into time-lapse photographyIf this is something you want to try, then start with your camera on a tripod. Take photos every few seconds. However, if you want to get some camera movement, then I would try the Syrp Genie Mini. Learn how to use it completely to get the best videos. If you decide to add more then you can look at doing tilting and gliding. Don’t confuse yourself by trying to learn it all at once. Read more on time-lapse photography here:
The post Time-Lapse Photography – Beyond the Basics appeared first on Digital Photography School. Photography via Digital Photography School https://ift.tt/29wB9CX July 29, 2018 at 02:04PM
https://ift.tt/2LO8k5O
What Everyone Needs To Know About Zoo Photography https://ift.tt/2LJ3h6H Anyone who is interested in wildlife photography would not miss the chance of a wildlife safari, but there are times when a safari is not a possibility due to many constraints. For anyone in a situation like this, until you get a chance for a wildlife expedition, it is good to visit the nearby zoo to get some images of the birds and animals – of course, it won't replace photographing animals out there in the wild. Moreover, it can be a good way to practice photographing wild animals. But here is what everyone needs to know about zoo photography…making images of wildlife in a zoo comes with its own limitations as most of the animals are caged or kept in enclosures that may be surrounded by glass or fencing. So, there are certain things you need to know and be prepared for before photographing at a zoo. 
Photo by Laurenz Kleinheider on Unsplash So how was your first visit to the zoo? Did you return with great images? Were you happy with them? If you weren't, not to worry – we have some amazing advice here for you so that you can come home with some brilliant images the next time you visit the zoo! Here Is What Everyone Needs To Know About Zoo Photography:Blending Out The Fence:This is one of the most important and one of the most difficult factors to overcome when photographing in a zoo. Most of the animals are kept within fences – especially birds, monkeys and other small animals. Even the bigger animals in larger enclosures are usually fenced in. Photographing through a fence can be quite tricky especially if the fence is thick. Moreover, if the animal is close to the fence there is nothing that can be done to avoid the fence or blend the fence. 
Image by Geralt If you need a better image of animals or birds in a wired or fenced enclosure, you will need to use certain tricks to get a neat shot – although remembering that it is not always possible.

Remove the visible fences using a cloning tool. Image by Toby Dagenhart Photographing Through The Glass:Photographing through glass is the trickiest when it comes to zoo photographs because here you are dealing with reflections, oily smudges, and scratches on the glass. Some glass enclosures even have a colour cast in them that needs to be carefully dealt with during post-processing. How Do You Avoid These Unwanted Reflections? First of all find an area of the glass that has less specks and scratches and wipe the glass clean in that area, if possible, to remove oily or dirty smudges. Use a lens hood or any black cloth around the front part of the lens to minimise glare – your lens needs to be against the glass. If there is any glare, tilt the lens slightly at an angle where the glare is eliminated or at least minimal and then shoot. You may need to pump up the ISO a bit (between 400 to 1000) here and switch to manual focus if focussing becomes a struggle! 
Lisbon Zoo, Lisboa, Portugal. Photo by Bruno Martins on Unsplash Wait For The Action To Happen:Photographing wildlife in general requires a lot of patience, observation skills and to be ready to shoot the action when it happens. It is good to learn about the behaviour of different types of animals before your visit to the zoo so you know what to expect at certain moments. Feeding time is another a good time to be around as you can get some photographs where the animals portray their natural behaviour. This can also yield some funny moments. Revisit the zoo a few times so you get to know the animals better and chances are, with each visit you get better images. 
Image by Alexas_Fotos When To Visit:The best time of the day would be early in the morning when the zoo opens because at this time, the crowds are less and the animals are out active and the light will be great too! Later during the day, the animals are tired and sleeping in areas where they can be away from noise and other disturbances mostly caused by the visiting humans. Sometimes animals are quite active just before sunset (the golden hour) and this is a time when you can get some great shots utilising the beautiful golden light. 
Image by Gellinger What If All Else Fails And You Get Caught With The Crowd? Make the best use of this situation because you can get some really good candids where you can show human-animal interactions. With children in the frame, it can be quite interesting if there are areas where children are allowed to feed the animals. 
Photo by Daiga Ellaby on Unsplash Also, most of the time you will notice that humans are excited to see these animals and some really enjoy being there observing what the animals do. Humans too can react humorously to animal behaviour. Stand back and photograph these moments as these can bring a smile on anybody’s face. 
Zoo in Naples, United States. Photo by Nicklas Bajema on Unsplash Don't Forget To Bring A Tripod Or A MonopodDepending on how long you will be spending at the zoo (some may spend a whole day) you may need the help of a tripod or at least a monopod to give some rest to your hands occasionally while carrying heavy lenses around. But bear in mind, some zoos may not allow the use of tripods or monopods and you will need to check this with the zoo before your visit. So now that you have an idea of what to expect and how to deal with certain issues that you will come across in a zoo, let us look at the gear and settings that you will need to create brilliant zoo photographs. Gear Required:

Nikon AF-S NIKKOR 70-200mm f/2.8G ED VR II Lens

Photo by Ben O'bro on Unsplash
Settings:

Photo by Joshua Lee on Unsplash

Zoopark, Næstved, Denmark. Photo by Frida Bredesen on Unsplash
More Quick Tips:

Photo by Aurélien – Designatic on Unsplash

Lincoln Park Zoo, Chicago, United States. Photo by Andrew Pons on Unsplash

Image by Skeeze

Image by PublicDomainPictures
Image 1 by Photo by david clarke on Unsplash and Image 2 by Steffiheufelder
Photo by Mike Tinnion on Unsplash
Image by Alexas_Fotos
Image by Free-Photos
Image by Amy Chung
Photo by Jordan McGrath on Unsplash
Making brilliant zoo photographs can be quite a challenging task if you do not get the settings right and be patient and practice. You need to go out there to the zoo and keep trying if you are looking to photograph a specific animal in a particular environment and time of the day. Like they say, “Practise makes perfect.” Have you photographed in a zoo before? What were the limitations and how did you overcome them? Please feel free to share any tips you may have for zoo photography in the comments section below. The post What Everyone Needs To Know About Zoo Photography appeared first on Light Stalking. Photography News via Light Stalking https://ift.tt/2kwTW5i July 29, 2018 at 01:00PM
https://ift.tt/2LZ6w6V
3 Key Things You Need To Know About Model Releases https://ift.tt/2uW5EJE Whatever the genre of photography you specialize in, the chances are that at some time or another, you will photograph people. This might be street or candid, travel, or of course portraiture in a studio or outdoors. As recent events online with Facebook and Google have demonstrated, many people do not understand their rights to privacy, these mega companies have had free reign to do pretty much what they want with your personal data. However, people are entitled to certain degrees of privacy and one of those is how their image is used in photographs. To overcome this, photographers use a legal document called a model release. Today we are going to look at what a model release is, why and when you should use it. 
If you intend to gain from an image of a person, you need to have a release. By Nissor on Pixabay 1. What Is A Model Release?A model release form is a short, legally binding contract between you and the person you are photographing. In it, the subject gives their permission to the photographer to use images captured of them for any purpose. This includes with or without retouching or any other alteration to the image as the photographer wishes. In short, it is exempting the photographer from any civil lawsuit that might arise out of the use of his or her photographs. Many photographers will license their images to third party businesses such as advertising agencies or web designers. When they do this, they have little to no control over how the image will be used. If a model objects to the way his or her image is used and there is no model release, it will be the photographer that is liable not the third party company. If a model release has been signed, then it would be very difficult for the subject to bring a law suit and even more difficult to win it. 
All four people in this shot would need to sign a release. By Skimpton007 on Pixabay 2. When Should I Use One?The primary factor in deciding whether you need to use a model release is how you intend to use the final image. If you plan to sell the image either directly, to agencies or for stock, then you will almost certainly need to get the subject to sign a release. This will allow the end user to use that image for commercial purposes. That might mean using the image as part of an advertising campaign to promote a product or service or on packaging or other products that are sold. In short, anything that might be used to profit directly by using the image. It’s important to know that you need a model release for anyone recognizable in the photo, even if they are in the background of the shot. Recognisable does not just mean the person’s face, it could be any feature that makes identifies that person. There is, however, a license genre that does not require model releases and that is editorial use. Editorial use is where the image is used in a journalistic way, to illustrate a newspaper article or magazine even for nonfiction books. Some stock agencies will allow images for editorial use, often requiring a specific editorial caption, others will not accept editorial at all. 
Even an isolated part of a person's anatomy may need a release. By Skitterphoto on Pixabay As a rule of thumb, however, you should try to get a model release for everyone in your image, this gives you much more flexibility over the future use of the image. Even if you are not a professional photographer you should try to get model releases if possible. In the future, you may wish to submit images for stock, or may even get approached by someone to license your image. Without the model release, your images will be restricted to editorial use only. Also note that if photographing children, you need the model release to be signed by the parent or legal guardian of the child. You can use model release forms specific to photographing children 
Children will require a release by a parent or guardian. By Bess-Hamiti on Pixabay 3. Where Can I Get Model Releases.There are hundred’s of places online to get model releases forms. However, the best ones are often found at stock agencies. These are often watertight legally and can be modified for your own use. Gone now are the days of having to carry and organize dozens of pages model release forms. Now there are some fantastic apps that allow your model to sign using a smartphone or tablet. These apps allow you to keep your releases organized, export them as PDFs, and print them if required. The recent privacy scares in social media will certainly lead to a higher awareness of personal privacy among people. For this reason alone its well worth getting used to using model release forms. Although it can be a little awkward to get them signed if not using a professional or amateur model, they could protect you in the future from any civil lawsuit. They can also give you the freedom to use your people photographs however you wish. The post 3 Key Things You Need To Know About Model Releases appeared first on Light Stalking. Photography News via Light Stalking https://ift.tt/2kwTW5i July 29, 2018 at 10:01AM
https://ift.tt/2vdJGBu
You have come a long way as a photographer and people are constantly telling you, “Your photos look great! You should start to sell some!”. As you are excited at the prospect, take their advice, and begin to post photos of printed products on your social media or perhaps you even develop a website. However, you notice something. When you take an image of your images the color is off, there is a reflection of the lights in the room, and you are generally unhappy with how it looks. Not only that, but you realize your print products do not look that desirable to purchase based on the photo you took. The reality is taking photos of your print products or artwork (paintings for example) for marketing can be difficult. But for a few dollars and a little bit of work you can increase the marketability (and hopefully sales) of your hard-earned images (and photograph other artist’s work for them too). .jpg?resize=1500%2C1001&ssl=1)
I create a lot of my own artwork from my images and depend on quality images of my artwork to help market them. I hope you will learn a few key things while reviewing this article. You will learn how to make an inexpensive lightbox, how to change lighting direction and source, and how to set up a camera for shooting photos of your photos. With those skills in your arsenal, I hope you will begin to market your own work! .jpg?resize=1001%2C1500&ssl=1)
Pre-matted prints are a common way to sell your work. But in my opinion are difficult to photograph because of the gloss from the cover and reflections is causes. A properly lit lightbox can help you create marketable images of your artwork. Make a Lightbox for Less Than $20The first thing you will need to do is create (or buy) a lightbox. A lightbox is a simply a structure that provides a neutral background for making images. This is beneficial because it helps your camera control the color of your image and as well as removing distracting background elements. The construction of the lightbox will allow you to creatively light your artwork and ensure it is evenly lit as well. Let’s look at how you can build a lightbox for under $20. I like this design because it comes apart for easy storage or transportation. .jpg?resize=1001%2C1500&ssl=1)
In the steps below I will show you how to build this simple lightbox. What you will need:
Steps to make the lightboxUse the meter stick to measure in 2 inches from the edge of the foam-core board and then draw a line from the top that is half the length of the board. Now measure in from the same edge 2 3/32” inches and draw another line paralleling the first. You should now have two lines that are 3/32” apart that span half the board Using the utility blade, cut out the 3/32” space down half the board.
Repeat on the other side of the board so that you have parallel cuts in the board (see below).
Put that board aside and repeat on two more of the boards. Once you are done should have 3 boards with 3/32” grooves cut into them. Assemble the walls of the lightbox by sliding the grooves of the boards into each other.
Place one, uncut board underneath the walls for a bottom and place the other on top. You now have a lightbox! Display in the LightboxYou will now use your newly built lightbox for displaying, lighting, and photographing artwork. You will want an easel-style stand that fits the feel of your artwork. If you have any extra foam-core board laying around, consider using that to build a neutral easel that will not detract from your artwork. .jpg?resize=844%2C1500&ssl=1)
Once completed with an easel, your lightbox will help you create beautiful images of your artwork such as this metal print of the Aurora Borealis. LightingGetting the lighting in the box set correctly is the most important thing you can do. Correctly lighting your image will remove reflections from the artwork, evenly light it, and ensure the color of the light allows your camera to capture the white-balance of the image correctly. You may consider backlighting, lighting angle, and lighting intensity to help address these things. For each of these things, you should adjust and modify accordingly until you are happy with the shot. .jpg?resize=717%2C403&ssl=1)
I use this light panel to light my products, but a cell phone or other light source will suffice, too! Lighting AngleLighting angle is the most important thing you can do to create a quality shot. Try lighting your artwork from the top and the side and see what you like better. If your artwork is tilted backward in an easel, lighting it from the top and then shooting the image straight on with your camera will remove the reflection of the light in your final image. Lighting from the top and the sides simultaneously will evenly distribute the light over your print to accurately portray your product. .jpg?resize=1500%2C1001&ssl=1)
This image of a canvas print is lit from the top. .jpg?resize=1500%2C1001&ssl=1)
In this image, it was lit from the bottom. .jpg?resize=1500%2C1001&ssl=1)
This image of a canvas print was lit from the side and creates the best finished product to my eye. Back LightingBacklighting the image is another way to evenly distribute light. To backlight, place a lighting source behind your artwork so that it cannot be seen by the camera. Reflect the light off the roof of the lightbox or the side of it to light your image. A properly used backlight will give your image the appearance of floating in mid-air. .jpg?resize=1500%2C843&ssl=1)
This image of a metal print was lit from behind with a cell phone and from the top with a light panel. Lighting IntensityYou will need to control the lighting intensity inside the lightbox. There are several ways to do this. First, be sure to take advantage of those white walls by bouncing light off them. Second, you may want to cover your light source with something to soften the light. This could be a tissue over the light of a cell phone, or a professional cover on a light panel. As you progress with your skills you may consider purchasing a professional lighting source that allows you to adjust the intensity of the light. .jpg?resize=1001%2C1500&ssl=1)
I needed to reduce the intensity of the light and adjust my camera’s exposure compensation settings to keep this image from blowing out. .jpg?resize=1001%2C1500&ssl=1)
I changed my lighting intensity to get the proper exposure on this metal print. Camera Settings and SetupThe next thing you need to do is get your camera set up. I like to use a 50mm lens because it is sharp to the corners and will not distort the final image. If you have a tripod, it is best to use it and set it up in front of your artwork. Try starting your camera in aperture priority mode, your aperture at a couple of stops past wide open (e.g, if you have a f/2.8 lens stop it down to f/5.6), the white balance on auto and your ISO at 200. You can alter these settings, but use I like to use a shallow depth of field to emphasize the surface of your artwork. Since a picture is two dimensional you will not have to worry about it being out of focus! .jpg?resize=1500%2C844&ssl=1)
With your camera on a tripod, step down the aperture and shoot at a low ISO to reduce noise in the final image. A slow shutter speed should not be an issue with the camera on a tripod. Practice Makes PerfectEach of the things discussed in this article is just a starting point. Be sure to experiment with lighting angles, light sources, intensity, and camera settings to get the most stunning image of your product possible. Remember, “pixels are cheap”, so make lots of them as you go out marketing your art! The post Tips for Photographing Artwork for Marketing Purposes appeared first on Digital Photography School. Photography via Digital Photography School https://ift.tt/29wB9CX July 29, 2018 at 09:04AM
https://www.youtube.com/embed/oWIhYzr4qkg?rel=0&autohide=1&wmode=transparent
DPReview TV: Entry-level APS-C shootout https://ift.tt/2v10GeM  VIDEO In this week's episode of DPReview TV we take a look at three entry-level APS-C mirrorless models: the Canon EOS M50, Sony a6000 and Fujifilm X-T100. Which one rises to the top of the class? Chris and Jordan walk us through each camera's strengths and weaknesses in terms of key factors like autofocus, usability and JPEG image quality. Be sure to subscribe to our YouTube channel to get new episodes of DPReview TV every week. Support DPReview. Shop with View Comments (0) More about gear in this articleThe Fujifilm X-T100 is the company's least expensive X-series camera to include an electronic viewfinder. It shares most of its guts with the entry-level X-A5, including its hybrid AF system and 24MP sensor and, unfortunately, its 4K/15p video mode. The Fujifilm X-T100 sits between the entry-level X-A5 and midrange X-T20 and features a 24MP APS-C sensor, eye-catching design and a unique articulating LCD. Our sample gallery was shot with a number of lenses, including the 15-45mm equiv. kit lens and a number of primes. Fujifilm's new X-T100 is an SLR-style mirrorless camera that takes the internals of the X-A5, including phase-detect AF, and adds a fully articulating LCD and high-res OLED viewfinder. The X-T100 is priced at a very reasonable $599/€599 body-only and $699/€699/£619 with a 15-45mm lens. With the Canon EOS M50 review wrapped up, we've revisited our Best Cameras for Parents Buying Guide – and have some new recommendations in the category. Canon's new EOS M50 mirrorless camera offers 4K video capture, expanded Dual Pixel AF coverage and improved connectivity. We've taken a closer look at these features and more in our in-depth review. The Wandrd Prvke (pronounced 'provoke') is one of the best-looking and most functional camera backpacks on the market. Dials and sliders and buttons, oh my! This modular set of editing controls hopes to improve your photo editing workflow – for a price. The Sony RX100 VI is a spectacularly capable travel camera, combining a flexible zoom range with impressive autofocus. But there's no getting around the fact that it's an expensive camera, and a longer lens comes with certain trade-offs. Read on for our full analysis. The Tamron 70-210mm F4 Di VC USD is a lightweight telephoto zoom lens for DSLR cameras that comes in at an MSRP of $799. How does it perform? Find out in our full review. Samsung's flagship Galaxy S9+ comes with comprehensive photography features like dual optically stabilized rear cameras, smooth 4K video and of course, beauty filters for your selfies. But is it the best smartphone camera for you? Find out how it compares against the likes of Apple's iPhone X and Google's Pixel 2 in our full review. The instant camera market is heating up, and with four formats and 15+ cameras to choose from, we felt it was high time to examine them all and pick our favorite. Whether you're hitting the beach in the Northern Hemisphere or the ski slopes in the Southern, a rugged compact camera makes a great companion. In this buying guide we've taken a look at seven current models and chosen our favorites. What's the best camera for a parent? The best cameras for shooting kids and family must have fast autofocus, good low-light image quality and great video. In this buying guide we've rounded-up several great cameras for parents, and recommended the best. What's the best camera for shooting landscapes? High resolution, weather-sealed bodies and wide dynamic range are all important. In this buying guide we've rounded-up several great cameras for shooting landscapes, and recommended the best. What’s the best camera costing over $2000? The best high-end camera costing more than $2000 should have plenty of resolution, exceptional build quality, good 4K video capture and top-notch autofocus for advanced and professional users. In this buying guide we’ve rounded up all the current interchangeable lens cameras costing over $2000 and recommended the best. Photography News via Articles: Digital Photography Review (dpreview.com) https://ift.tt/i0r8o5 July 29, 2018 at 08:05AM
https://ift.tt/2mPbHLH
5 Tips for Capturing Street Portraits On A White Background https://ift.tt/2vc0sRq A few years ago I found myself traveling upriver on the remote Pacific coast of Colombia. I was in an unstable little boat piloted by a half-drunk captain, clutching my camera bag nervously to my chest — and having the time of my life! I was on my way to do portraits in an indigenous village, part of a street project that I had started in Medellin. 
Coffee vendors/prostitute from Medellin. Photos by Dennis Drenner/www.districtportraits.com I first started doing street portraits after seeing Richard Avedon’s famous project “In the American West.” I loved the way he used a white background to strip away everything except the subject of the portrait, letting the expression on the faces and the wrinkles on their clothes tell the whole story, without any further information from the environment. One day I found myself having a coffee in a busy town square in Medellin, Colombia called Parque Bolivar. There were all sorts of fascinating characters walking past my park bench, and I wondered how to approach this scene as a photo project. After a few days of pondering, I remembered Avedon and thought I could do my own white background street portraits with the people in the square. 
Indigenous Woman from Nuquí/Carnaval dancer from Barranquilla. Photos by Dennis Drenner/www.districtportraits.com My project, called “Faces of Colombia” eventually grew larger than the park, and took me all over the country. I went everywhere from remote jungles and rough areas of Bogota to the offices of the Colombian Vice President. I met murderers and nuns, fashion models and street kids, guerillas, and grandmothers. I worked on the project for about three years. Here are a few things I learned along the way: 1. Give Back With PicturesDepending on where you are, people may be reluctant to pose for you. This happened to me when I started my project in Medellin. On my first day of shooting, I managed to get a few people to sit for a portrait. When I came back, I brought a few cheap prints from local photo lab to hand out, and suddenly everyone was excited and trusting. Word got out that the gringo was a good guy, and all my subsequent shoots were much easier. I also kept a couple of small prints for myself to show people samples when I worked at new locations. 
Paramilitary soldier in Valledupar/Massacre survivor in Medellin. Photos by Dennis Drenner/www.districtportraits.com 2. Use a Cloth Background and Light ItRichard Avedon used seamless paper for his project, but he wasn’t getting on tiny airplanes and then traveling down dirt roads in a jeep for two hours. He was also operating in the days before Photoshop. For my project, I used a large white backdrop that I could fold up and easily tuck into my travel bag. I also carried a few battery powered strobes that I would use to light the background and blow out some of the wrinkles. You mainly want to light the background immediately behind the subject to make later Photoshop work easier (trying to clip out a dark wrinkle on the background that is located behind someone’s hair is no fun at all). You should, however, be careful not to over light that background, as I did on some occasions. When you do this it’s a bit like shooting into the sun, causing flare in your images and a loss of contrast in your image. Set your strobes so the background is just barely white, not nuclear! 
Sex worker and weightlifter in Medellin. Photos by Dennis Drenner/www.districtportraits.com 3. Pick A Shooting Location with Soft Light and some PrivacyFor my Colombia project, I would find locations with soft open shade which would allow me to photograph at just about any time of day and provided a consistent look to the project. I also looked for spaces which had a bit of privacy. No one is going to reveal their soul to your camera when half of the marketplace is standing around gawking. For my first location in the town square in Medellin, I set up my backdrop in a parking lot a block away. That way I could grab an interesting character in the park (where there were hundreds!) and then walk the short distance to our quiet spot for the shoot. 4. Find A Rich LocationYou’ll have more success and have a lot more fun if you find a location rich in interesting characters. In cities, this is pretty easy as there is such a large number of diverse people. Even then, you may find some days or times of day work better than others. If you are shooting on a weekday morning, people might be rushing to work, whereas they’d be more likely to pose on a Sunday afternoon. You’ll also notice patterns in the same location that will help you find different subjects. There may be a rush of school children walking home mid-afternoon or street musicians strolling around in the early evening hoping to get tips by playing for young lovers. Pay attention, and soon you will notice daily patterns of activity. With my Colombia project, I sought out a variety of locations in my efforts to represent all aspects of the country. So I traveled to the government building of Bogota to capture the elite rulers of the country, to the Caribbean coast to photograph carnival dancers and musicians, and to a remote camp for portraits of sinister paramilitary soldiers. 
Displaced indigenous people in San Jose de Guaviare. Photos by Dennis Drenner/www.districtportraits.com 5. Don’t Over DirectOne thing I love about personal projects is that I don’t have to worry about making a flattering image. In my professional headshot business, I have to make people look good or I won’t be able to pay my mortgage. In a street portrait, I get to photograph what people are giving me. If they look nervous or angry or sad, I don’t try to coax a smile out of them. I photograph that. As a final thought, I’d like to mention that you don’t have to travel to exotic locations to do interesting portraits. I literally did a whole project in the alley behind my house and ended up getting the project published in the Washington Post Magazine among others. I guarantee you have interesting characters walking around your own neighborhood. So no excuses, get out there and make some portraits today! 
Street musician in Medellin and a fishmonger in Quibdo. Photos by Dennis Drenner/www.districtportraits.com The post 5 Tips for Capturing Street Portraits On A White Background appeared first on Light Stalking. Photography News via Light Stalking https://ift.tt/2kwTW5i July 29, 2018 at 08:00AM
https://ift.tt/2OkdVzr
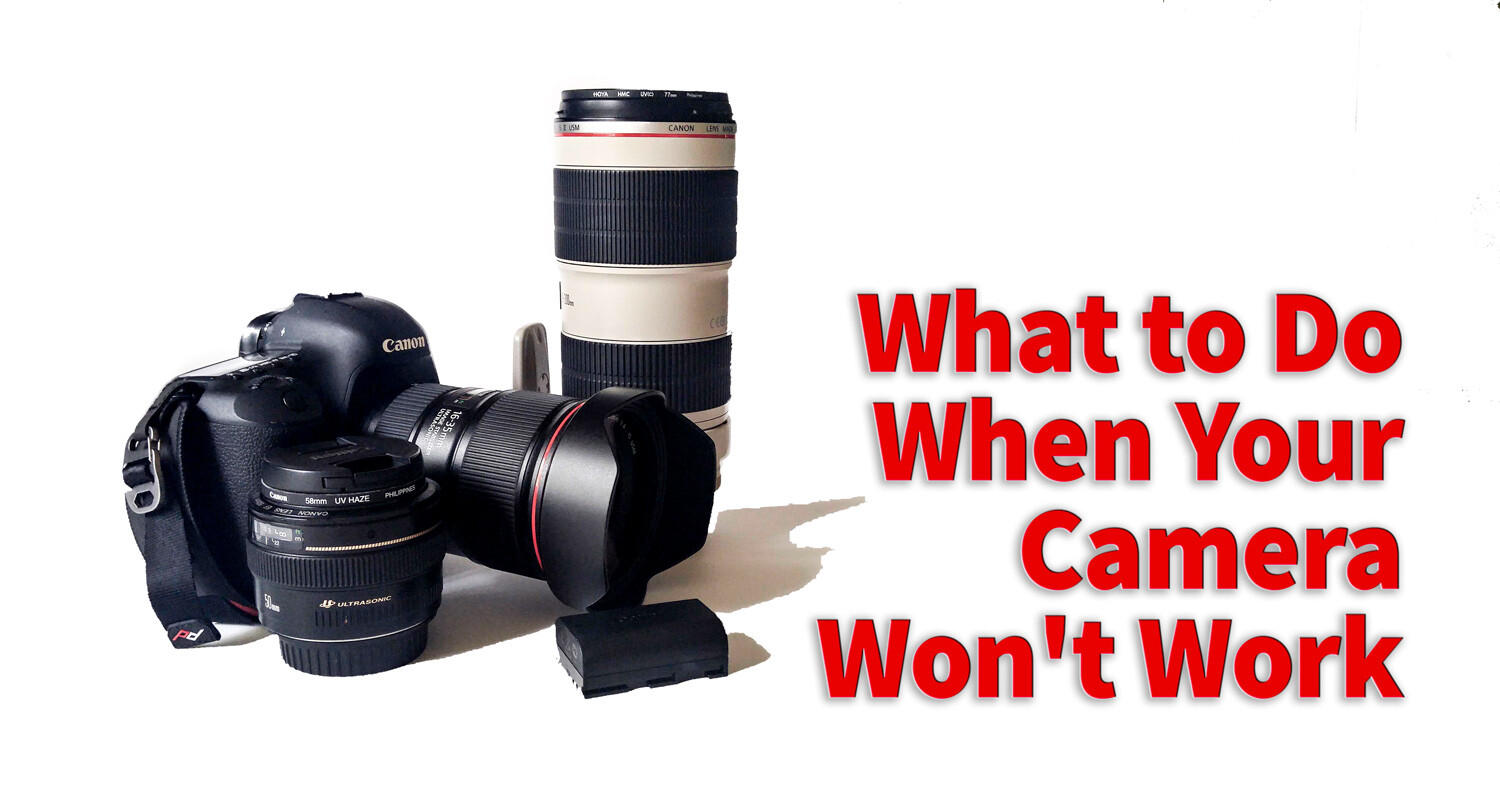
You love your camera and care for it with due diligence. You (hopefully) clean the sensor and wipe down your lenses, being careful to keep them dry and avoiding high humidity. But what happens when no matter how careful you’ve been, your camera won’t work and starts to act funny? What if that dear, dear equipment of yours stops working the way you try and expect? Then what?
Easy FixesThere are some fairly common problems that you can fix yourself. They involve a little bit of fiddling with your camera, but you don’t always need to run to your local camera store for repairs. So before you go running to the experts consider these options if your experience the following issues with your camera. 1) The lens won’t focus

Try using a blower to clean the attachment area for your lens. Just remember don’t ever touch the little gold squares with your fingers. They can corrode and then your camera cannot communicate with the lens. I will apologize for the camera shake on this image. It’s not easy holding a camera while shooting using a blower tool.
2) Memory Card Errors

Here you can see the little switch on the SD card. If you can’t write to the card check here. 3) Weird ExposuresIt can happen sometimes, you read the exposure correctly, and somehow everything comes out way too bright or too dark. The first thing to check is your exposure settings.

Oops, yep definitely did not look at camera settings when I shot this. Always check those when you consistently get a weird exposure.
Know when it’s time to put your camera to rest
There are times when there’s nothing you can do. Your camera is just like other tools and eventually, it will wear out. So let’s talk about the signs that you may have a camera on its last legs.

The dark band at the top is a sign that your camera shutter isn’t functioning properly.
ConclusionSo go ahead and tell us more about your camera. Give us some nice anecdotes about your frustrations with your gear. Tell us about the quick fixes you’ve found and tell us about your love-hate relationships with your older gear and why you moved on. The post What to Do When Your Camera Won’t Work and You Wanna Scream appeared first on Digital Photography School. Photography via Digital Photography School https://ift.tt/29wB9CX July 28, 2018 at 02:04PM |
Categories
All
Archives
November 2020
|


.jpg?resize=1001%2C1500&ssl=1)
.jpg?resize=1001%2C1500&ssl=1)
.jpg?resize=1001%2C1500&ssl=1)

 RSS Feed
