
|
https://ift.tt/2FLDWVO
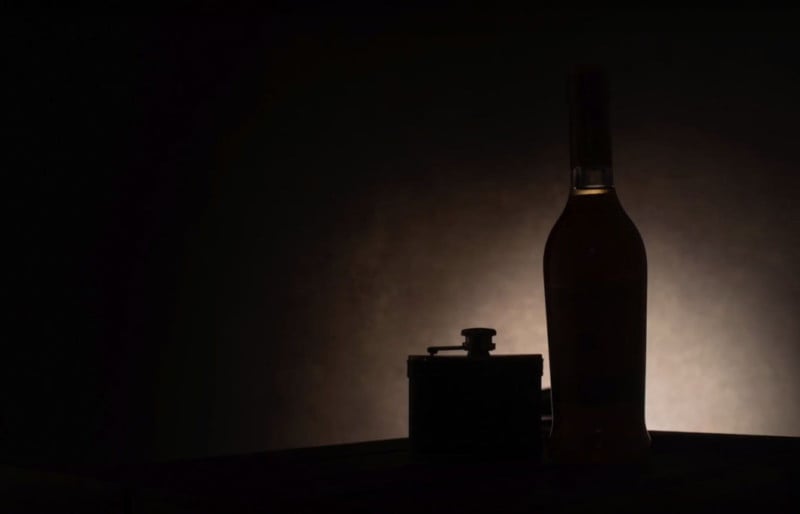
The One Light Whiskey Shot https://ift.tt/2UaY90t
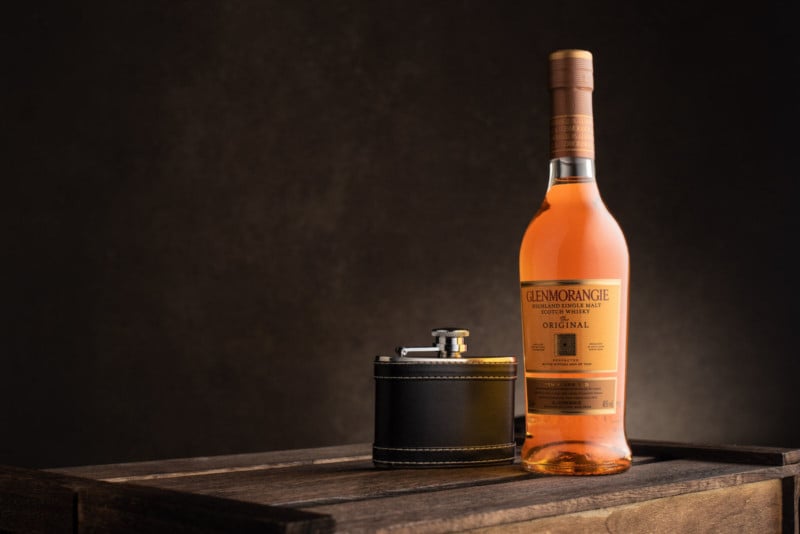
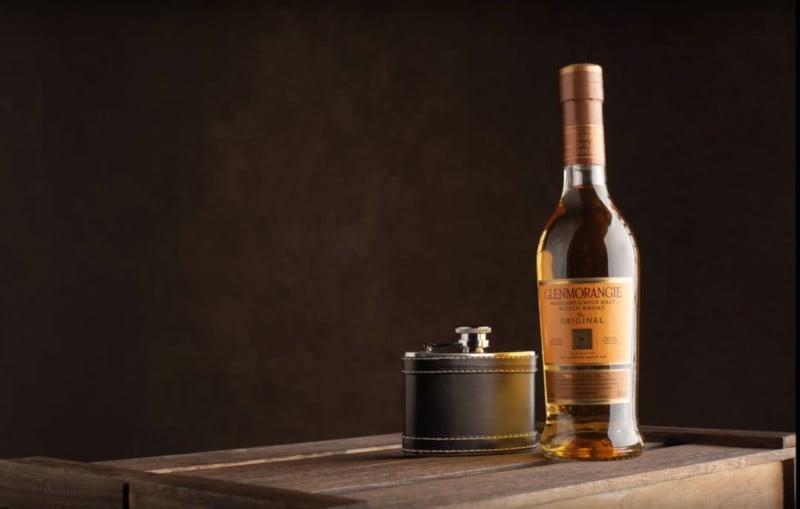
This article is for all of the new photographers new to lighting and to all who think they are limited by their lack of gear! I will show you how you can create this whiskey image with just one light, in-camera, and with no editing. Here’s the video version of this tutorial and walkthrough: Most of this image is in the setup, and by that, I mean shooting at a nice angle for the bottle and hip flask — an angle that is pleasing to the eye. For this shot, I had the camera low and pointing slightly upwards to the bottle and flask. I played about with the position of the wooden apple box and settled for this angle. For the background, I used a hand-painted backdrop from Artery Backdrops. It has great texture and colors which suited this scene perfectly but you can use pretty much anything as a background just be mindful it compliments the product your shooting. On to the lighting setup and a little technique I discovered which works great in this scenario. I used the Pixapro Citi 600 in a 90cm Softbox, but don’t be put off if you don’t have the same light — you can use whatever light you have, you only need one. First, using the Softbox to create a nice highlight down the side of the bottle and positioned camera right.
The problem we have is the left-hand side of the bottle is really dark, so we need to add some light to it. But remember: we are only using one light. We do this by adding a white foam board to bounce the light back into that side of the bottle. If you don’t have any foam board, you can use a card or anything that will reflect that light back.
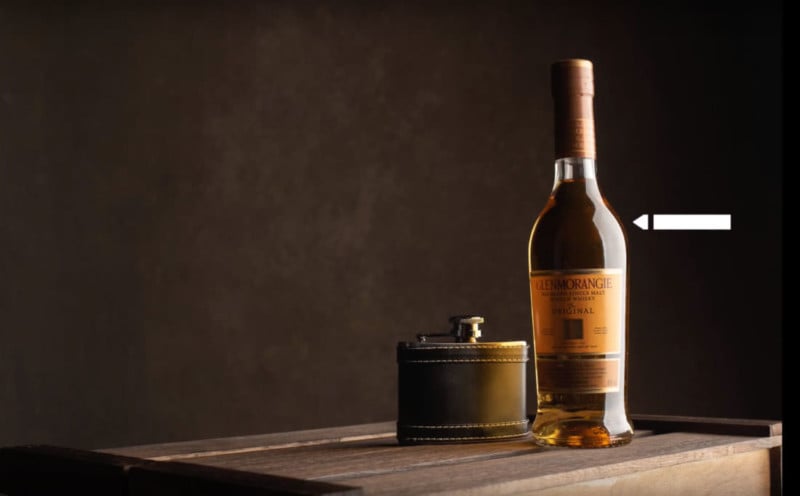
You can see how it has lifted the shadows and produced another highlight down the left side of the bottle. If you don’t like how wide that highlight is, simply adjust the fill card/foam board until you get your preferred look. A couple of things are still wrong with this image, the first being the highlight on the right of the bottle its still too hard. The second is there is too much light falling on to the canvas background. The best way around this would be to move the whole set away from the background but, if like me you are limited for space, we need another way. You could use a flag/gobo placed behind the light and in front of the background to stop the light falling on it, but that would mean more stands in a small space. My workaround is to add a strip box grid to the softbox at the back of the softbox and turning the modifier away from the background slightly (you can see how I have done this in the video).
I have the background how I want it. It’s time to work on the highlight down the right-hand side of the bottle. This highlight is too hard even though we are using a softbox that’s placed quite close, we need to soften this more and we do this by adding an inexpensive diffusion panel from a 5 in 1 reflector (if you don’t have one of these a white shower curtain would give a similar effect ). If we position this as close to the bottle as we can so it doesn’t creep into the shot and take another shot.
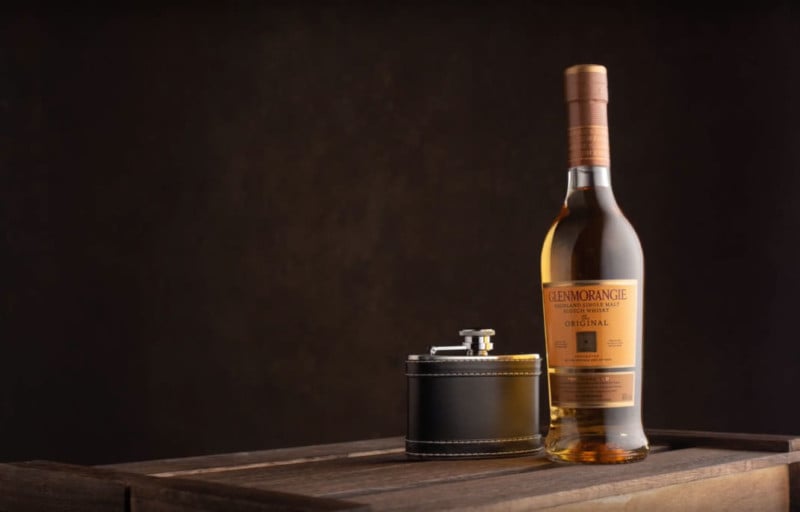
That has produced a really nice soft highlight that looks so much better. I would much prefer to light this with multiple lights it would be so much easier to get everything looking exactly the way I want it but we are sticking with just the one light for the purpose of this tutorial. Next, we need to lift the color of the liquid in the bottle. This is going to make a big difference to the whole look of this set and we do this by adding some colored card cut out in the shape of the bottle, just slightly smaller in size overall, and placed behind the bottle to bounce light and color back through to give this effect:
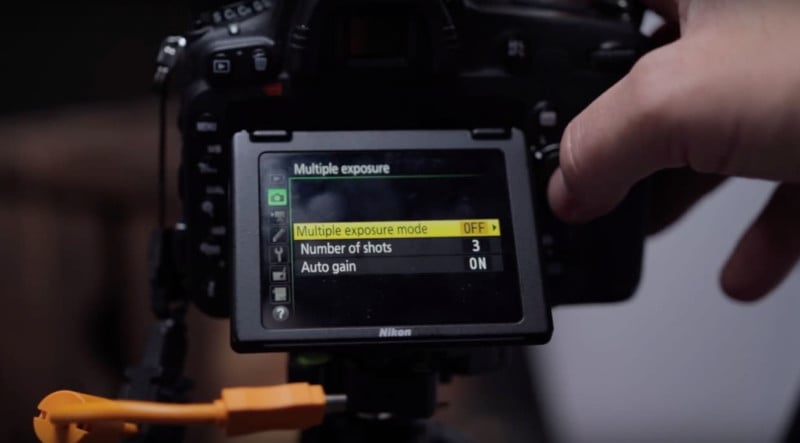
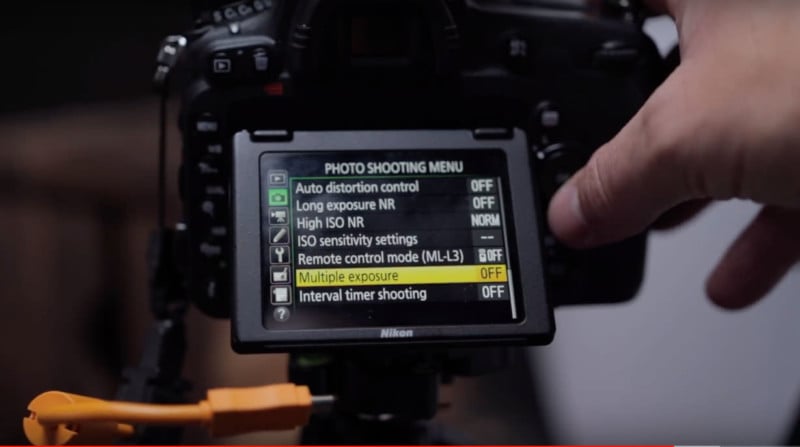
Wow, that really does make a huge difference to the image! Now that we have that looking really good with just one light. I now want a small ball of light on the background just a glow, but how do we do that if I only have one light? Well, this is where the great little technique I discovered and tested out on this image comes into play. You may already be familiar with or know of the multiple exposure technique. I have seen this used many times in portraits where they take a portrait shot almost silhouetted and another image of the sky and clouds and the camera combines it all in camera. This got me thinking — I wanted to try this in a product shot using just one light. To do this we need to set up the camera to shoot two images and combine them in camera. On my Nikon D750, I turn on multiple exposure mode and set the number of shots I need to take, you have a choice of 2-3.
Once this is set on the camera the next step is to take the first shot:
Now what we need to do is remove the light from the softbox and fit it in a standard gridded reflector and place it facing the background just behind the bottle. We take another shot:
This is the really cool part! The camera now combines the images adding the nice glow on the background area to our first image producing a raw image in-camera!
I was super happy with the results and using this little technique and I hope it gives you a bit of inspiration to give it a go as it is really effective and produces great images with just one light! About the author: Barry Mountford is a photographer based in Gateshead, England. The opinions expressed in this article are solely those of the author. You can find more of Mountford’s work on his website, Facebook, Twitter, and Instagram. This article was also published here. Photography News via PetaPixel https://petapixel.com March 30, 2019 at 11:37AM
0 Comments
https://ift.tt/2U4zESw
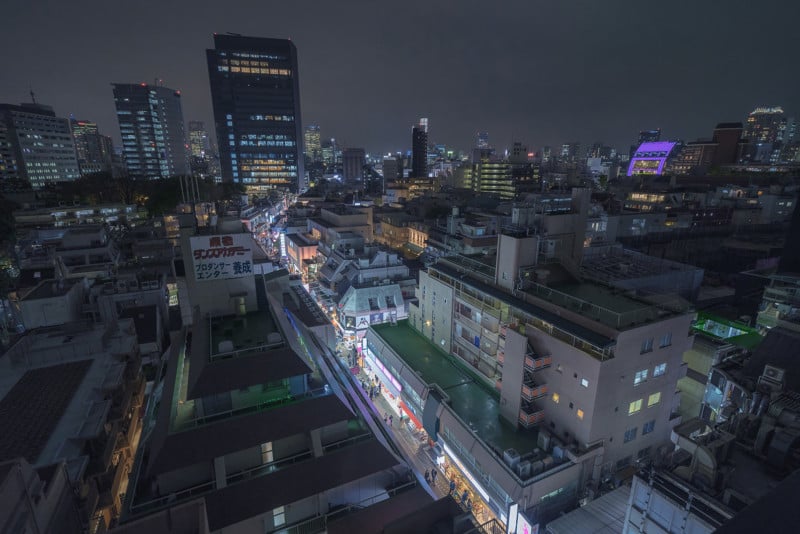
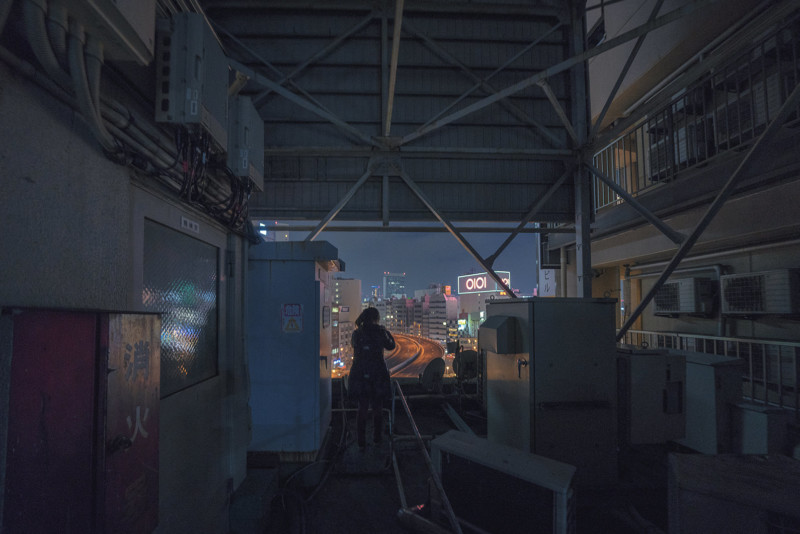
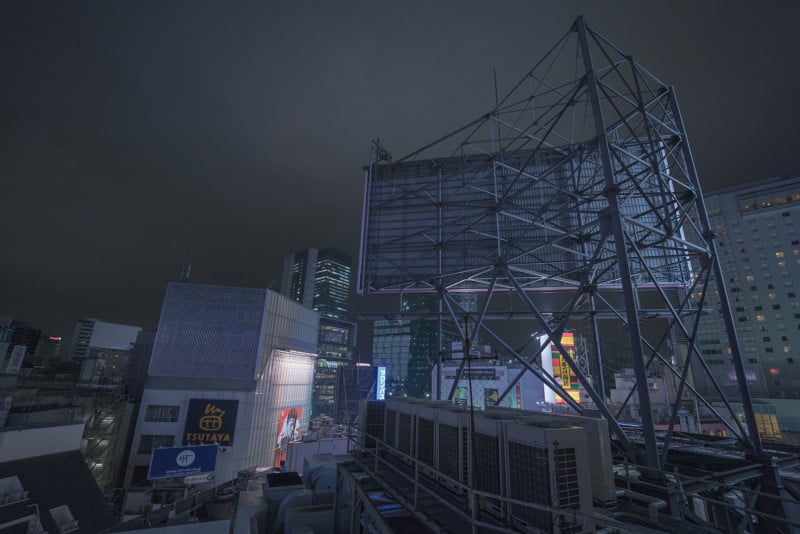
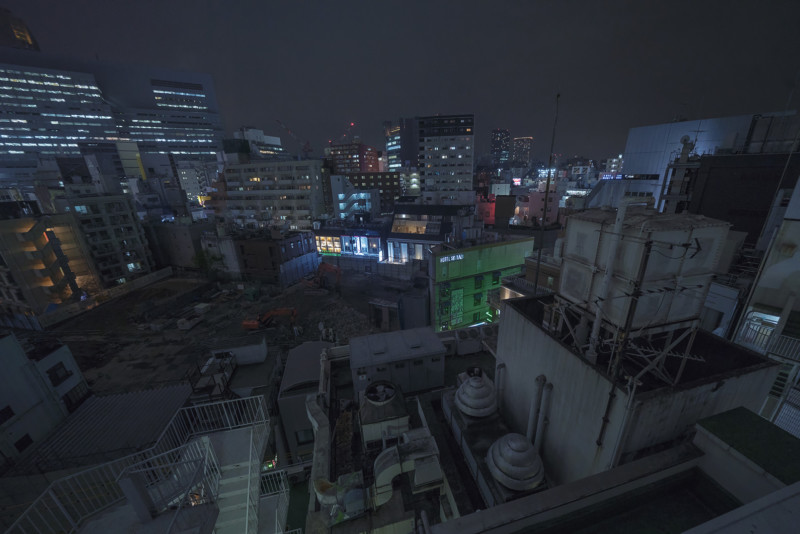
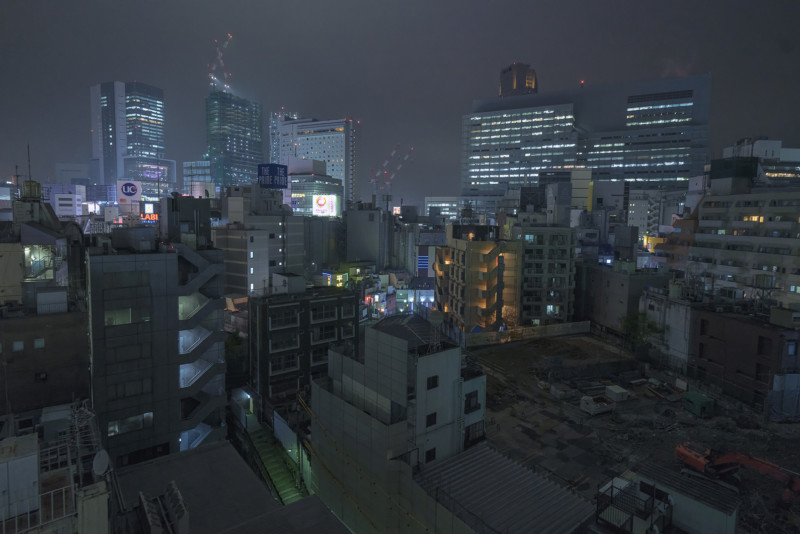
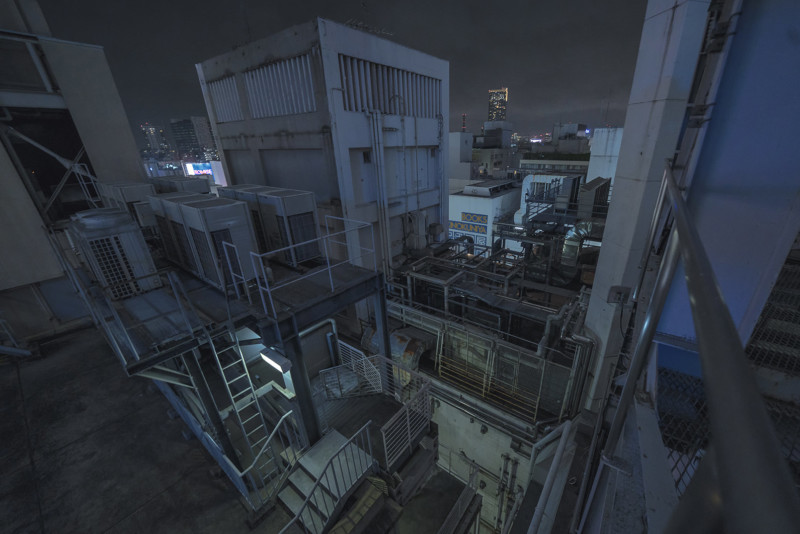
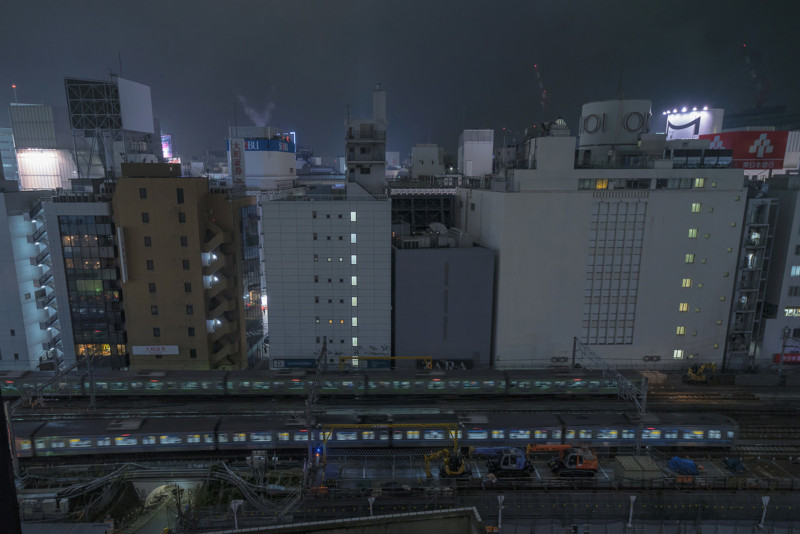
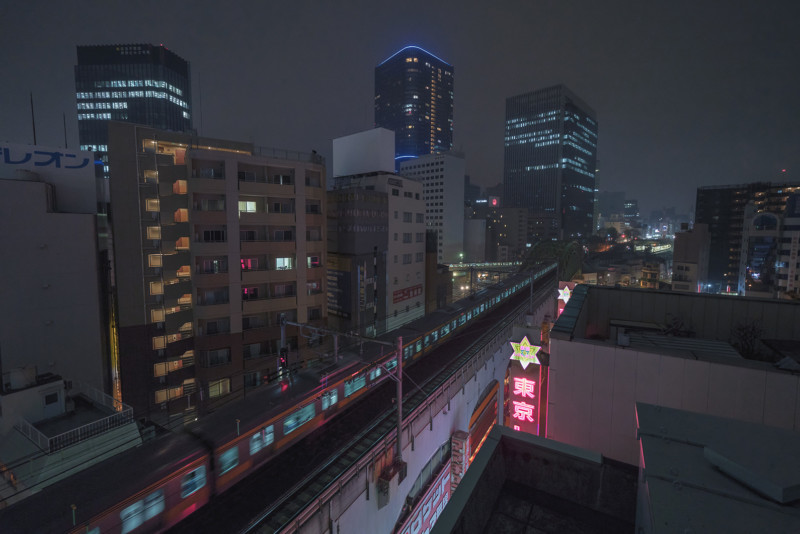
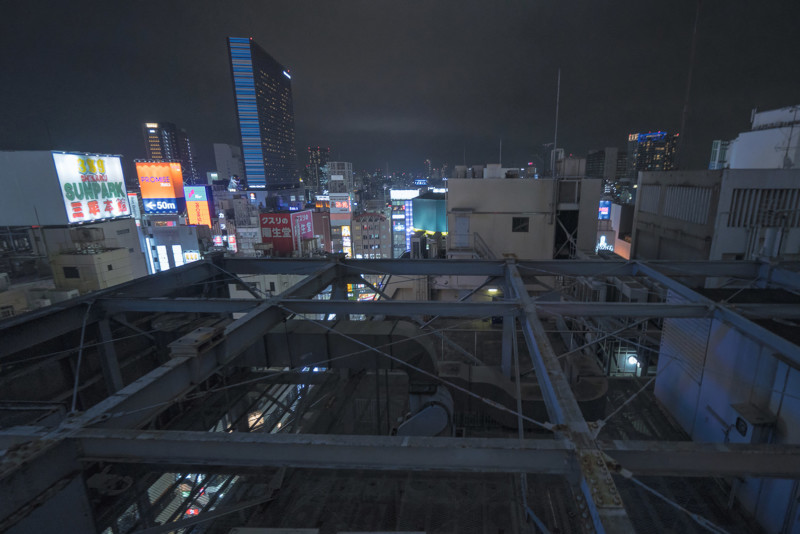
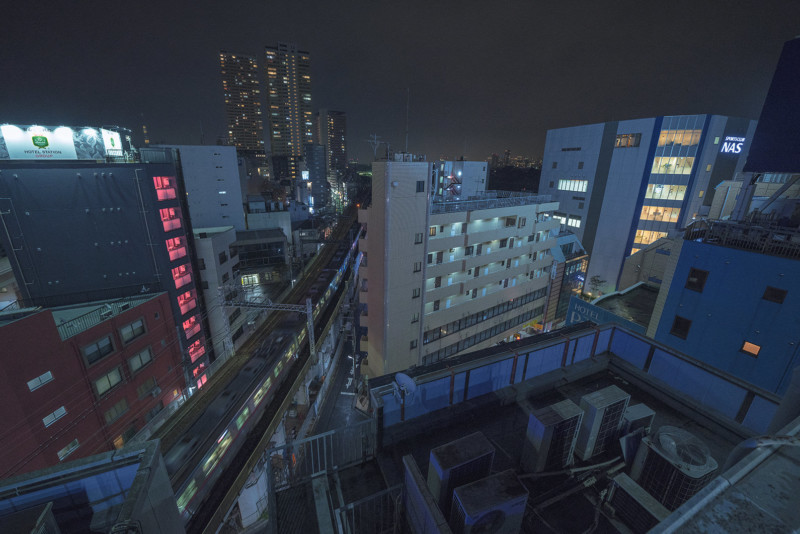
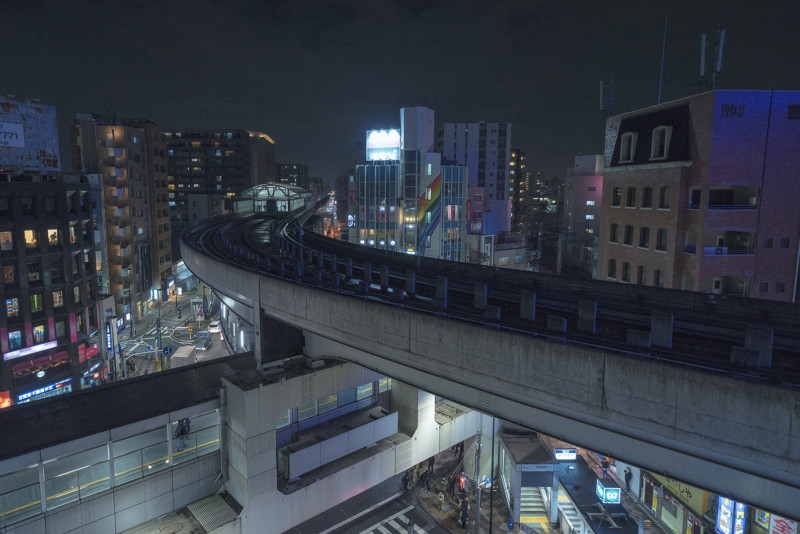
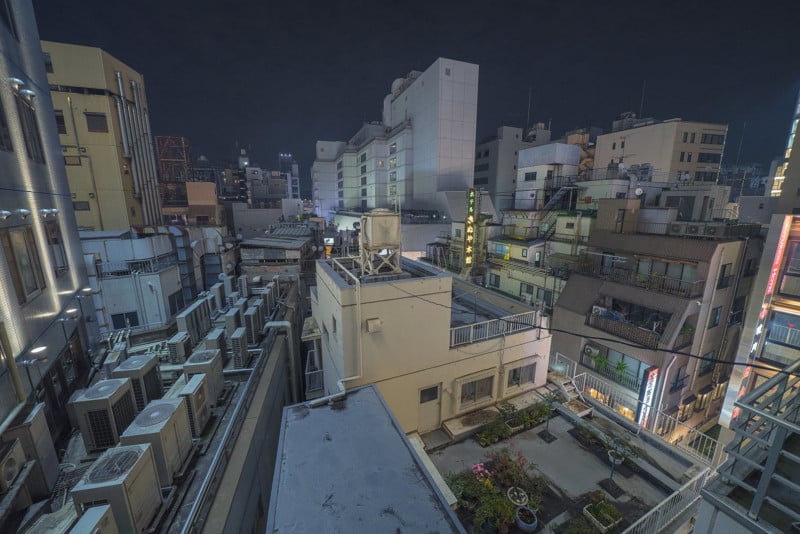
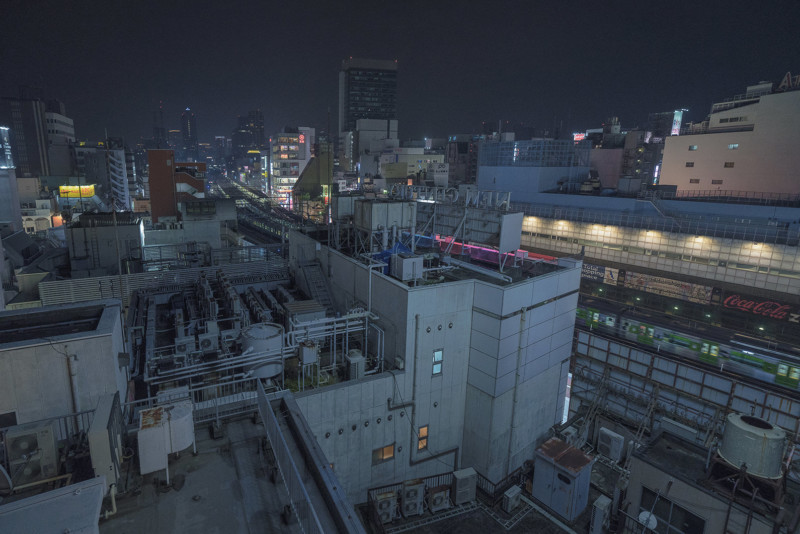
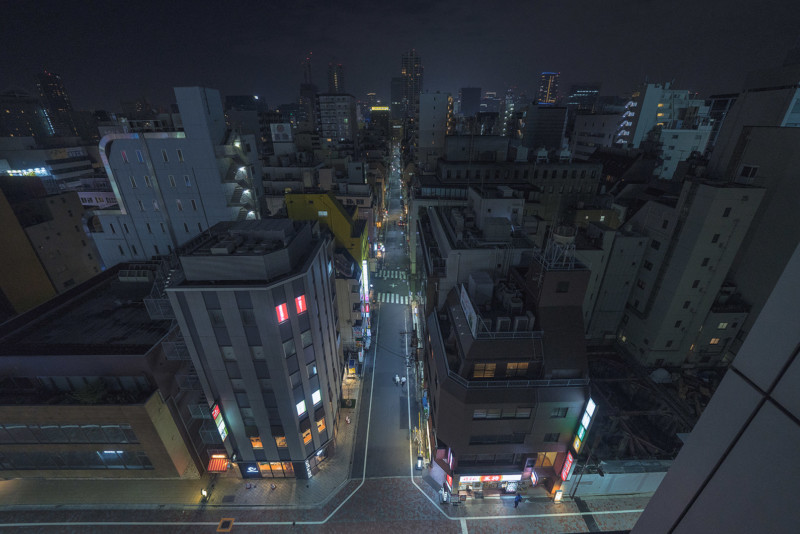
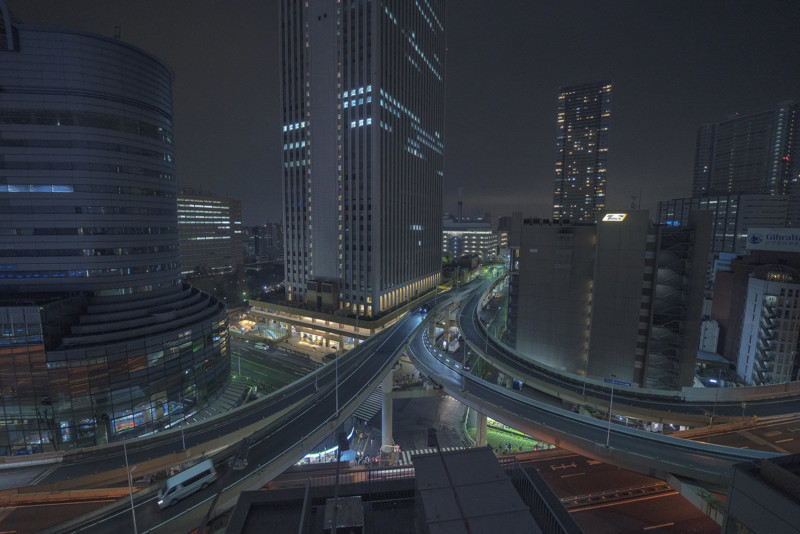
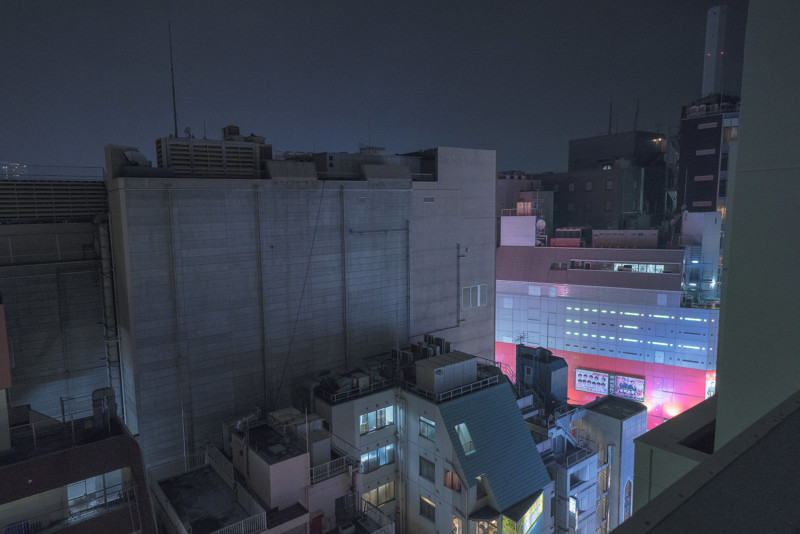
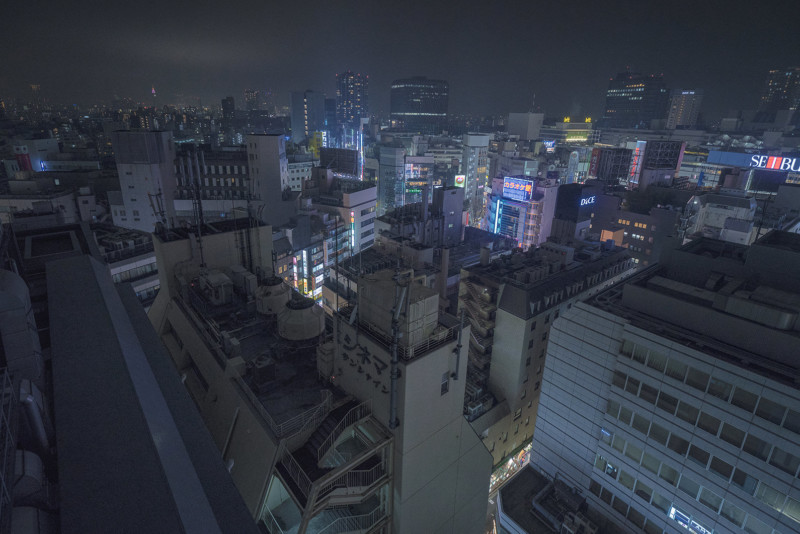
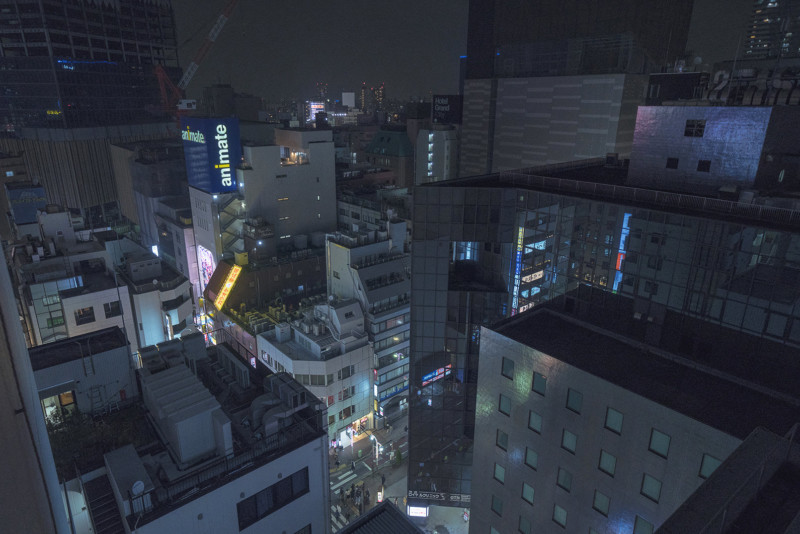
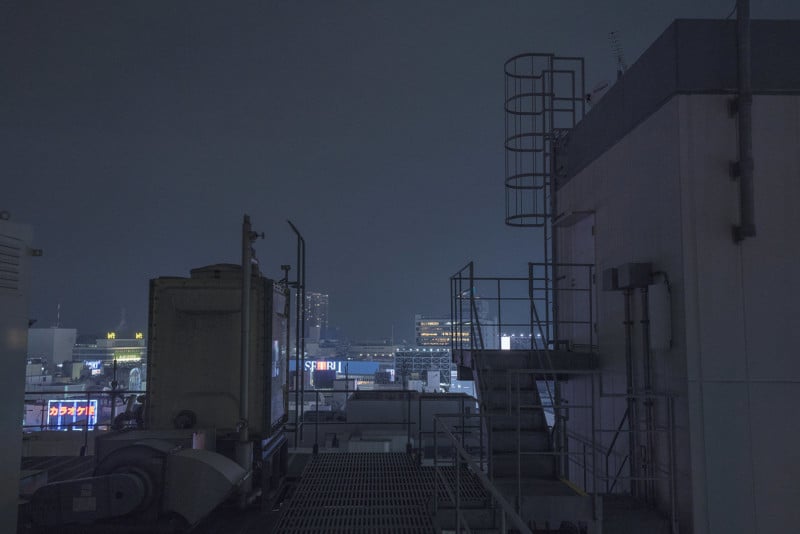
Rooftop Photos of Tokyo at Night https://ift.tt/2CNuZJO
Photographer Austin Hou visited Tokyo a number of times between 2017 and 2018 and spent his nights rooftopping and photographing the city from above.
Here’s what Hou says about the series:
You can find more of Hou’s work on his website. P.S. If you enjoyed these photos, be sure to check out photographer Alain Cornu’s 4×5 large format rooftop photos of Paris at night. Photography News via PetaPixel https://petapixel.com March 30, 2019 at 11:02AM
https://ift.tt/2uxJjSp
How Learning To Grade Footage Can Help You Colour Correct Images https://ift.tt/2uymbDb Once you have weaned yourself off Jpegs and in-camera colour profiles, you may find that the colours in your images are not quite what you expected or wanted. If you are shooting RAW, there is no colour correction or white balance applied. You need to do that in post-production. To newcomers and even experienced photographers correcting colour in images can be challenging. You correct a colour issue in highlights and the shadows swing the wrong way. You get the sky looking great but that sand beach now looks bluish. It's all a very fine balancing act. Many of us now also shoot high definition or even 4K video. Although this often has a mild colour correction applied in camera, we still need to correct further in post-production. Editors call this process colour grading and as photographers, it can be a useful skill to learn. Here’s why. What Is Colour Grading?Colour grading and colour correction are terms that are relatively interchangeable in video editing. In general, however, colour correcting does just that, corrects colour shifts in various tonal ranges of the footage. Colour grading then applies a colour style to that footage. Look carefully at virtually any well-made film or video these days and you will see it will have been colour graded. It may have been given a warm yellow feel to denote hazy days of summer, maybe a neon green cast as in the Matrix to denote when the film is inside the Matrix itself. Colour grading gives mood to a film and can do the same for a photograph. You Need A Calibrated MonitorIf you are going to be serious about any type of colour correction either in stills or in video then you are going to need to calibrate your monitor. Proper monitor calibration will require a specialist tool. These can be had for as little as a $100 or up to the 1000’s. You don’t need the most expensive model, a basic model will do for most work. Monitor calibrators are pretty much automated. You hang them from the top of your monitor, overlaying a coloured box. The software then changes the colour of the box and the calibrator reads and analyses it. The whole process takes around 5-minutes and should be done once every couple of weeks. You should also calibrate the monitor in the environment that you work in. If you work with fluorescent lights on, then calibrate with them on. If possible, work with your monitors facing away from natural daylight. As this can change through the day, it can change your colour perception. 
A calibrated monitor is vital. Photo by Nate Grant Video Color Correcting ToolsOne of the reasons we can learn so much from grading footage is that video editing suites generally have more options and tools. In image correction, we tend to only have the histogram and the clipping indicators with which to work. To correct colour we can use the RGB channels on the histogram but that’s about the limit of the visual aids we have. In video grading, we have more visual tools to help us correct our footage. By watching how these tools react to our corrections we can learn so much about correcting still images. These are the primary visual aids most video editing suites have.

The histogram is a tool most of us are familiar with Colour Correcting Footage: The Waveform ScopeWhen we correct footage, like with images, we start with the exposure. Editors generally use the Waveform for this. They tend to start by getting the overall exposure correct, then bring the blacks down to 0, the whites to the 100 mark. Then if needed they lower or raise the midtones. This is not dissimilar to exposure correction in images except the waveform gives us a much better visual representation of the correction and the way the tones are spread throughout the footage. It gets more interesting when we come to correcting colour. To start a colour correction, we can use the RGB parade in the waveform scope. This shows us the three primary colour channels. The left of each channel is the highlights and the right, the shadows. The beauty of the waveform scope is that when, for example, we drag the highlights colour wheel towards the red, not only do we see the red parade increase, but also the green and blue channels decrease. More often than not, that decrease is in the midtone and shadow areas, in other words, you are by adding red to the highlights you are removing green and blue from mid and dark tones. This could lead to a cast in the shadows. This is a very important consideration when colour correcting images in, for example, Lightroom. The visuals tools we have do not give us such an obvious representation of how moving one colour in one tonal range can affect other colours in other tonal ranges. The waveform scope demonstrates much better, the cause and effect of colour correction. 
The waveform scope would make a great addition to stills software. Colour Correcting Footage: The VectorscopeTo determine where any colour hue and saturation, we use the vectorscope. This tool is a circle surrounded by a gradient of colours, primaries, and secondaries. In the centre is a white smear, for want of a better word. If we had a perfectly colour corrected clip of a grey card, that white smear would be perfectly circular. That would represent equal amounts of colour and saturation in each channel. For a regular video clip, the smear will often be an oblong shape pointing out towards one of the colours at the edges of the circle. The further the white smear is towards a colour, the more saturated that colour is. If the overall smear veers away from the centre, towards a particular colour, that may indicate a colour cast or also a clip with a predominance of one colour such as a sunset. 
The vectorscope is a very powerful tool for determining saturation in individual colors. Again we can use the colour wheels in combination with the vectorscope to help set the right level of saturation. Playing around with this visual aid can be a great way to see how changing saturation in one colour can affect others. 
Color wheels are a very precise way to modify colour in various tonal ranges. Although not intended to be a tutorial on colour grading footage, we hope that by understanding and using the tools available to video editors, you may get a better understanding of how colour correction works overall and in particular with stills. Whilst you may not have the budget to buy a high-level video editing suite, you can get a truly professional suite for free. It’s called DaVinci Resolve and it is used by top end editors on Hollywood movies. The learning curve is steep, but there are plenty of great tutorials on Youtube, in particular for colour correcting. Resolve was originally designed purely as a colour grading tool and so has all and more of the tools we discussed above. It is a great app for getting to grips with and understanding the nuances of colour correction and grading. Get a good grip of correcting your footage and you will find it opens up all sorts of possibilities with your still images. Photography News via Light Stalking https://ift.tt/2kwTW5i March 30, 2019 at 10:01AM
https://ift.tt/2HQ043D
The post Create a Backup Today! Here is Why and How appeared first on Digital Photography School. It was authored by Ian Johnson. Are your files protected?Insurance policies. We deal in them every day – car, home, life, renters, medical and more. The list goes on and on, but what are you doing to ensure your photos are insured against loss? The loss comes in many ways entirely out of your control – hardware failure, theft, or calamity. This article is your wake up call to consistently backup your work. I am writing it because 5 months ago when my house burned I had my wake-up call. Don’t worry, my wife and I are fine, and there was no loss of life – only property. Why am I telling you this very personal bit of my life? Simple. Catastrophe can come in any form and at any time. Learn from my mistakes and back up as soon as you complete this article. 
This picture of my house burning is meant to convey reality. Calamity can happen at any time. Do you have a backup solution to protect your files in the face of disaster? Let me take you back to six months ago because it is likely my backup strategy may reflect your own. I am a pretty serious photographer and create much content of professional and family-related photos. I had a 24tb server backing up my files with redundancy. From the server, I kept an off-site backup of files by copying to a hard drive and then storing it. As I’ll highlight later, that way of doing a backup is adequate as long as you stay up on it. Unfortunately, I had not completed an offsite backup for two years! Consequently, ALL of my professional work and memories during that time were vulnerable as my living room went up in flames and the water from fire hoses quenched them. One of the first things I thought when I arrived to see my house spurting 20-foot flames from the roof was, “what about my server?” 
Your computer is fragile, but yet we trust them to hold a lot of incredibly important information. Whether its fire, theft, water, or failure, be sure your backup solution protects you. Establish one today! Backup strategiesIt may seem intimidating to back up your work, but thanks to the advances of high-capacity, affordable hard drives there has never been an easier time to do it! Once you have a system in place it becomes even easier. Digital Photography School has published several articles on the subject and most advocate for the “3-2-1” strategy. This means : 3: Have three copies of your data. 2: Keep them in two separate places. 1: At least one must be offsite. If this sounds like it is too hard, fear not, and do not tune out yet! I’ll outline three strategies to back up your work in easy to understand ways that serve both beginner and professional photographers. To help show off the strategies I’ve created some schematics (hopefully entertaining and fun ones) to show you how each system works. Back up to a hard driveHard drives are cheap. A quick search shows you can purchase a 6TB (terabyte) hard drive for $125! Before you think to yourself “I can’t afford $125,” consider it is cheaper than any insurance policy you currently pay for, and if your photos are like my photos, it is an insurance policy protecting your memories and business. Purchasing and rotating two hard drives consistently allows you to keep a backup of your work current. You may want to consult these guidelines for purchasing a hard drive. Most major hard drive brands come with built-in software to automatically backup your files for you. This makes it incredibly convenient to back up your work. You can use two hard drives (“#1” and “#2) to adhere to the 3-2-1 rule by:

Use these easy steps to establish a back-up system using two hard drives. This solution is your cheapest option and requires the most work on your part. As long as you set up the backup using your hard drive’s software, it will automatically backup your files to hard drives #1 and #2 as you rotate them on and off-site. This system will FAIL if you do not adhere to rotating the hard drives consistently! Backup to the cloudCloud services have become relatively cheap (about $100/year or less) and perform backups of your images with the caveat that you have a regular internet connection. Most cloud services can back up local files and files on attached external hard drives. You can adhere to the 3-2-1 rule by:

Use this simple system to backup your files to a hard drive and to the cloud. This is a pretty good option depending on how much content you are creating. If you are generating hundreds of gigabytes of content regularly or if you live in an area of slow internet this may not be feasible for you. Cloud services work best if the file structure doesn’t change. Moving files to new folders create a duplicate and the need to upload more data to the cloud. This option is middle-of-the-road for the expense. It is necessary to pay for a hard drive (or two) and a cloud service for a total of ~$300 annually. Maintain a serverServers (refer to NAS Servers) are arrays of hard drive that give you redundancy in case of hard drive failure. Housing all of your images on a server and backing them up from there is a great way to establish a relatively low-maintenance backup of your files. To adhere to the 3-2-1 rule:

Having a server may seem complex, but can be the backbone of the rest of your backup system. This is the system I advocate for your if you are able to afford it! This is the most expensive solution, and will likely cost $1,000 or more to set up. However, that cost becomes distributed over several years since you no longer need to purchase several individual hard drives. This system is overall the most reliable and requires the least amount of work on your part once set up. Backup now!I hope my story of personal loss is compelling enough for you to start researching backup solutions immediately. Do you have a story of image loss you are comfortable sharing? Leave it below to add to the mounting evidence of the need for future readers. My story has a surprising ending because my server survived and I was able to recover the files. There is almost no chance I’ll ever be that lucky again. As I always say, “Pixels are cheap.” I say that at the end of all of my articles. However, just because they are cheap, doesn’t mean they are not emotionally or economically valuable. Please back your pixels up today! The post Create a Backup Today! Here is Why and How appeared first on Digital Photography School. It was authored by Ian Johnson. Photography via Digital Photography School https://ift.tt/29wB9CX March 30, 2019 at 08:04AM
http://img.youtube.com/vi/I-7FI2xCnnc/0.jpg
DPReview TV: 'Wooden Niccolls' with the Blackmagic Pocket Cinema Camera 4K https://ift.tt/2FBoVEP A 'Wooden Niccolls' is an episode in which Chris and Jordan bring together a film crew to recreate a scene from a Hollywood movie, all while testing a piece of gear. In the first Wooden Niccolls for DPReview TV, their team used the Blackmagic Pocket Cinema Camera 4K (BMPCC 4K) to recreate a scene from Eternal Sunshine of the Spotless Mind. But wait – there's more! You'll go behind the scenes to see how the scene was shot, meet members of the crew, and learn a bit about rigging the BMPCC 4K. Will Chris win the Oscar for his portrayal of Kate Winslet in a dramatic role? Will Jordan's touching performance bring you to tears? We look forward to critics' reviews. If there's a movie episode you'd like to see our dynamic duo recreate, tell us in the comments! Get new episodes of DPReview TV every week by subscribing to our YouTube channel!
Photography News via Dpreview https://ift.tt/i0r8o5 March 30, 2019 at 08:01AM
https://ift.tt/2JQyPYH
Sigma 60-600mm F4.5-6.3 Sport sample gallery https://ift.tt/2U5RyEu The Sigma 60-600mm F4.5-6.3 Sport is quite the beast, and will likely appeal to those looking to photograph wildlife, airshows and all manner of distant subjects. We've discovered that it's actually quite a handy lens for casual, everyday shooting – if you'd like your photographic pursuit to double as an upper body workout. Take a look at how we've been getting along with it. See our Sigma 60-600mm F4.5-6.3 Sport Photography News via Dpreview https://ift.tt/i0r8o5 March 30, 2019 at 08:01AM
https://ift.tt/2U5a6o1
4 Reasons Why You Should Use Props In Portraiture https://ift.tt/2VacR4g Props can be an important part of portraiture, product, and even landscape photography if you know how to use them properly. The main function of props is pretty much straightforward – they should improve the composition and add a certain visual interest to the main subject. Many professional studios have typical props such as stools, pedestals, costume props, potted plants, blankets, hats and so on. However, you should know that almost any object can be a prop – you don’t have to buy specialized props for studio photography. Even everyday objects such as lamps, books, balloons or pillows can make your images more dynamic and contribute to the storytelling potential of your photo shoots. The following tips will help you understand why it’s useful to include props in your photo shoots! 
Photo by Randy Fath 1. Props Can Make A Posing Routine EasierOne of the most common issues in portraiture is not being able to make your model look and feel relaxed. Especially if your model gazes straight towards the camera in a formal pose, chances are the photo will look tense and overly posed. In order to pose your subject in a more natural way, you can use props such as stools, tables, books, or flowers. These objects can give your models something to focus on, which will make them less fidgety and easier to shoot. Using props is also very helpful when you have shy models – they will be less conscious of the camera if they have something to do (hold a book, sit on a stool and so on). Of course, don’t include props if they aren’t necessary – certain photographs will definitely look more effective and more powerful without any distractions. 
Photo by Henri Meilhac 2. Props Can Impact The Overall MoodAnother important thing to remember is that props can affect the overall mood of your images. The placement, color, and function of props you use can be as powerful as body posture or facial expressions of your model. For instance, a model that is surrounded by bright or colorful flowers can make the viewer feel cheerful and happy, while old furniture and dusty books can enhance a nostalgic atmosphere. You can also create a quirky and whimsical mood with unusual props, such as large hats or flamboyant glasses. Don’t forget that the props you choose should enhance your model’s look. For instance, if your model has green eyes, a green-colored prop (such as a green chair or a green balloon) can emphasize this feature. You can also use a light source as a prop by including it in the composition. This can work beautifully especially if you have an artsy looking table lamp. 
Photo by Matt Collamer 3. Props Can Help You With StorytellingThere are two different approaches when it comes to enhancing storytelling with props. You can use obvious props for costume-themed and holiday-themed photo shoots, such as Santa’s white beard, witch hat or angel’s wings. These are ideal props for kids – they will love them! On the other hand, props can also be more subtly used to tell a story of your model’s job, interests and hobbies. In this case, you can include a musical instrument, headphones, ball, empty canvas and so on. 
Photo by Bruce Mars 4. Props Can Make Regular Backdrops More EngagingIf you plan to use a backdrop in your photo shoot, it’s a great idea to coordinate your props with your backdrops. For instance, you can use an assortment of white balloons in front of a white backdrop – this will create an ethereal and soothing atmosphere. On the other hand, for more dramatic effects, you can use blue chairs on a yellow backdrop – this will add a powerful visual weight to your photograph. Always remember to choose your props wisely – the bigger they are, the more distracting they may become. The same goes for colors. You probably don’t want your props to be more important than the model, so make sure you don't overuse vibrant, highly saturated, colors in your props. 
Photo by Averie Woodard Since props should be optional fun elements in your photography, feel free to experiment, improvise, and be imaginative with them. You will learn that there are many ways you can use an ordinary object as an engaging prop for your model. In case you want to learn more about portraiture, feel free to check out the following links! Further Resources:
Photography News via Light Stalking https://ift.tt/2kwTW5i March 30, 2019 at 07:01AM
https://ift.tt/2FBj6Yg
Look Through the Viewfinder of Street Photographer Nick Turpin https://ift.tt/2FHPnOk Well-known London street photographer Nick Turpin has started a new point-of-view video series to allow people to “come along for the ride” as he creates his work. The 17.5-minute video above is a look into how he works and things on the streets of the UK’s capital. While most point-of-view street photography videos use a GoPro mounted to the top of the photographer’s camera to show their point of view, Turpin is directly sharing the viewfinder view of his Fujifilm X100F of what his eye actually sees. “I have developed a system to film through the viewfinder as I work on the streets of London,” Turpin, the founder of the international street photography group iN-PUBLiC, tells PetaPixel. “I’ve never seen it done before and I think it’s the best way to teach street photography technique.” And combined with Turpin’s commentary as he chooses settings, uses different techniques, and creates scenes, the video provides an eye-opening look into the mind of a seasoned street photographer. 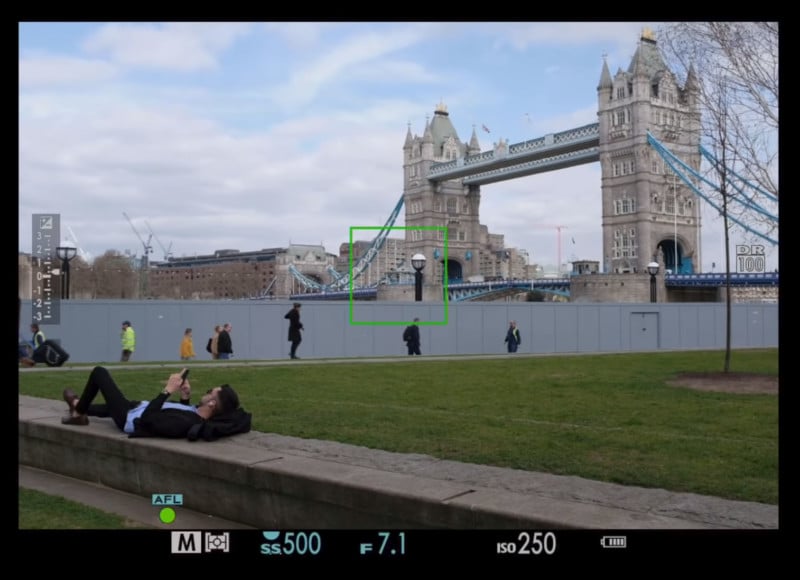
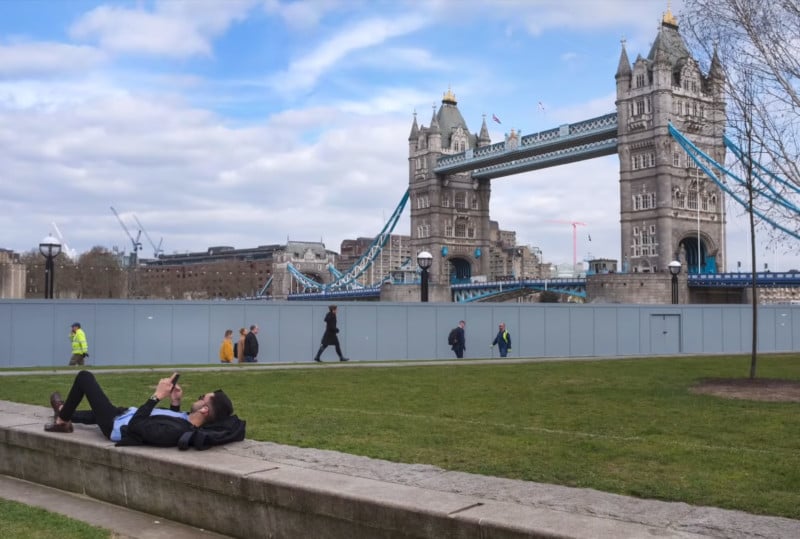
Turpin says he’s planning to continue filming this type of point-of-view video over the coming months, and you can follow along with the series through his new YouTube channel. Photography News via PetaPixel https://petapixel.com March 29, 2019 at 10:42AM 35 Photographs of Light Bulbs That Will Illuminate And Inspire https://ift.tt/2FHO6pA Light bulbs are perhaps the most basic yet poetic artificial light source in the world. Beyond their importance, they are quite photogenic as simple objects, and today we want to give these little warm fellows a special place in our photography world. Today we bring you a curated collection of 35 beautiful looking light bulbs that we hope will illuminate and inspire your photography. 
Photo by Raul Varzar 
Photo by Rodion Kutsaev 
Photo by Sean Patrick Murphy 
Photo by Terry Vlisidis Let's face it, elevating the every day from boring to art is about amazing composition. Getting composition right has always been the greatest challenge for the photographer. If you’d like to get better at photography composition and learn concepts that go beyond the basics, you should take a look at Kent DuFault’s guide to advanced composition.
Photo by Skye Studios 
Photo by Riccardo Annandale 
Photo by Fachy Marín 
Photo by Nick de Partee 
Photo by DXL 
Photo by Anh Duy 
Photo by Brennan Burling 
Photo by Cinn 
Photo by Luis Tosta 
Photo by Hans Vivek 
Photo by Matthew Brodeur 
Photo by Matteo Kutufa 
Photo by Adam Wilson 
Photo by Johny Caspari 
Photo by Natasha Kasim 
Photo by Delfi de la Rua 
Photo by Samuel-Elias Learning And Applying Advanced Composition Will Elevate Your PhotographsAdvanced Composition – will ensure you create images that pop. You'll get more out of your photography and start taking images that will truly capture your creative vision. If you’d like to improve your composition skills and learn concepts that go beyond the ‘rule of thirds’, do take a look at Kent DuFault’s guide Advanced Composition. In Kent Dufault's Advanced Composition, you'll discover advanced composition concepts such as:

Photo by Mason Nelson 
Photo by Diz Play 
Photo by Jessica D. Vega 
Photo by Ethan Hoover 
Photo by Patrick Tomasso 
Photo by Blake Wheeler 
Photo by Jason Leem 
Photo by Eberhard Grossgasteiger 
Photo by Tomas Jasovsky 
Photo by Thomas Martinsen 
Photo by Bob Abednego 
Photo by Patrick Tomasso Further Learning:We hope that this gallery of light bulbs has inspired you to find beauty in simple things that you may take for granted every day. If you are looking to improve your photography composition and learn concepts that go beyond the ‘rule of thirds’, do take a look at Kent DuFault’s guide Advanced Composition. With this guide, you will learn all about:
Photography News via Light Stalking https://ift.tt/2kwTW5i March 29, 2019 at 10:01AM
http://img.youtube.com/vi/LxtorgYsbOs/0.jpg
Video: a teardown of OPPO's periscope-style smartphone telephoto lens https://ift.tt/2FHANq4 Periscope-style tele lenses are the latest big thing in mobile photography as they allow to squeeze longer zoom factors than before into the thin bodies of high-end smartphones. Huawei just launched the P30 Pro with a 5x optical tele and OPPO's Reno device with a similar setup is set to launch on April 10, 2019. Despite still being more than a week away from the official launch date, a video has surfaced on the Chinese social media site Weibo, showing a teardown of the Reno's rear camera, including the innovative tele lens, and it's fascinating to see how much technology and optical engineering can fit into such a tiny module. The periscope camera only measures 23.5 x 11.5 x 5.73mm, making it thin enough to fit into phones without the need for a big camera hump. It also doesn't take up much space in the body overall and therefore does not get into the way of other components.
The module consists of the image sensor, lenses and the prism that diverts the incoming light into the lens and onto the sensor. Optical image stabilization is achieved through a magnetic coil that moved the prism. Optical image stabilization is also available on the camera's primary wide-angle and image data captured by the two cameras can be combined to generate a 10x hybrid-zoom image. We also already know that at least one version of the Reno will be powered by Qualcomm's top-end chipset Snapdragon 855-powered and come with a 6.4-inch AMOLED display with 2340 x 1080 pixel resolution. So, overall the upcoming OPPO looks like it could be a real competitor to the P30 Pro. Photography News via Dpreview https://ift.tt/i0r8o5 March 29, 2019 at 08:51AM |
Categories
All
Archives
November 2020
|


 RSS Feed
