
|
https://ift.tt/2QIvlqr
How to Create Social Media Images With Google Drawings https://ift.tt/2D7NfAl
In this article, you’ll learn how to create professional-looking images using Google Drawings. 
How to Create Social Media Images With Google Drawings by James Scherer on Social Media Examiner.
Why Use Google Drawings?Google Drawings was originally built to help businesses create flowcharts, website wireframes, mind maps, and other types of diagrams. But it can also be a powerful tool for creating graphics for your social media marketing. Many marketers use tools like Canva, which rely on templates you customize with your own text and images, or with purchases from the tool’s libraries. Although tools like Canva are convenient, they’re less flexible than creating social media images in Google Drawings. If you’re like many digital and social media marketers who have limited design skills, the flexibility of the blank drawing canvas in Google Drawings might seem intimidating. However, with a few free resources and knowledge of some basic design concepts explained in this article, you can create original, professional-looking graphics in Google Drawings for free.
After you understand the basics, creating your own graphic in Google Drawings doesn’t take longer than with a tool like Canva. To demonstrate, I typically need about 20 minutes to make an image. Even if you do have a design team, rarely can they prioritize your social media images over website or client work, so the ability to create graphics yourself lets you meet your need right away. Canva does make an extensive library of images already available via its platform, and the ability to save your favorites is awesome. You have to source these elsewhere for Google Drawings; but again, that gives you more freedom. Although both tools have pros and cons, I think the benefits of Google Drawings are underrated and I recommend trying both tools to see which you prefer. Here’s how to get started creating social media graphics with Google Drawings. #1: Gather Resources for Creating Your Own Social Media ImagesBefore you begin creating graphics in Google Drawings, you need inspiration. Keep an eye out for images you like in others’ social media posts and ads. You can also find inspiration in print layouts and online publications you admire. People often save these images for reference later in what’s called a swipe file. Then when you’re ready to create social media images, you can browse through your swipe file for elements that will work for your brand. To illustrate, maybe you like the vertical bar over a photo in this ad for car2go. Or perhaps you like the way an image uses a background illustration to convey an idea or feeling.
After you use your swipe file to develop a basic idea of the design you want to create, you don’t have to make the whole image from scratch. When you use free image resources as building blocks for your social media images, you can work quickly to design a professional-looking graphic. For instance, find a photo or pattern to use as a background, add an icon as a focal point, type the text, and you’re done. For stock photos, my favorite resource is Pexels, but you can find dozens of other options. For background patterns, The Pattern Library offers hundreds of patterns and designs. My go-to icon resource is Flaticon, which has a searchable library of hundreds of thousands of icons. They vary from super-simple to more complicated.
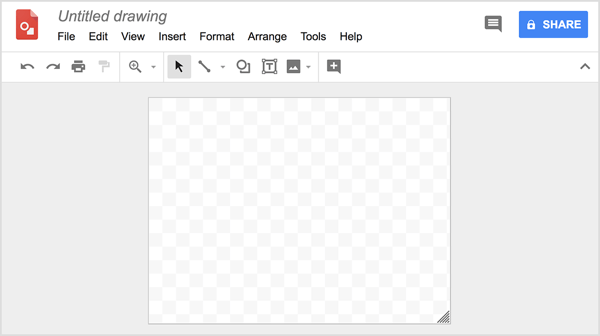
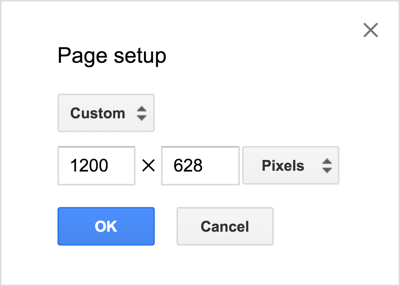
Tip: When you use free resources for photos, patterns, and icons, pay close attention to the license for any item use. On some services, the person who shared their creation can choose from a few different types of license, so you can’t assume the terms are consistent for every resource on the same service. Resources like Flaticon require you to credit the source using a specific format. Your swipe file can also be a resource for color palettes and fonts you like. To identify a specific color on a website, try the ColorZilla Chrome plugin, which adds an eyedropper tool to the Chrome browser so you can grab the exact colors from other designs or websites. Similarly, use the WhatFont Chrome plugin to identify a font on a website or in a graphic. #2: Open a New Blank Image in Google DrawingsWhen you’re ready to start creating a graphic in Google Drawings, open Google Drive and click the New button in the upper left. From the menu that appears, select More and then choose Google Drawings from the submenu. A blank Google Drawings canvas appears, ready for your design. To start, choose the dimensions for your drawing. Select Page Setup from the File menu. In the dialog box that appears, you can choose from a common ratio or select the Custom option to enter specific dimensions. A custom size is helpful when you want to make sure your image reflects the recommended sizing for a specific social media platform like Facebook or Instagram. In this example, the Google Drawings area is sized 1200 x 628 pixels for a single-image Facebook news feed ad.
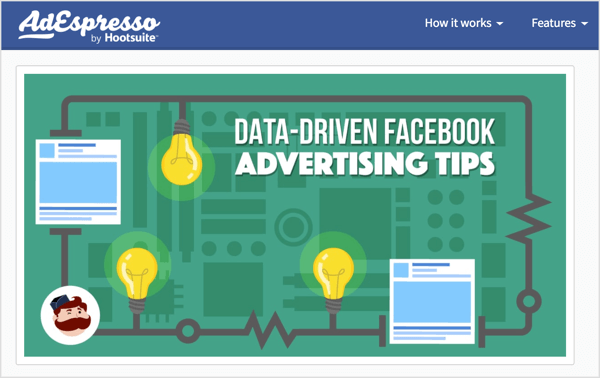
#3: Add Photos and ShapesTo design your graphic, Google Drawings has all sorts of tools for inserting photos, drawing shapes, aligning elements, and adding text. To show you how these tools work, this example pulls ideas from the ad shown earlier and blog post images from AdEspresso (like this one), which typically have a patterned background:
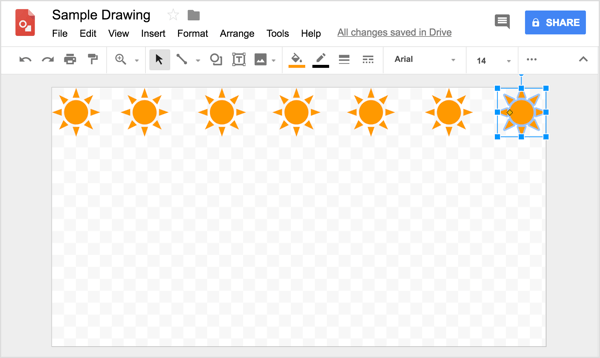
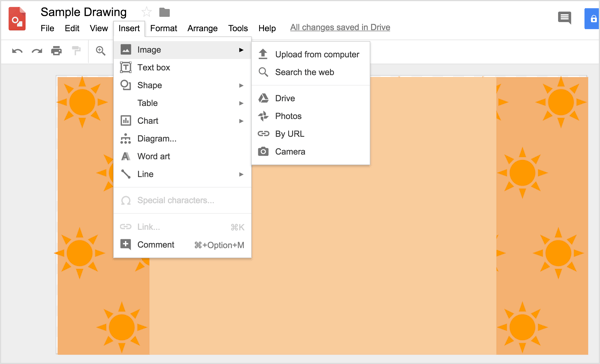
To create a pattern for your background, choose Image from the Insert menu and select the option that reflects where your background image is saved. For instance, you can choose Upload From Computer, Google Drive, and so on. This example uses an illustration available within Google Drawings. To repeat the image across the drawing canvas, select the image, press Ctrl+C (Windows) or Command+C (macOS) to make a copy, press Ctrl+V to paste the copy, and then move the copy next to the first image. In this case, keep pasting copies to create a row across the whole drawing canvas. As you try to align your shape in a row, helpful reference lines appear as you click and drag the copies.
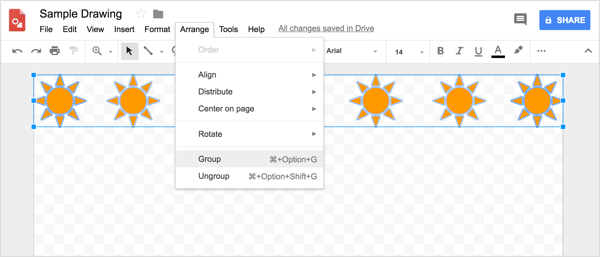
Tip: If you need to adjust the positioning of image elements slightly, select the element and then press an arrow key. Or for very fine adjustments, press Shift and then an arrow key, and the selected item or items move in the given direction by one pixel. When you have multiple objects selected, context-click and select an option to align them vertically, horizontally, or distribute them evenly. When you’re done creating the first row, select each copy and choose Arrange > Group.
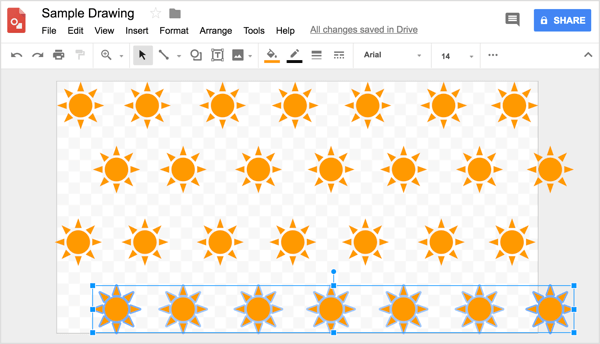
From there, you can copy and paste the row as a group until you create a whole pattern over the drawing canvas. Use the grid to help you position the rows evenly.
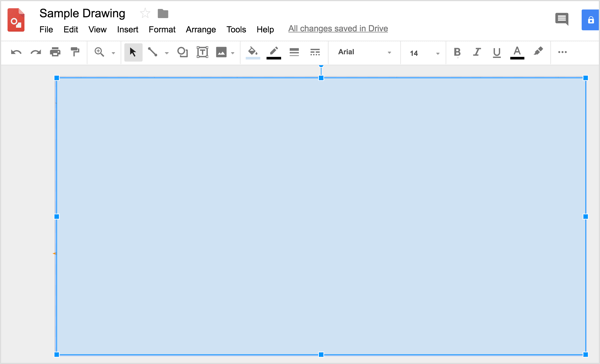
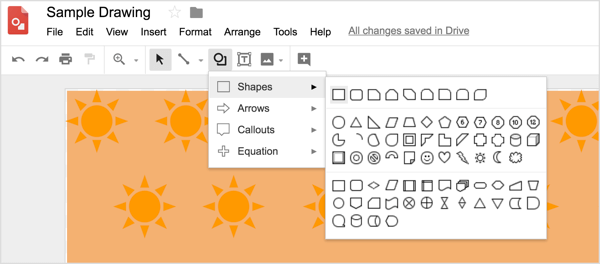
When you’re done, use the rectangular shape tool to draw a rectangle that covers the whole drawing canvas. This shape will be your background color. You can find line and shape tools on the toolbar. Simply select the tool you want and start drawing.
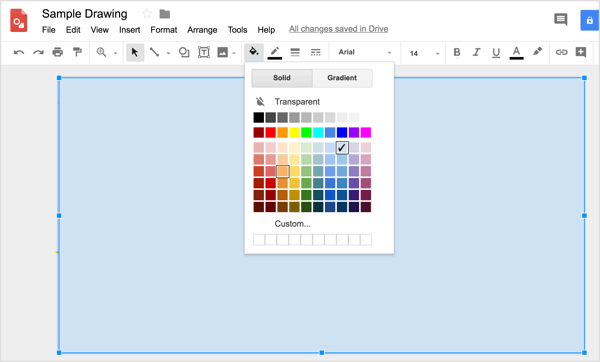
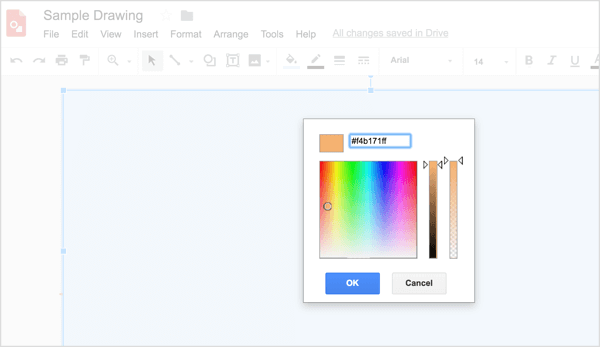
To choose a color, you can use ColorZilla to copy a color from one of the photos or illustrations you downloaded from any of the resources mentioned earlier (or your own favorite site for free designs to use in your social media images). To apply that color to the shape, click the Fill Color tool and select Custom.
Then paste the color code that ColorZilla copies into the appropriate box.
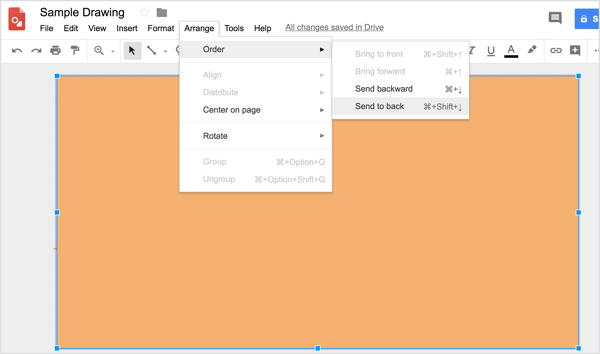
To make the pattern show on the background again, you have two options. You can make the color transparent using the slider on the right of the custom color dialog box, or select the shape and choose Arrange > Order > Send to Back.
To add a vertical rectangle similar to the car2go ad shown earlier, you use the shape tools again to draw the shape.
Next, this image needs a large illustration to create a focal point. To insert an image, use the Insert menu again and navigate to the image you want to use.
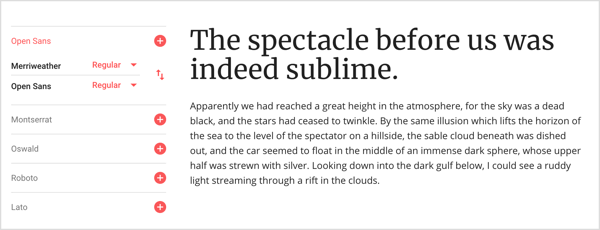
Then move the image to the desired spot, and size it as needed without going beyond the dimensions of the original image. If you need to resize an image you’ve inserted, hold down the Shift key to maintain the image’s aspect ratio and avoid distorting the design. Then drag a sizing handle until the image is the desired size. If you resize an image, avoid making it larger. #4: Write and Format Text Like a DesignerIf you’re adding text to your social media images, getting the right font combinations is more important than you might think. The little things (like font choice) separate professional content from amateur. Luckily, Google has your back. Not only does Google Drawings feature over 400 fonts, Google itself has more than 800 font families you can import if you can’t find the precise font you’re looking for. In general, when adding text to social media images, you typically want two fonts: a serif font for your headline and a sans-serif font for the body copy or tagline. To illustrate, the following font combination uses the serif font Merriweather for the heading and the sans-serif font Open Sans for body text.
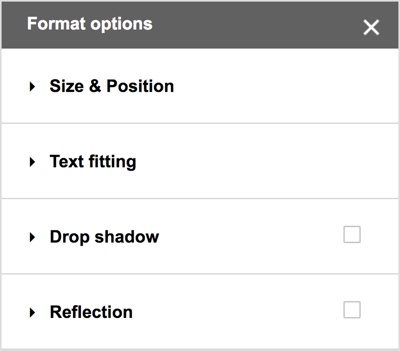
To add text to your image in Google Drawings, first use the Text Box tool to draw a text box. Then you can type and format your text. You’ll find all of the usual text formatting options on the toolbar. Also, you can choose Format > Format Options from the menu bar to see additional choices for drop shadows, reflections, and detailed sizing and positioning options.
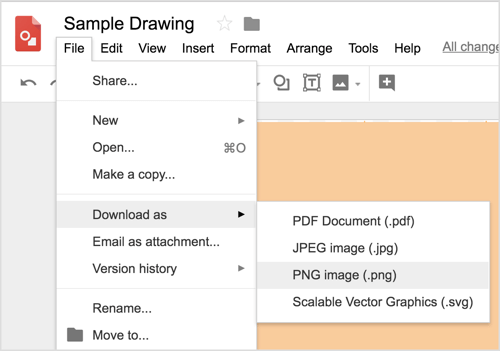
#5: Export Your Image to a Social Media-Friendly FormatWhen your image is ready to post, you have to export it in your desired file format from Google Drawings. For social media platforms, you typically want a PNG file. Choose File > Download As > PNG Image (.png). The file will download to your operating system’s Downloads folder, and then you can upload it to your social accounts.
#6: Save and Share Templates for Social Media Images With Your TeamAfter you spend the time creating an image you like that reflects your brand, you have that image forever and can use it as a template. Simply make a copy, change a few elements, and create an entirely “new” graphic for your next article, social media ad, Instagram post, and so on. After you design the basic concept, you can make changes to create a unique image in less than 5 minutes. After that template is ready, your entire marketing team can use it. Share a folder on Google Drive to make it quick and easy for anyone on your team to create any social media images you typically create, such as a Facebook post image. As long as no one edits the page size, everything will be the right size and look consistently branded. It’s like having your own version of Canva’s superior templates feature. If you’re collaborating on a design, the share features within Google Drawings allow your whole team to create, edit, and comment on graphics, too. .What do you think? Have you tried creating your own graphics? What resources or tips helped you design a professional-looking image? Please share your thoughts in the comments.  Social Media via Social Media Examiner https://ift.tt/1LtH18p September 19, 2018 at 05:07AM
0 Comments
Leave a Reply. |
�
Amazing WeightLoss Categories
All
Archives
November 2020
|


 RSS Feed
